本系列文已改編成書「甚麼?網頁也可以做派對遊戲?使用 Vue 和 babylon.js 打造 3D 派對遊戲吧!」
書中不只重構了程式架構、改善了介面設計,還新增了 2 個新遊戲呦!ˋ( ° ▽、° )
新遊戲分別使用了陀螺儀與震動回饋,趕快買書來研究研究吧!ლ(╹∀╹ლ)
在此感謝深智數位的協助,歡迎大家前往購書,鱈魚感謝大家 (。・∀・)。
助教:「所以到底差在哪啊?沒圖沒真相,被你坑了都不知道。(´。_。`)」
鱈魚:「你對我是不是有甚麼很深的偏見啊 (っ °Д °;)っ,來人啊,上連結!」
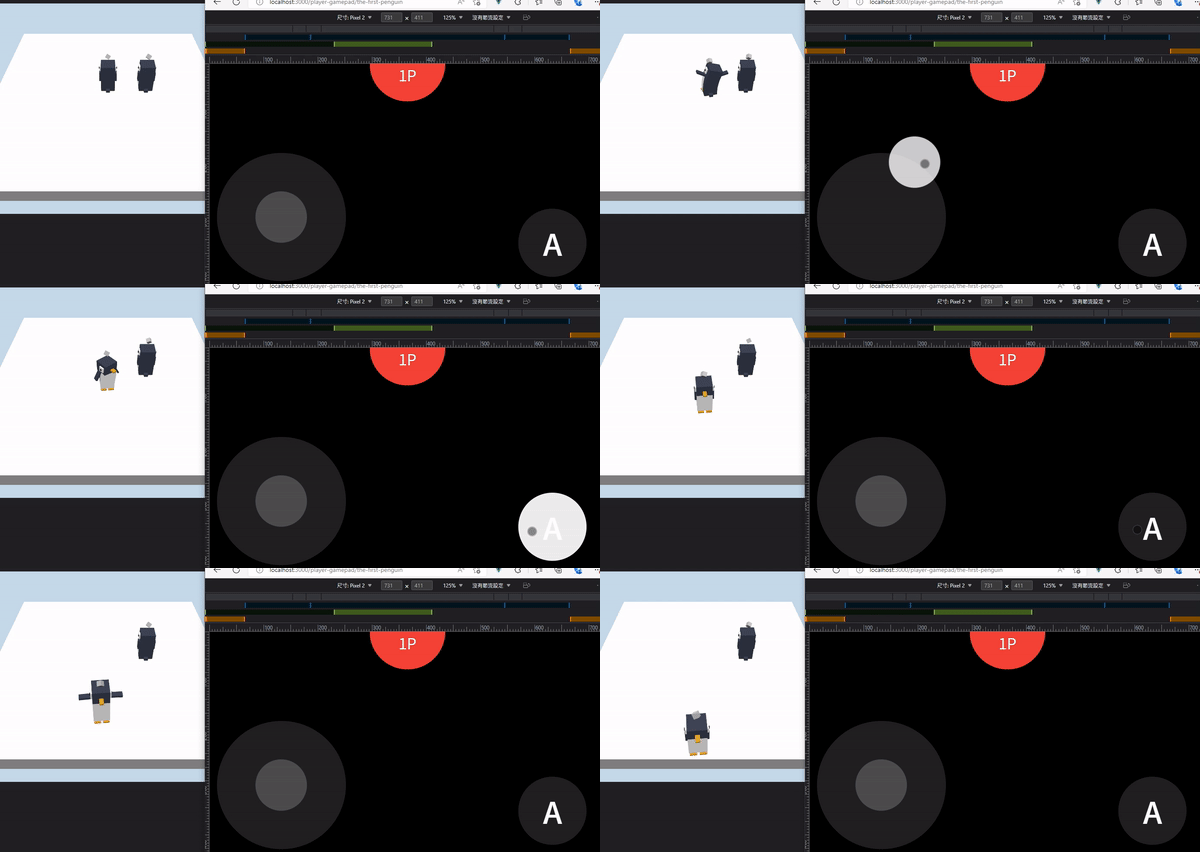
讓我們實際使用搖桿訊號控制器動作看看吧,先控制第一隻企鵝看看。
src\games\the-first-penguin\game-scene.vue
...
<script setup lang="ts">
...
import { curry } from 'lodash-es';
...
/** 根據 key 取得資料 */
const findSingleData = curry((keys: SingleData[], name: `${KeyName}`) =>
  keys.find((key) => key.name === name)
);

/** 控制指定企鵝 */
function ctrlPenguin(penguin: Penguin, data: GamepadData) {
  const { keys } = data;
  const findData = findSingleData(keys);

  // 攻擊按鍵
  const attackData = findData('a');
  if (attackData) {
    penguin.attack();
    return;
  }

  // 移動按鍵
  const xData = findData('x-axis');
  const yData = findData('y-axis');

  const x = xData?.value ?? 0;
  const y = yData?.value ?? 0;

  if (x === 0 && y === 0) return;
  if (typeof x === 'number' && typeof y === 'number') {
    // 企鵝往上(正 Z 方向)是螢幕的 -Y 方向,所以要反轉
    penguin.walk(new Vector3(x, 0, -y));
  }
}
/** 初始化搖桿 */
function initGamepadEvent() {
  gameConsole.onGamepadData((data) => {
    console.log('[ gameConsole.onGamepadData ] data : ', data);

    const penguin = penguins[0];
    if (!penguin) return;

    ctrlPenguin(penguin, data);
  });
}
async function init() {
  ...
  initGamepadEvent();

  /** 持續運行指定事件 */
  ...
}
...
</script>
其中 curry 是 Functional Programing 的重要概念之一,利用 closure(閉包)特性,可以讓 function 會形成一個鏈,變成可以依序傳入參數,最終完成運算。
個人覺得很適合用來處理資料,可以看到取得控制訊號的程式可以變得更為簡潔易讀。
想知道更多的讀者參考以下連結:
現在我們可以用搖桿控制企鵝了!

現在讓我們實際依照玩家資料建立對應的企鵝,一人一隻企鵝吧。( ´ ▽ ` )ノ
首先我們需要一個可以依照玩家 ID 取得玩家代號的功能。
src\composables\use-client-game-console.ts
...
export function useClientGameConsole() {
  ...
  function getPlayerCodeName(id: string) {
    const index = gameConsoleStore.players.findIndex(({ clientId }) =>
      clientId === id
    );

    if (index < 0) {
      return 'unknown ';
    }

    return `${index + 1}P`;
  }

  return {
    ...
    getPlayerCodeName,
  }
}
接著調整 createPenguin() 內容。
src\games\the-first-penguin\game-scene.vue
...
<script setup lang="ts">
...
import { getPlayerColor } from '../../common/utils';
import { colors } from 'quasar';
...
async function createPenguin(id: string, index: number) {
  // 依照玩家 ID 取得對應顏色
  const codeName = gameConsole.getPlayerCodeName(id);
  const color = getPlayerColor({ codeName });
  const hex = getPaletteColor(color);
  const rgb = textToRgb(hex);

  const penguin = await new Penguin(`penguin-${index}`, scene, {
    position: new Vector3(5 * index, 10, 0),
    color: new Color3(rgb.r / 255, rgb.g / 255, rgb.b / 255),
    ownerId: id,
  }).init();

  return penguin;
}
...
</script>
...
然後不能讓每隻企鵝出現的位置都一樣,這樣會卡成一團企球。( ゚ ∀ 。)
src\games\the-first-penguin\game-scene.vue
...
<script setup lang="ts">
...
const penguinInitPositions = [
  new Vector3(-5, 0, 5),
  new Vector3(5, 0, 5),
  new Vector3(-5, 0, -5),
  new Vector3(-5, 0, -5)
];
...
async function createPenguin(id: string, index: number) {
  // 依照玩家 ID 取得對應顏色
  const codeName = gameConsole.getPlayerCodeName(id);
  const color = getPlayerColor({ codeName });
  const hex = getPaletteColor(color);
  const rgb = textToRgb(hex);

  const position = penguinInitPositions[index % penguinInitPositions.length];
  // 超過 4 人時調整高度
  position.y = Math.round(index / penguinInitPositions.length) * 10 + 5;

  const penguin = await new Penguin(`penguin-${index}`, scene, {
    position,
    color: new Color3(rgb.r / 255, rgb.g / 255, rgb.b / 255),
    ownerId: id,
  }).init();

  return penguin;
}
...
</script>
...
最後調整建立企鵝的部分,改為依玩家資料建立企鵝。
src\games\the-first-penguin\game-scene.vue
...
<script setup lang="ts">
...
const gameConsoleStore = useGameConsoleStore();
...
async function init() {
  ...
  const result = await Promise.allSettled(
    gameConsoleStore.players.map(({ clientId }, index) =>
      createPenguin(clientId, index)
    )
  );
  result.forEach((data) => {
    if (data.status !== 'fulfilled') return;
    penguins.push(data.value);
  });
  ...
}
...
</script>
...
現在讓我們想辦法變出兩個玩家,可以再開一個不同的瀏覽器,或是使用手機透過區網連線。
現在是一個玩家一隻企鵝了!

最後最重要的部分,就是讓玩家只能控制自己的企鵝!◝( •ω• )◟
調整 initGamepadEvent() 內容。
src\games\the-first-penguin\game-scene.vue
...
<script setup lang="ts">
...
const gameConsoleStore = useGameConsoleStore();
...
/** 初始化搖桿 */
function initGamepadEvent() {
  gameConsole.onGamepadData((data) => {
    const { playerId } = data;

    const penguin = penguins.find((penguin) => penguin.params.ownerId === playerId);
    if (!penguin) return;

    ctrlPenguin(penguin, data);
  });
}
...
</script>
...
現在玩家只能控制自己的企鵝了!✧*。٩(ˊᗜˋ*)و✧*。
以上程式碼已同步至 GitLab,大家可以前往下載:
