昨天的鐵人文是簡單介紹版本控制和 Git,實作的方式是在 local 用 Git 和版本控制,今天上的課是延續昨天的內容,要來介紹 GitHub 和 Remote repository。
今天會上的內容:如何透過 GitHub 創一個 remote repository。
首先是登入 GitHub,在右上角按「+」,選擇 new repository。
接著設定好 Repository name、Public / Private。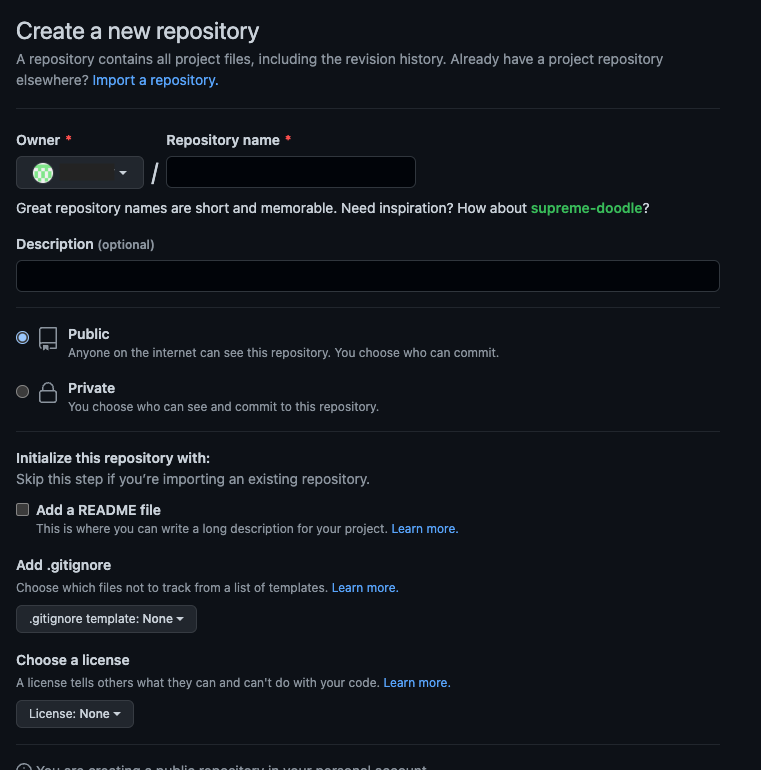
再來就是按照指示來使用 command line。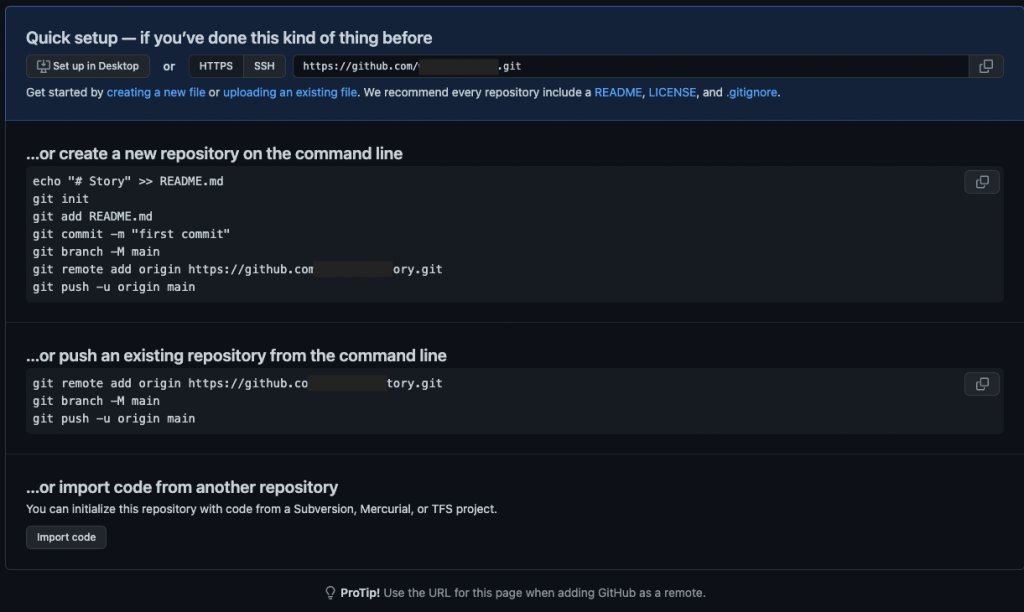
git remote add origin https://github.com/....
這邊的 origin 是你遠端 repository 的名字,可以改成任何你想要的,老師說可以改成 bacan 也可以 XD
但是傳統上來說,十分建議大家保持用 origin,原因是大多數的 programs 比較習慣用傳統的命名方式,也代表它對其他人來說會更容易理解你在幹嘛,而不用傳統上的命名就會讓人比較難理解。
git push -u origin master
這邊的 u flag 基本上是連結 local 和遠端的 repository。所以這行代表:我們會把檔案 push 到叫 origin 的遠端,然後 push 到名叫 master 的 branch 上。master branch 是預設的 branch 或是你所有 commits 的主要 branch,關於 branch 的詳細說明會在之後的課程介紹。

 iThome鐵人賽