每天的專案會同步到 github 上,可以前往 這個網址 如果對於專案有興趣或是想討論一些問題,歡迎留言 OR 來信討論,信箱為:nickchen1998@gmail.com
今天我們要介紹如何利用 pytest 提供的 parametrize 來自動生成多筆測試,這個方式通常用於硬體的測試,需要使用很多不同的數值來對某個功能做測試,例如:USB 寫入速度跟寫入的檔案大小,但測試的 function 其實是一樣的,像這種情況我們就不需要撰寫多個 test case,利用 parametrize 的方式來進行測試即可
下面我們直接上範例來進行解釋
程式解析:
import pytest


# 基本範例
@pytest.mark.parametrize(argnames='num1, num2, result', argvalues=[(1, 1, 2), (2, 2, 4)])
def test_add(num1: int, num2: int, result: int):
    assert num1 + num2 == result
測試結果:
可以看到下圖中我們只執行了 test_add 這個 test case,但測試的項目卻成功地產生出兩個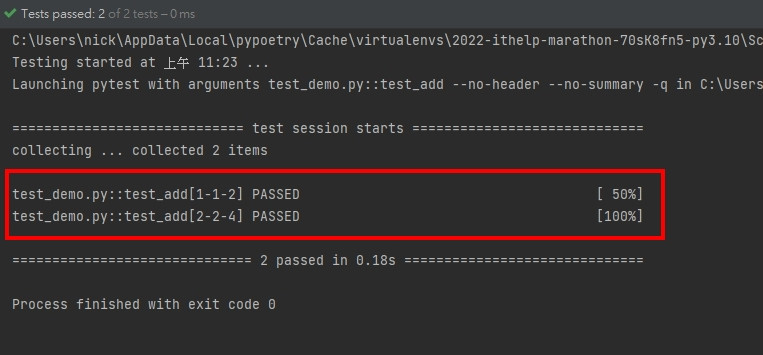
除此之外,我們也可以將多組測試參數寫進檔案中,在測試之前先讀取進 python 中,於裝飾器內再指派給 test case
{"test_add": [[1, 1, 2], [2, 2, 4]]}
import json
import pytest


# 搭配檔案讀取
with open("./test_args.json", "r", encoding="utf8") as file:
    test_args = json.loads(file.read())['test_add']


@pytest.mark.parametrize(argnames='num1, num2, result', argvalues=test_args)
def test_add_with_json_file(num1: int, num2: int, result: int):
    assert num1 + num2 == result
下圖中我們可以看到同樣成功生成了兩個測試
如果同時生成許多組測試,可能會造成閱讀上的不易,這時候我們可以透過 ids 來為每一組測試提供名稱
這邊我們會沿用上方讀取 json 後產生的 test_args,並手動根據 test_args 的長度來建立相關的 id,當然 ids 也可以利用讀取檔案的方式讀取近來,只要數量符合測試資料筆數,且型態為 list 即可
# ids 的使用
ids = [f"case: {i}" for i in range(1, len(test_args) + 1)]


@pytest.mark.parametrize(argnames='num1, num2, result', argvalues=test_args, ids=ids)
def test_add_with_json_file_and_ids(num1: int, num2: int, result: int):
    assert num1 + num2 == result
下圖中我們可以看到 pytest 成功為我們的每組測試都加上名稱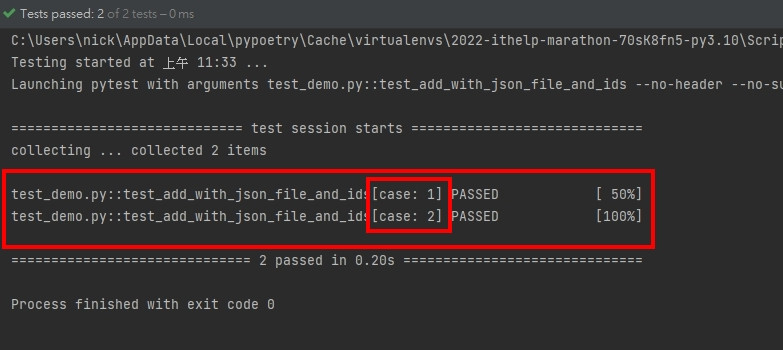
網路上有很多 fixture 搭配 parametrize 的使用方式,不過筆者試了一下,發現 fixture 其實可以很直覺的 import 進來直接使用,請看下面範例
建立一個 fixture 用來展示用
import pytest
from mongomock.mongo_client import MongoClient


@pytest.fixture(name="conn")
def mongo_client_fixture() -> MongoClient:
    with MongoClient() as conn:
        yield conn
可以看到在這個 test case 當中,直接將 import 進來的 fixture name 打在 test case 最後面的參數,即可進行使用,請務必將 fixture 放在最尾端避免造成額外的錯誤
為了驗證是否真的有被 import 近來,第二個 assert 的部分為驗證 conn 參數是否為 MongoClient 型態,而非 None
from fixtures import mongo_client_fixture
from mongomock.mongo_client import MongoClient

use_fixtures = [mongo_client_fixture]


# 搭配 fixture 使用
@pytest.mark.parametrize(argnames='num1, num2, result', argvalues=[(1, 1, 2), (2, 2, 4)])
def test_add_with_fixtures(num1: int, num2: int, result: int, conn: MongoClient):
    assert num1 + num2 == result
    assert isinstance(conn, MongoClient)
今天我們介紹了如何參數化的執行 test case,讓測試案例更加活用,明天我們就會進入到 pytest 的最後一個環節,會教大家如何撰寫 pytest 的設定檔,
讓我們的測試程式更加的客製化