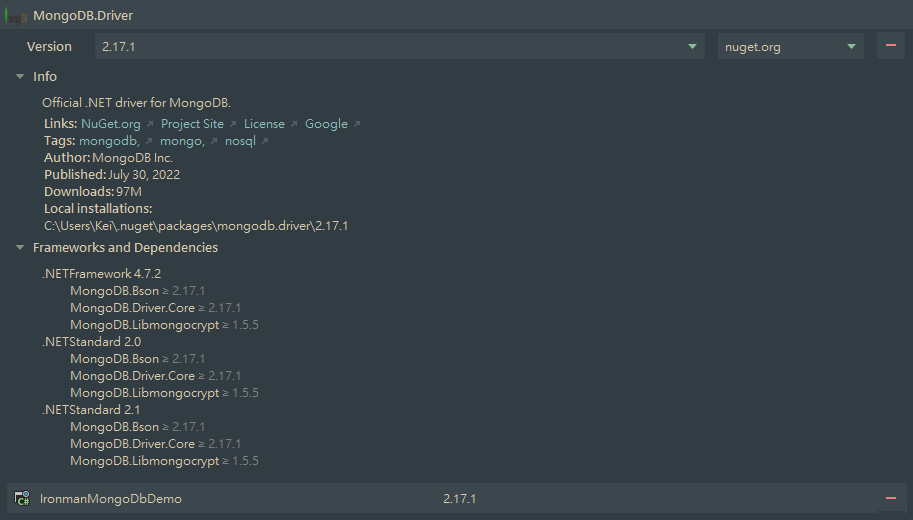
這次一樣使用 .NET6 WebAPI 專案搭配 NuGet 套件進行開發,MongoDB 也有提供官方的 NuGet 套件 MongoDB.Driver方便開發者使用,裡面提供的相關方法簽章跟前一篇所使用的 mongosh 很接近,使用起來滿簡便的也很完整,像是同個操作都會提供同步和非同步兩種方法可以選擇。
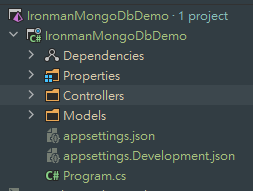
建立 WebAPI 專案,版本為 .NET6,命名為 IronmanMongoDbDemo。
專案加入對 MongoDB.Driver NuGet 套件的參考。
把接下來會需要用到的常數都先放在 Consts.cs 中。
因為是練習想節省相關設定,所以直接把 ConnectionString 包含帳號密碼寫在程式碼中,但這不是個安全的作法,正式開發時不建議這樣設定。
public static class Consts
{
    public static string ConnectionString = "mongodb://appUser:appPwd@localhost:1235";
    public static string DbName = "demodb";
    public static string CollectionName = "NotificationSettings";
}
在 Program.cs 中注入 MongoClient 並設定 ConnectionString,接著注入 IMongoDatabase。
// Add services to the container.
builder.Services.AddSingleton(new MongoClient(Consts.ConnectionString));
builder.Services.AddSingleton(sp =>
{
    var client = sp.GetRequiredService<MongoClient>();
    return client.GetDatabase(Consts.DbName);
});
建立這次要使用的 DataEntity,命名為 UserSettingDataEntity,並透過設定 [BsonId] Attribute 指定 UserId 為這個資料的 Id。
public class UserSettingDataEntity
{
    [BsonId]
    public string UserId { get; set; }

    public string Address { get; set; }

    public bool NeedNotify { get; set; }
}
建立 NotificationSettingsController.cs ,在建構子取得剛剛注入的 IMongoDatabase,並透過 CollectionName 取得存放 UserSettingDataEntity 的 Collection。
[ApiController]
[Route("[Controller]/[Action]")]
public class NotificationSettingsController : ControllerBase
{
    private readonly IMongoCollection<UserSettingDataEntity> _notificationSettingsCollection;

    public NotificationSettingsController(IMongoDatabase db)
    {
        _notificationSettingsCollection = db.GetCollection<UserSettingDataEntity>(Consts.CollectionName);
    }
}
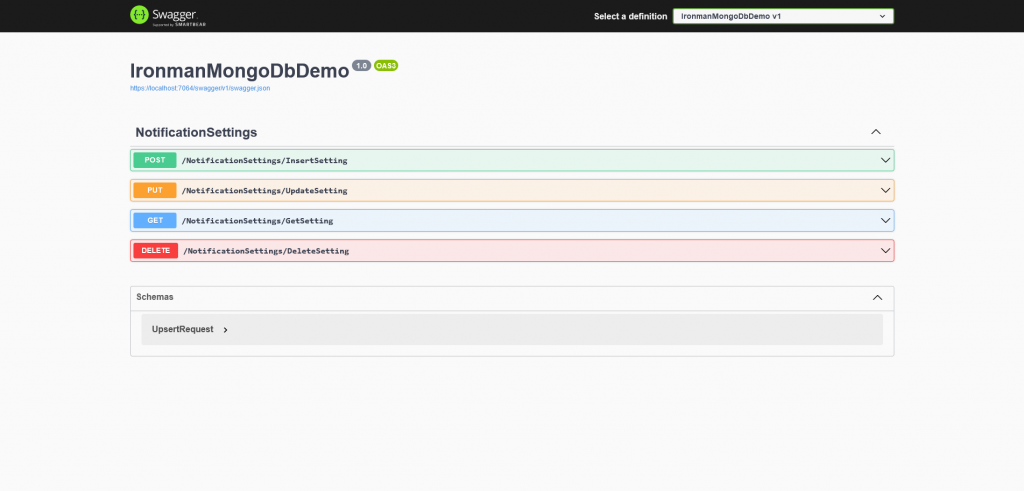
接下來就可以建立各功能的 endpoint 及功能了,包含:
首先新增建立通知設定的 endpoint,透過呼叫 collection.InsertOneAsync(DataEntity) 新增一筆 Document 進資料庫。
    [HttpPost]
    public async Task<IActionResult> InsertSetting([FromBody] UpsertRequest requestPayload)
    {
        var dbEntity = requestPayload.ToDataEntity();
        await _notificationSettingsCollection.InsertOneAsync(dbEntity);
        return NoContent();
    }
其中 RequestPayload 如下:
public class UpsertRequest
{
    public string UserId { get; set; }

    public string Address { get; set; }

    public bool NeedNotify { get; set; }

    public UserSettingDataEntity ToDataEntity()
    {
        return new UserSettingDataEntity
        {
            UserId = UserId,
            Address = Address,
            NeedNotify = NeedNotify
        };
    }
}
接著是取得資料,使用 collection.FindAsync(過濾條件) 會回傳可以取得符合該條件資料的 Cursor,再透過 Cursor 取得資料,而過濾條件可以直接使用 C# 的 Lambda expressions。
    [HttpGet]
    public async Task<IActionResult> GetSetting(string userId)
    {
        var cursor = await _notificationSettingsCollection.FindAsync(x => x.UserId == userId);
        var result = await cursor.FirstOrDefaultAsync();
        if (result is null)
        {
            return NotFound();
        }
        return Ok(result);
    }
再來是修改,使用 collection.ReplaceOneAsync(過濾條件, DataEntity) 可以透過指定條件的方式把整個 Document 覆蓋掉,這邊使用指定 Id 的方式來實現。
    [HttpPut]
    public async Task<IActionResult> UpdateSetting([FromBody] UpsertRequest requestPayload)
    {
        var dbEntity = requestPayload.ToDataEntity();
        var result = await _notificationSettingsCollection.ReplaceOneAsync(x => x.UserId == requestPayload.UserId, dbEntity);
        return Ok(result);
    }
最後是刪除設定的部分,使用 collection.DeleteOneAsync(過濾條件) 也是透過指定條件的方式刪除資料。
    [HttpDelete]
    public async Task<IActionResult> DeleteSetting(string userId)
    {
        var result = await _notificationSettingsCollection.DeleteOneAsync(x => x.UserId == userId);
        return Ok(result);
    }
這樣基本的 API 就開發完成了!
