GitLab Workflow內容包括,git 版本控制系統、CI/CD Pipeline,以及專案管理的功能,像 Wiki、Issue Tracking、Kanban、Burndown Chart等。GitLab 的 CI/CD Pipeline 會依據使用者存放在各專案內的 .gitlab-ci.yml 檔自動建立,且能順利整合從測試到部署的大多數常見工具或第三方服務。
Continuous Integration 持續整合
藉由頻繁的整合,來減輕版本之間差異過大時,會發生的合併困難甚或失敗。在此階段,通常還會加入自動化測試來確保待合併的分支,不會發生功能錯誤。
Continuous Delivery 持續佈署
在確定程式碼的功能性正常後,會自動因應不同的環境進行相對應的程式檔佈署。佈署完成後,可以進行手動測試驗證。
Continuous Deployment 持續交付
在已經有相對應的程式檔後,自然就要落地到機器上來正式運行,給客戶們使用啦,這就是這階段的目的。
CI/CD可以加快代碼發布速度,CI/CD使開發人員能夠更快地做更多的事情,確保可靠性和可用性,提高開發人員的效率,自動化,工具和可觀察性。Gitlab Pipeline 優點如下,
.gitlab-ci.yml 是定義一個流程稱為 pipeline,他是每次要建置、測試時應該要跑完的完整步驟流程,而 pipeline 裡面可以切割成數個「stage」(階段,例如 build、test 這樣算兩個 stage),每個「stage」則可以有多個「job」(工作)。
在執行的時候,他會按照 stage 的順序執行,前一個 stage 完成後、才會執行下一個 stage。當 stage 的所有 job 都順利完成後,他才會去執行下一個 stage,其中如果有某些 job 失敗了,那就不會執行下一個 stage,pipeline 就會此以失敗的狀態結束。

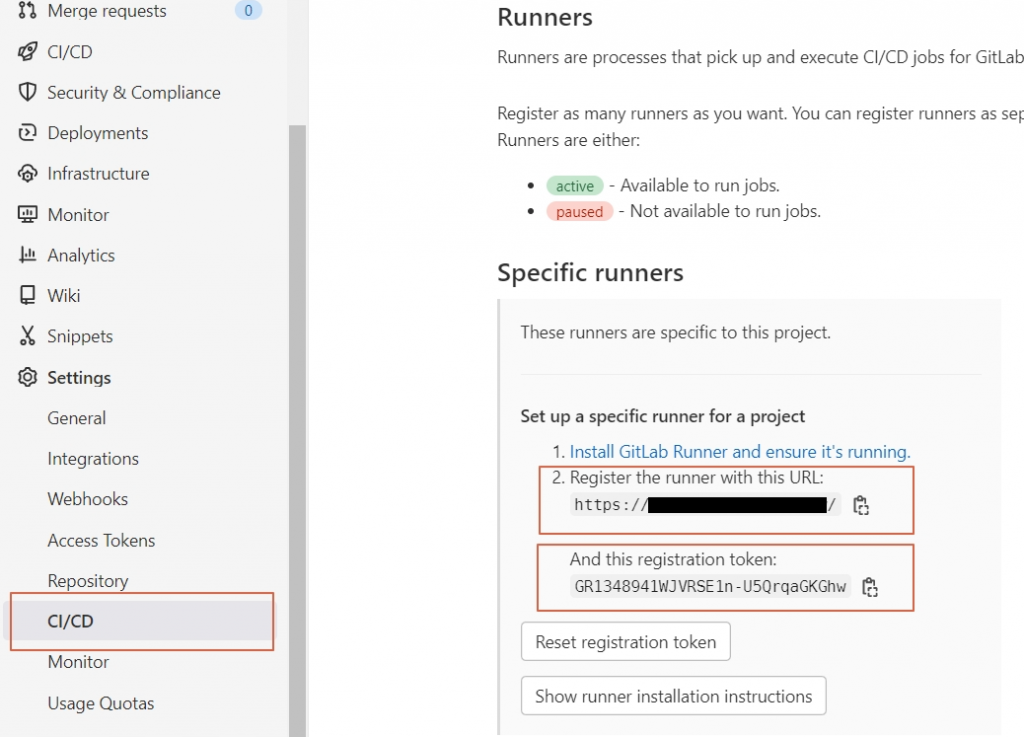
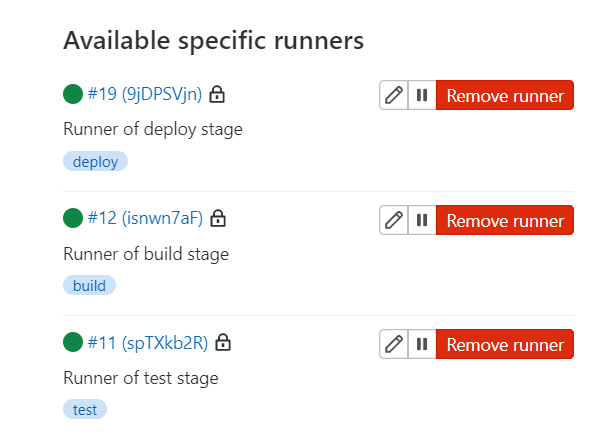
當執行 .gitlab-ci.yml 定義的 pipeline 的時候,GitLab Server 會去找合適的 runner,把這個 job 丟給 runner 執行。至於哪個 job 該用哪個 Runner 是使用 tag來做區分。針對 Runner 做設定,看是要全站共用、群組共用、或是專案共用。
當 Runner 收到 GitLab Server 指派工作的時候,他就會從 GitLab Server 上把程式碼複製過來(用 git),然後執行所交付的工作,並將紀錄、結果回報給 GitLab Server。
Run GitLab Runner in a container
$ docerk pull gitlab/gitlab-runner
$ docker volume create gitlab-runner-config
$ docker run -d --name gitlab-runner --restart always
    -v /var/run/docker.sock:/var/run/docker.sock
    -v gitlab-runner-config:/etc/gitlab-runner
    gitlab/gitlab-runner:latest
$ docker run --rm -it -v gitlab-runner-config:/etc/gitlab-runner gitlab/gitlab-runner:latest register
Runner registered successfully. Feel free to start it, but if it's running already the config should be automatically reloaded!
Docker Image 在 CI/CD流程 中有很重要的角色,CI流程時環境指令是否正確運行與是否使用對的 Image 有很大的關係。
我的 Dockerhub 帳號 xenophon566 有已經配好的 Docker Image 方便在每個CI流程使用。
如果不是使用 Gitlab 的
share runner,gitlab-ci.yml檔中就要特別指定tag 欄位,否則會找不到runner。
package.json
"scripts": {
    "start": "ng serve --port 4201",
    "ng:ut-r": "ng test --watch=false --browsers=ChromeHeadlessCI",
    "cy:ci-r": "npx cypress run --config-file cy-ci.json",
    "ng": "ng",
    "build": "ng build"
}
karma.conf.js
module.exports = function (config) {
    config.set({

        ...

        customLaunchers: {
            ChromeHeadlessCI: {
                base: "ChromeHeadless",
                flags: ["--no-sandbox", "--disable-setuid-sandbox"],
            },
        },
    });
};
Dockerfile
# Stage 1: Compile and Build angular codebase

# Use official node image as the base image
FROM xenophon566/node:latest as build

# Set the working directory
WORKDIR /usr/local/app

# Add the source code to app
COPY ./ /usr/local/app/

# Install all the dependencies
RUN npm ci --include=dev

# Generate the build of the application
RUN npm run build

# Stage 2: Serve app with nginx server

# Use official nginx image as the base image
FROM xenophon566/ng-deploy:latest

# Copy the build output to replace the default nginx contents.
COPY --from=build /usr/local/app/dist/cypress-playground /usr/share/nginx/html

# Expose port 80
EXPOSE 80
.gitlab-ci.yml的檔案,並根據該檔案所定義的內容自動建立 CI/CD Pipeline。.gitlab-ci.yml
// 表示目前規劃有4個 stages
stages:
- build
- test:unit
- test:e2e
- deploy:uat
build:
// 建立階段 - build stage
stage: build
// 使用我的 node image
image: xenophon566/node
// 只觸發於 main 分支
only:
- main
// 腳本開始前
before_script:
// 安裝依賴包
- npm ci --include=dev --cache-folder node_modules
script:
// 打包專案
- npm run build
// 專案建好後放到 Gitlab Page
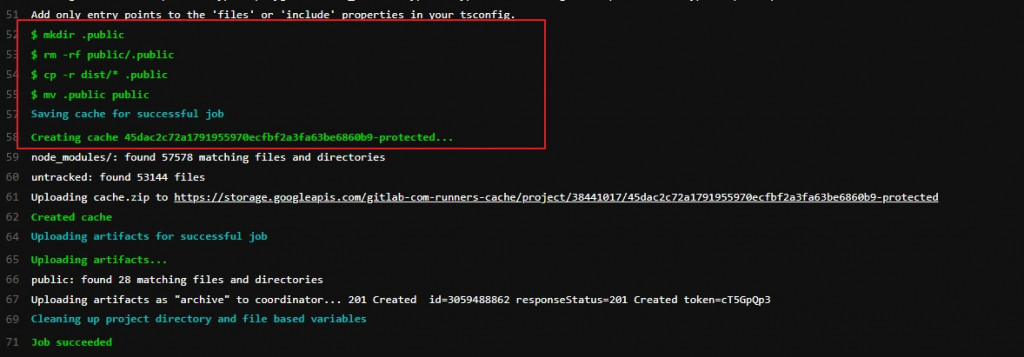
- mkdir .public
- rm -rf public/.public
- cp -r dist/* .public
- mv .public public
when: on_success
cache:
untracked: true
key:
files:
- package-lock.json
paths:
- node_modules/
policy: pull-push
artifacts:
paths:
- public
expire_in: 1 week
test:unit:
// 單元測試階段 - unit test stage
stage: test:unit
image: xenophon566/node
only:
- main
dependencies:
- build
before_script:
- npm ci --include=dev --cache node_modules --prefer-offline
script:
// 執行 Angular 內建的 Karma 進行單元測試
- npm run ng:ut-r
- echo "Unit Test DONE..."
test:e2e:
// E2E測試階段 - e2e test stage
stage: test:e2e
// 使用 cypress image 進行 E2E 測試
image: cypress/browsers:node16.14.2-slim-chrome103-ff102
only:
- main
dependencies:
- build
before_script:
- npm ci --include=dev --cache-folder node_modules
script:
// 執行 Cypress 進行 E2E 測試位於 Gitlab Page 的頁面
- npm run cy:ci-r
- echo "E2E Test DONE..."
deploy:uat:
// 佈署階段 - ng-deploy image
stage: deploy:uat
// 佈署 UAT 階段 - 使用我的 dind image
image: xenophon566/dind
services:
- docker:dind
only:
- main
dependencies:
- build
before_script:
- docker login -u "$DOCKERHUB_USERNAME" -p "$DOCKERHUB_PASSWORD"
script:
// 建立我的 xenophon566/ng-deploy image 並存到 Docker Hub
- docker build --cache-from $NG_DEPLOY_IMAGE:latest -t "$NG_DEPLOY_IMAGE:$CI_COMMIT_SHA" .
- docker push "$NG_DEPLOY_IMAGE:$CI_COMMIT_SHA"
// 手動 Pipeline 流程
when: manual
按照上述的流程佈署,最終在
UAT階段會產生一個 Imagexenophon566/ng-deploy然後在接其他自動流程或手動佈署到指定環境做使用。
deploy:uat 為手動執行階段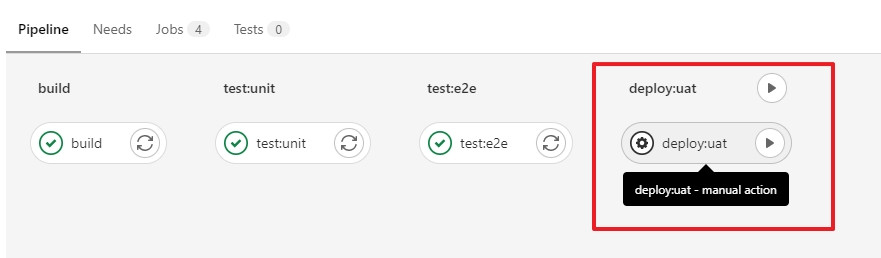
play 按鍵後會製作 Docker Image 存到 Dockerhub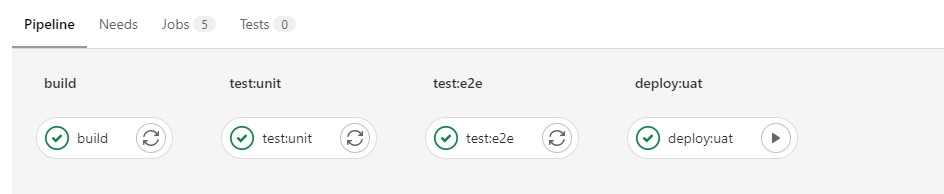
Karma 進行單元測試
E2E 測試位於 Gitlab Page 的頁面
ng-deploy image 推到 Dockerhub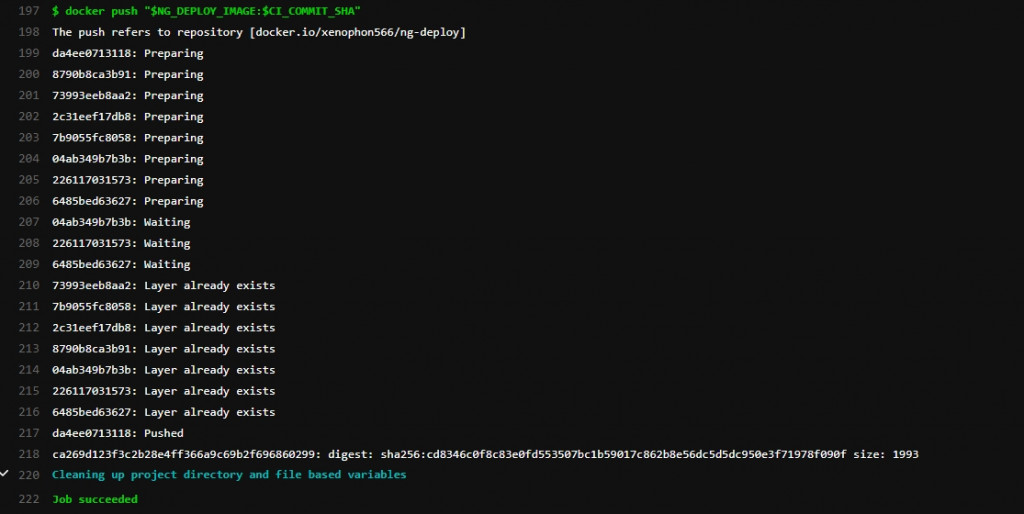
ng-deploy Image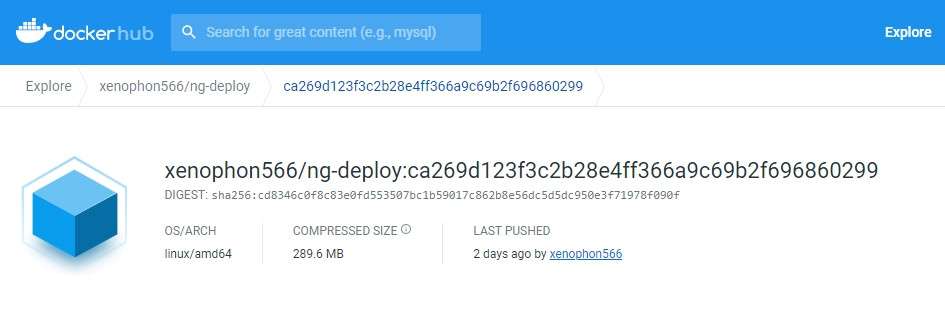
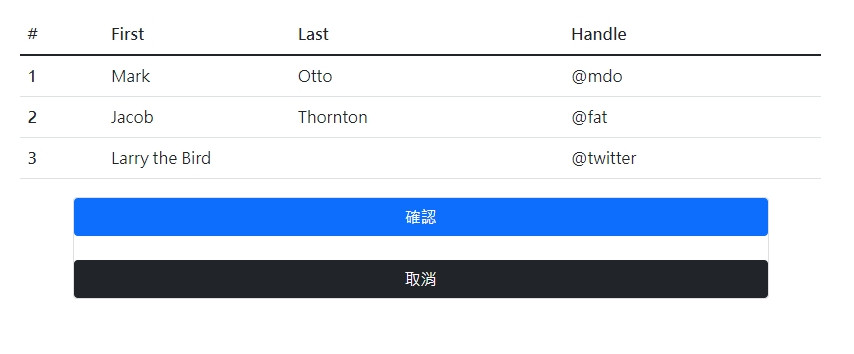
UAT 環境,QA人員就可以進行人工測試了,例如佈署 ng-deploy 到本機 http://localhost/#/home 可見到畫面如下,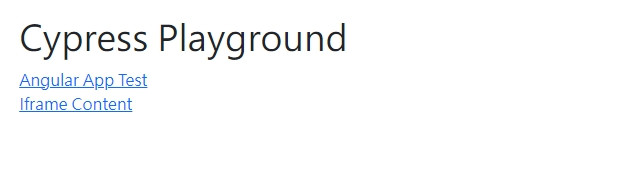
前幾篇介紹了 Angular 的自動測試,有了 Gitlab Pipeline 的 CI/CD 工作流程,更讓自動測試功能如虎添翼,其他工具像是 CircleCI,Travis CI 等等數十種工作流程管理工具,有興趣可以自行去研究。
前幾篇也介紹了在 Gitlab 中被稱為 Merge requests 的功能,讓代碼最終被 push 時可以有機會被審查一次,能有效解決技術債的累積問題。
本文練習範例請參考 CypressPlayground
下一篇會總結一下,使用 Angular 開發專案還有哪些知識需要知道。