嗨大家好!我是Sean!
昨天正式的進入實戰篇後,我們先討論了關於使用者註冊的部分。
那麼,今天就是要一起把登入與登出的部分補完啦!
就如同昨天開頭所介紹的,網頁與使用者密不可分的關係,註冊與登入、登出也是同樣的。
那麼我們就直接進入正題來實現我們登入以及登出的API。
那麼,我們就先來講登入的部分。
相較於註冊,登入並不須要這麼多資訊輸入,比較關鍵的資料只有username,password兩者而已。
同樣的,我們也先由serializer寫起。
from rest_framework import serializers
from django.contrib.auth import authenticate

class LoginSerializer(serializers.Serializer):
    username = serializers.CharField(
        label = 'Username',
        write_only = True
    )

    password = serializers.CharField(
        label = 'Password',
        style = {'input_type': 'password'},
        trim_whitespace = False,
        write_only = True,
    )
    def validate(self, attrs):
        username = attrs.get('username')
        password = attrs.get('password')
        if username and password:
                user = authenticate(request=self.context['request'], username=username, password=password)

                if not user:
                    msg = {
                        'success': False,
                        'message': 'Wrong username or password'
                    }
                    raise serializers.ValidationError(msg)
        else:
            msg = {
                'success': False,
                'message': 'Username and password are required'
            }
            raise serializers.ValidationError(msg)

        attrs['user'] = user
        return attrs
與昨天相同的是,我們先列出我們所需的欄位,並且再以其中參數做驗證
在定義validate,我們先抓取欄位中填入的input,並且再把username和password配對,做authenticate的驗證,確認是否有這個user存在
依照結果來吐出response,並且再回傳結果,供function使用
回到view的部分,
from .serializers import LoginSerializer
from rest_framework import generics
from django.contrib.auth import login

class LoginView(generic.GenericAPIView):
    serializer_class = LoginSerializer

    def post(self, request, format=None):
        serializer = LoginSerializer(data=request.data, context = {'request': self.request })

        if serializer.is_valid():
            user = serializer.validated_data['user']
            login(request, user)
            msg = {
                'success': True,
                'message': "Validation success"
            }
            return Response(msg, status=status.HTTP_202_ACCEPTED)

        return Response({
            'success': False,
            'message': 'Wrong username or password',
            },
            status = status.HTTP_400_BAD_REQUEST
        )
這邊我們也使用昨天的GenericsAPIView,然後定義post method的功能,將input data放入serializer。
然後,跟昨天一樣的作法,來檢驗serializer是否is_valid()。
但不同的地方是在這邊,我們不需要做儲存,因為username與password的配對已經有儲存在資料庫了。
我們要做的事只有透過驗證後,將使用者login就好。
成功login以後,我們再給予相對應的response,就是這樣一支login的api就完成了。
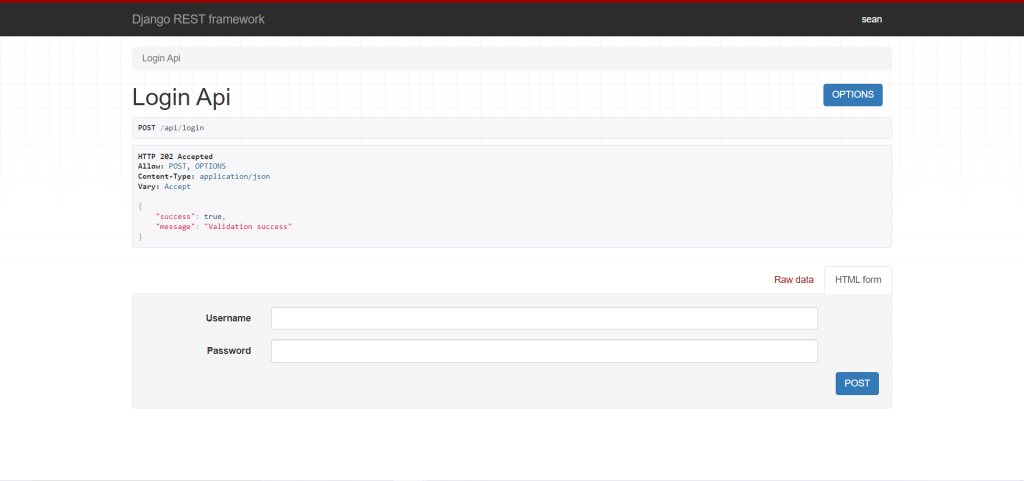
成功打開api的畫面,會長得像這樣:
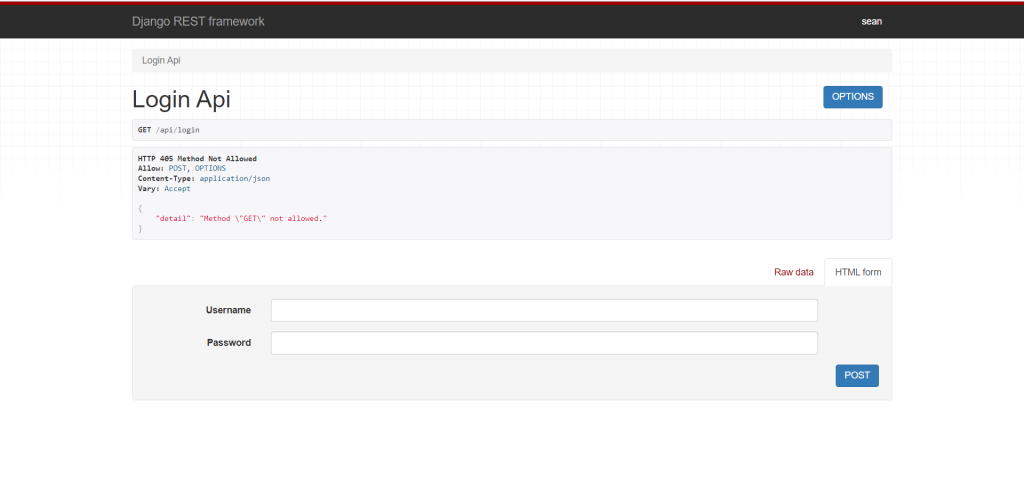
我們再輸入帳號密碼後,登入成功會回覆202以及response:
登出的部分,相對於登入比較簡單一些。
通常沒有需要輸出的欄位,所以在這邊我們不需要寫到serializer,只需要寫到view就好。
from rest_framework import views
from django.contrib.auth import logout

class LogoutAPIView(views.APIView):

    def get(self, request):
        logout(request)

        return Response({'message': 'logout successfully'}, status=status.HTTP_200_OK)
完成了以後,我們同樣寫好url的路徑,並且開啟網頁。
若原先在使用者登入的情況下,我們進入admin的路徑,會直接下面的畫面: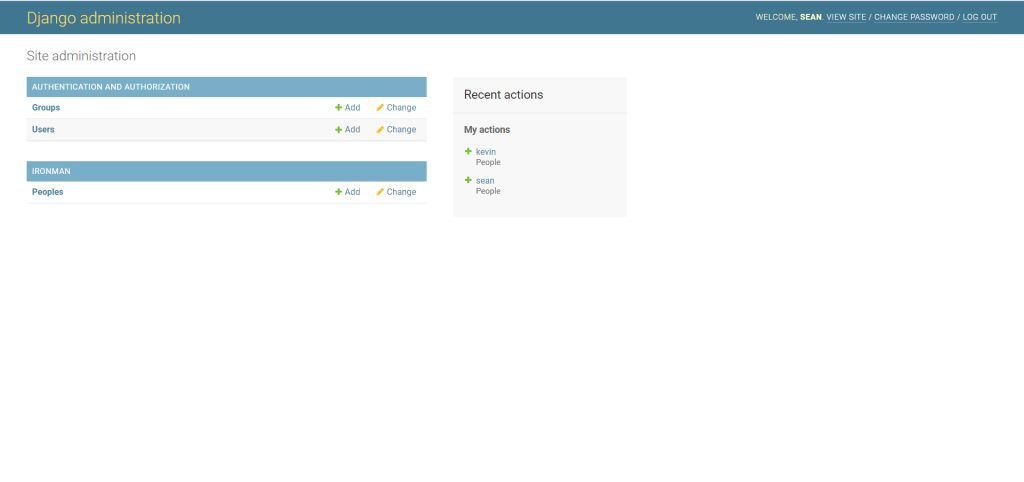
然後,我們再進入logout的api路徑,可以看到我們的logout successfully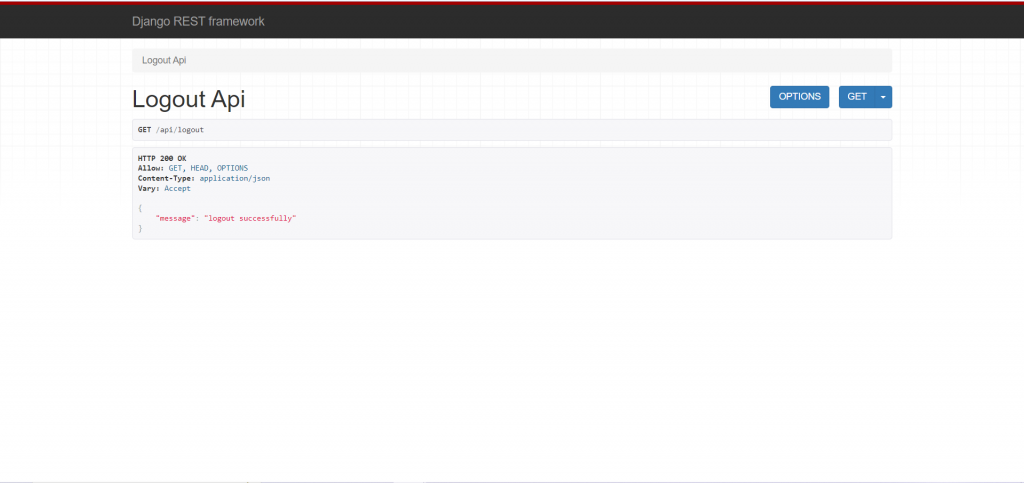
接著,我們再回到admin的路徑,就可以看到我們已經登出使用者成功啦!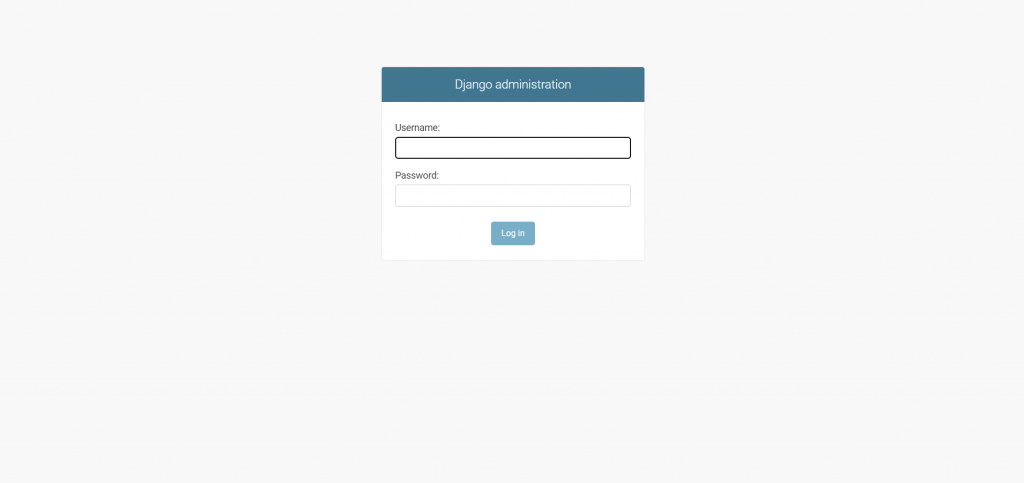
恭喜各位已經突破新手必打的註冊、登入以及登出了!
當然,我們今天的示範比較簡單,沒有涉及token或是其他問題,不過我們也已經學會登入登出的基本邏輯了!
那麼,今天的文章就到此結束!感謝大家的收看!
我是Sean,你各位海上的人,我們明天見!