實作時感覺最魔術的地方是 flex-direction: row-reverse; 搭配 justify-content: flex-end; 來做出堆疊效果。其他基本上都是小事。
首先參考一下 MUI Avatar 的使用方式,可以透過 props.src 來指定圖片,或是也可將內容當做 children 包進元件。
為了實現以上需求,採用以下的條件來決定最後 Avatar 元件究竟要渲染什麼內容:
const finalRender = useMemo(() => {
  if (onError) {
    return (
      <div
        className={cn(imgStyle, withBorder && figureStyle, withChildrenStyle)}
      >
        <PersonIcon fill="#fff" />
      </div>
    );
  }
  if (children) {
    return (
      <div
        className={cn(
          imgStyle,
          withBorder && figureStyle,
          withChildrenStyle,
          withBorder && withChildrenBorderStyle
        )}
      >
        {children}
      </div>
    );
  }
  if (src) {
    return (
      <ImageBase
        src={src}
        classes={{
          figure: cn(withBorder && figureStyle, imgStyle),
          img: imgStyle,
          onError: onErrorStyle,
        }}
        onError={fallBackToText}
      />
    );
  }
  return (
    <div className={cn(imgStyle, withBorder && figureStyle, withChildrenStyle)}>
      <PersonIcon fill="#fff" />
    </div>
  );
}, [children, src, onError, withBorder, fallBackToText]);
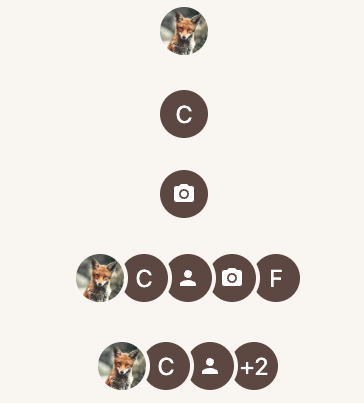
回傳內容的優先度由高到低排序如下:
<PersonIcon fill="#fff" /> 來作為圖片死去的替代顯示。Avatar 傳入 props.children 時,顯示該 children 內容。props.src 時,透過 ImageBase 元件來處理圖片內容。props.children 也沒有提供 props.src 的情況下,回傳(與圖片出錯時一致的)預設外觀。概念:將 props.children 傳遞進來的內容複製一份到 result 陣列裡,如果使用者有設定 props.max 的話,則將超過 max 數值的 Avatar 元件捨去,並透過 result.push(<Avatar withBorder>+{childrenLength - (max - 1)}</Avatar>); 顯示「扣掉 props.max 後,還有多少個 Avatar 元件」此數值。
最後透過 reverse() 反轉 result 陣列,再搭配 flex-direction: row-reverse; 與 justify-content: flex-end; 讓 Avatar 元件們可以正確排序,最後使用 baseStyle 中的 & > div: { marginLeft: '-12px' } 做出元件堆疊的效果。
useEffect(() => {
  let result: JSX.Element[] = [];
  React.Children.forEach(children, (child) => {
    const c = child as JSX.Element;
    result.push(React.cloneElement(c, { withBorder: true }));
  });
  const childrenLength = React.Children.count(children);
  if (typeof max === 'number' && max > 1 && max < childrenLength) {
    result = result.slice(0, max - 1);
    result.push(<Avatar withBorder>+{childrenLength - (max - 1)}</Avatar>);
  }
  setChildrenArr(result.reverse());
}, [children, max]);
PersonIcon 改成其他圖片或是文字來替代。Avatar 的間距:這部分是透過 withChildrenBorderStyle 將 borderColor 設定的與背景顏色一致來做出距離效果。如果你複製貼上今天的 code 且專案的背景顏色不是 #f9f4ef 的話,記得將 withChildrenBorderStyle 中的 #f9f4ef 改成正確的背景色。一直以來都以為 row-reverse 頂多拿來對應一些奇妙的排版邊際案例,沒想到還可以這樣用...?