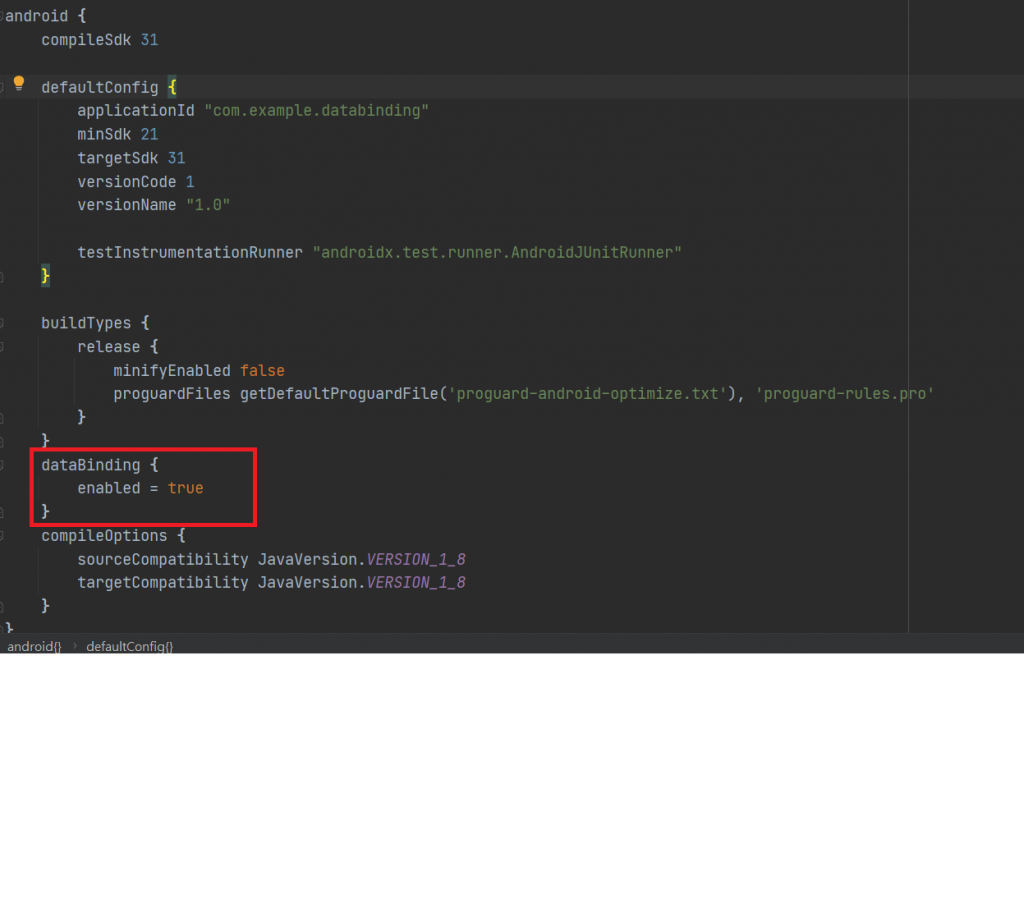
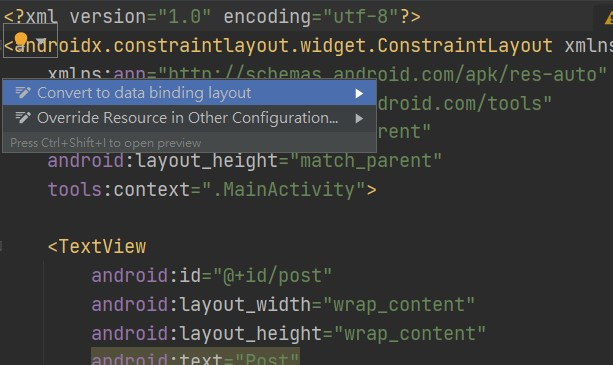
想必各位在想androdid的元件時,一定都有遇到過每多一個元件就要寫一次findViewById()的困擾吧,這東西呢看起來很雜很亂,尤其當元件一多的時候,看起來相當的煩躁,所以今天呢就來講講這好用的工具--DataBinding
可以直接將功能或者文字內容綁定至元件上。


public class Model {
    private String name;
    private String phone;
    public Model(String name, String phone) {
        this.name = name;
        this.phone = phone;
    }

    public String getName() {
        return name;
    }

    public void setName(String name) {
        this.name = name;
    }

    public String getPhone() {
        return phone;
    }

    public void setPhone(String phone) {
        this.phone = phone;
    }
    public void click(View view){
        Toast.makeText(view.getContext(),"send",Toast.LENGTH_SHORT).show();
    }
}
<layout xmlns:android="http://schemas.android.com/apk/res/android"
    xmlns:app="http://schemas.android.com/apk/res-auto"
    xmlns:tools="http://schemas.android.com/tools">

    <data>
        <variable
            name="Model"
            type="com.example.databinding.Model" />
    </data>

    ...
</layout>
<layout xmlns:android="http://schemas.android.com/apk/res/android"
    xmlns:app="http://schemas.android.com/apk/res-auto"
    xmlns:tools="http://schemas.android.com/tools">

    <data>
        <variable
            name="Model"
            type="com.example.databinding.Model" />
    </data>

    <LinearLayout
        android:layout_width="match_parent"
        android:layout_height="match_parent"
        android:orientation="vertical"
        android:gravity="center_vertical"
        tools:context=".MainActivity">

        <TextView
            android:id="@+id/name_txt"
            android:layout_width="wrap_content"
            android:layout_height="wrap_content"
            android:text="@{Model.name}" />

        <TextView
            android:id="@+id/phone_txt"
            android:layout_width="wrap_content"
            android:layout_height="wrap_content"
            android:text="@{Model.phone}" />

        <EditText
            android:id="@+id/phone_edt"
            android:layout_width="match_parent"
            android:layout_height="wrap_content"
            android:ems="10"
            android:inputType="textPersonName"
            android:text="@={Model.phone}" />
        <Button
            android:id="@+id/button"
            android:layout_width="match_parent"
            android:layout_height="wrap_content"
            android:onClick="@{Model::click}"
            android:text="Button" />
    </LinearLayout>
</layout>
@{}:表單向綁定,僅從中取值。(TextView,Button)
@={}:表雙向綁定,包含設值和取值。(EditText)
//layout 檔為 activity_data_binding ActivityDataBindingBinding
private ActivityDataBindingBinding activityDataBindingBinding
在這裡告知xml中data標籤內的資料,且根據layout檔名生成BindingClass,透過set+variable的name。如下:
<data>
        <variable
            name="Model"
            type="com.example.databinding.Model" />
</data>
設定的方法即為setModel();
範例
//取代setContentView(R.layout.activity_data_binding);
ActivityMainBinding binding = DataBindingUtil
                .setContentView(MainActivity.this, R.layout.activity_main);
Model model = new Model("Android", "0800-230423");
binding.setModel(model);
經過以上就不用在findViewById()找到元件後再setText或者setOnClickListener了,這樣程式碼是不是乾淨很多了呢~
