這幾天會進行 Login 元件的測試,並將測試分好幾個步驟,今天主要先測試元件渲染及 Input 操作流程是否正常尚未進行到點擊登入流程的測試。
Login 元件現有功能,如下:
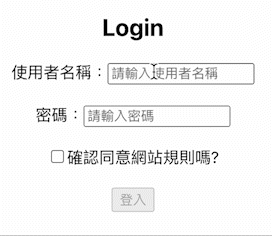
接著來看範例程式碼:
Login.js
共有兩個 state 其中一項用來儲存使用者的登入資訊,另一項用來儲存使用者是否有點擊 checkbox 。
import React, { useState } from "react";

const Login = () => {
  const [loginData, setLoginData] = useState({
    username: "",
    password: "",
  });
  const [isChecked, setIsChecked] = useState(false);

  const handleChange = (e) => {
    setLoginData({
      ...loginData,
      [e.target.name]: e.target.value,
    });
  };

  return (
    <>
      <h2>Login</h2>
      <form>
        <label htmlFor="username">
          使用者名稱:
          <input
            type="text"
            id="username"
            name="username"
            placeholder="請輸入使用者名稱"
            value={loginData.username}
            onChange={handleChange}
          />
        </label>
        <br />
        <label htmlFor="password">
          密碼:
          <input
            type="password"
            id="password"
            name="password"
            placeholder="請輸入密碼"
            value={loginData.password}
            onChange={handleChange}
          />
        </label>
        <br />
        <label htmlFor="agreeRules">
          <input
            type="checkbox"
            id="agreeRules"
            onChange={(e) => setIsChecked(e.target.checked)}
          />
          確認同意網站規則嗎?
        </label>
        <br />
        <button disabled={!isChecked} type="button">
          登入
        </button>
      </form>
    </>
  );
};

export default Login;
首先針對第一點 Login 能否正確呈現在網頁上,透過 getBy 取得各個節點後使用 toBeInTheDocument 斷言能否正確顯示。
ByLabelText 能選出對應該 Label 的 Input 節點getByRole 可透過帶入 name 選取對應文字內容的按鈕import React from "react";
import userEvent from "@testing-library/user-event";
import { screen, render } from "@testing-library/react";
import Login from "./Login";
test("The login form is displayed correctly", () => {
render(<Login />);
const nameInputNode = screen.getByLabelText("使用者名稱:");
const passwordInputNode = screen.getByLabelText("密碼:");
const checkbox = screen.getByRole("checkbox");
const loginButton = screen.getByRole("button", { name: "登入" });
expect(nameInputNode).toBeInTheDocument();
expect(passwordInputNode).toBeInTheDocument();
expect(checkbox).toBeInTheDocument();
expect(loginButton).toBeInTheDocument();
});
接下來針對能否輸入 Input 視窗值且正確顯示進行測試:
透過 userEvent type 來輸入 Input 視窗文字內容,並比對是否與呈現的 value 一致。
describe("Input can correctly enter the value", () => {
  test("Enter username correctly", () => {
    render(<Login />);

    const nameInputNode = screen.getByLabelText("使用者名稱:");
    userEvent.type(nameInputNode, "艾草");

    expect(nameInputNode.value).toBe("艾草");
  });
  test("Enter password correctly", () => {
    render(<Login />);

    const passwordInputNode = screen.getByLabelText("密碼:");
    userEvent.type(passwordInputNode, "a12345678");

    expect(passwordInputNode.value).toBe("a12345678");
  });
});
最後測試點擊確認按鈕時是否能打開 Button ,這部分的測試於之前的文章有介紹過,將該功能拼回 Login 按鈕後進行測試:
透過 userEvent.click 點擊 checkbox 並於點擊後透過 toBeEnabled 及 toBeDisabled 判斷是否有開啟 button 。
describe("Click the checkbox to change the disabled property of the button", () => {
  test("Unable to press the button at first", () => {
    render(<Login />);
    const loginButton = screen.getByRole("button", { name: "登入" });
    expect(loginButton).toBeDisabled();
  });
  test("The button can be turned on when the checkbox is checked", () => {
    render(<Login />);
    const loginButton = screen.getByRole("button", { name: "登入" });
    const checkbox = screen.getByRole("checkbox");
    userEvent.click(checkbox);
    expect(loginButton).toBeEnabled();
  });
  test("Clicking the checkbox twice disables the button", () => {
    render(<Login />);
    const loginButton = screen.getByRole("button", { name: "登入" });
    const checkbox = screen.getByRole("checkbox");
    userEvent.click(checkbox);
    expect(loginButton).toBeEnabled();
    userEvent.click(checkbox);
    expect(loginButton).toBeDisabled();
  });
});
Login 目前的三個測試內容進行到完成,明天來針對使用者點擊按鈕送出後的流程做測試!
https://www.youtube.com/watch?v=hPOS6IRKJm0


 iThome鐵人賽