Whisper 是 OpenAI 提供的一種開源的自動語音辨識( Automatic Speech Recognition,ASR )的神經網路模型,用來執行語音辨識(language identification)與翻譯(speech translation)的功能。能夠將各種語言的語音轉錄成文字(multilingual speech recognition),甚至可以處理較差的音頻品質或過多的背景雜訊。
模型架構,安裝需求和標準,可參考官方文檔: https://github.com/openai/whisper
Introducing Whisper - OpenAI: https://openai.com/research/whisper (裡面就有"Read paper", "View code", "View model card")
Read paper: https://cdn.openai.com/papers/whisper.pdf
View code: https://github.com/openai/whisper
View model card:https://github.com/openai/whisper/blob/main/model-card.md
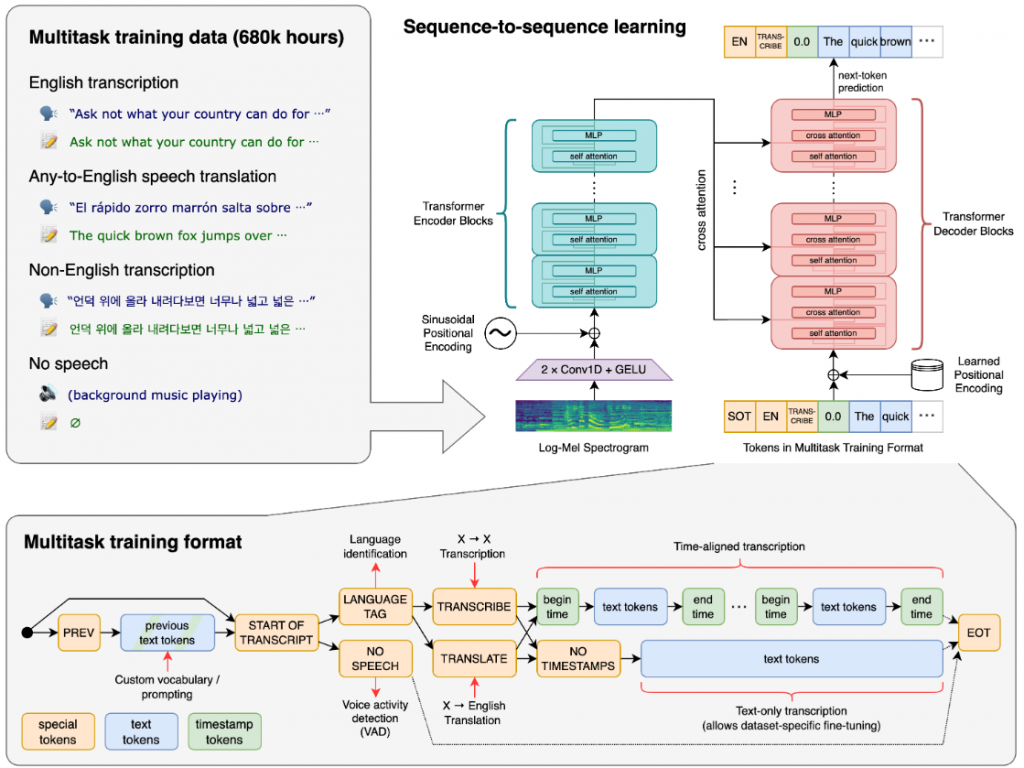
上圖為 Whisper 的模型訓練方法,可以從 paper 看,不過筆者在這邊簡單解釋一下:
數據資料集(data)
左上為 Multitask(多工) training data ,總共 680k hours (其實也透漏資料大小), 為何叫多工呢? 因為它分為四種: (1) 英文轉錄, (2) 任何語言翻譯為英文,(3) 非英語系轉錄,(4) 不講話(只有背景音樂)
訓練 (training)
它的訓練過程在右邊,主要為 sequence-to-sequence learning, sequence-to-sequence model 是一類將序列轉化為序列技術的統稱,最初即是由 Google Translate 研究團隊所開發。關於 sequence-to-sequence, 主要是由 Encoder 和 Decoder 兩個 RNN 所構成, 可以想像 Encoder 相當於處理 input data, 我們餵資料給它,經由特徵工程(或 attention, 或影像壓縮處理, 去噪....等等特殊處理),然後再經由 Decoder 之後輸出。關於 sequence-to-sequence,可以參考這篇: http://zake7749.github.io/2017/09/28/Sequence-to-Sequence-tutorial/ ,寫的還不錯。
好了,所以我們可以看到圖片的左下方有個箭頭,將 Multitask training data (多工訓練資料) 餵進去 Log-Mel Spectrogram (Mel Spectrogram, 梅爾頻譜),何謂梅爾頻譜? 其實,它就是在語音處理中常常用到的頻譜,在語音分類中把信號變成圖片,然後用分類圖片的算法 (例如: CNN) 來分類語音。更多詳細梅爾頻譜的資料,請參考: https://blog.csdn.net/bo17244504/article/details/124707265
https://medium.com/analytics-vidhya/understanding-the-mel-spectrogram-fca2afa2ce53
https://zhuanlan.zhihu.com/p/351956040
因此, 這些頻譜經由 CNN (2xConv1D + GELU) 的方法 training (訓練),再經由正弦波位置編碼(Sinusoidal position encoder, 所謂正弦波位置編碼,簡單講就是在 transformer 架構中加入一些關於 token 位置的信息,其演算法使用了不同频率的正弦函數来作為位置編碼,所以叫作正弦波位置編碼),接著,進入 Tranformer Encoder 的過程 (MLP + self-attention),(MLP + self-attention)...(MLP + self-attention),(self-attention 來自相同序列),幾層我不知道,或許多層多次,然後再經由 cross attention (cross attention 來自不同序列),經由 transformer decoder 輸出。當然,在訓練過程中,我們可以得知 Multitask training format 中 token 的信息,與訓練好的模型來預測下一個 token。這也意味著可以經由模型來輸出講者的說話模式(內容)。
正弦波位置編碼可參考: https://zhuanlan.zhihu.com/p/98641990, https://zhuanlan.zhihu.com/p/338592312
MLP:https://chih-sheng-huang821.medium.com/%E6%A9%9F%E5%99%A8%E5%AD%B8%E7%BF%92-%E7%A5%9E%E7%B6%93%E7%B6%B2%E8%B7%AF-%E5%A4%9A%E5%B1%A4%E6%84%9F%E7%9F%A5%E6%A9%9F-multilayer-perceptron-mlp-%E5%90%AB%E8%A9%B3%E7%B4%B0%E6%8E%A8%E5%B0%8E-ee4f3d5d1b41
https://zh.wikipedia.org/zh-tw/%E5%A4%9A%E5%B1%82%E6%84%9F%E7%9F%A5%E5%99%A8
=======
以上模型講解完畢,接下來是安裝的部分。
如果您已有 OpenAI ChatGPT API key,則可以直接進行 OpenAI 語音辨識,不需要額外安裝 Whisper:
pip install openai #安裝套件
import os
import openai
openai.organization = "org-iLO9ZtJh7FCEufYHGQNle6ur"
openai.api_key = os.getenv("OPENAI_API_KEY")
"OPENAI_API_KEY" 則為您個人所申請的 ChatGPT API key, 需以括號 " " 包住, 例如:您的 ChatGPT API key 為 12345678, 則 "OPENAI_API_KEY" 則為 "12345678"
看 Moedl 詳細資訊及權限:
openai.Model.list()
但如果您沒有OpenAI ChatGPT API key,或您對於 Whisper 很感興趣,則可以參考以下步驟,也就是本文的重點:
基礎環境要求: Python 3.8-3.10 (官方文件說明此 model 在 Python 3.9.9 and PyTorch 1.10.1 進行運行和測試)
下載ffmpeg並添加環境變數
(a) 於此網站 https://github.com/BtbN/FFmpeg-Builds/releases 找到“ffmpeg-master-latest-win64-gpl.zip”版本下載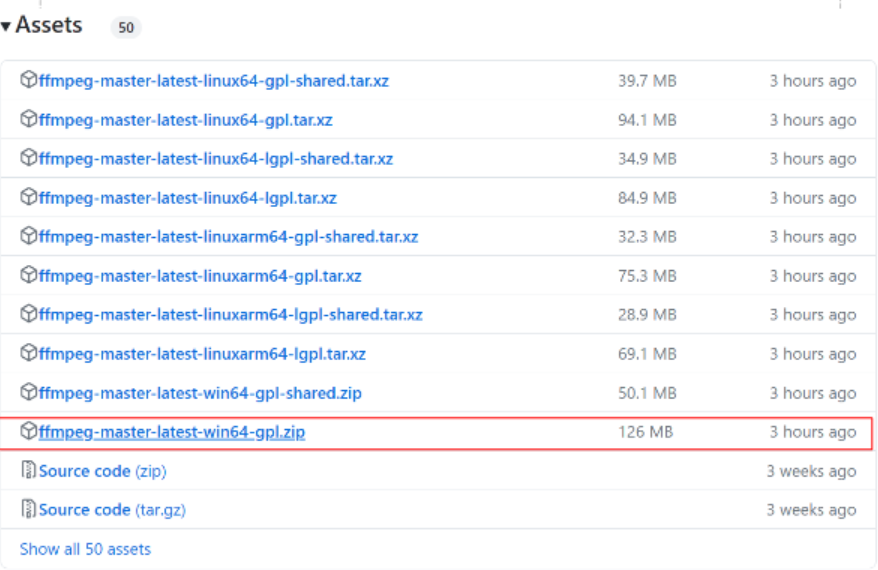
(b) 解壓縮後,找到bin文件夹下的“ffmpeg.exe”,將它複製到一个文件夾中,添加到系统環境變量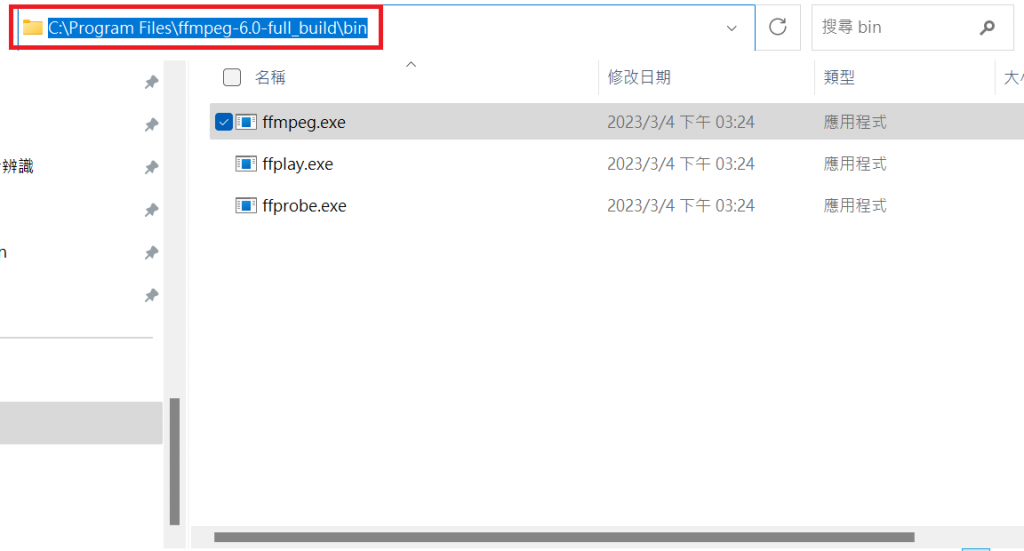


(c) 開啟 cmd, 輸入 ffmpeg,檢查是否安裝成功。安裝成功畫面如下:
(b) 安裝完成後,打開 command-line(CMD 窗口),輸入 git,安裝成功如下所示:
則可進行 PyTorch 的安裝。
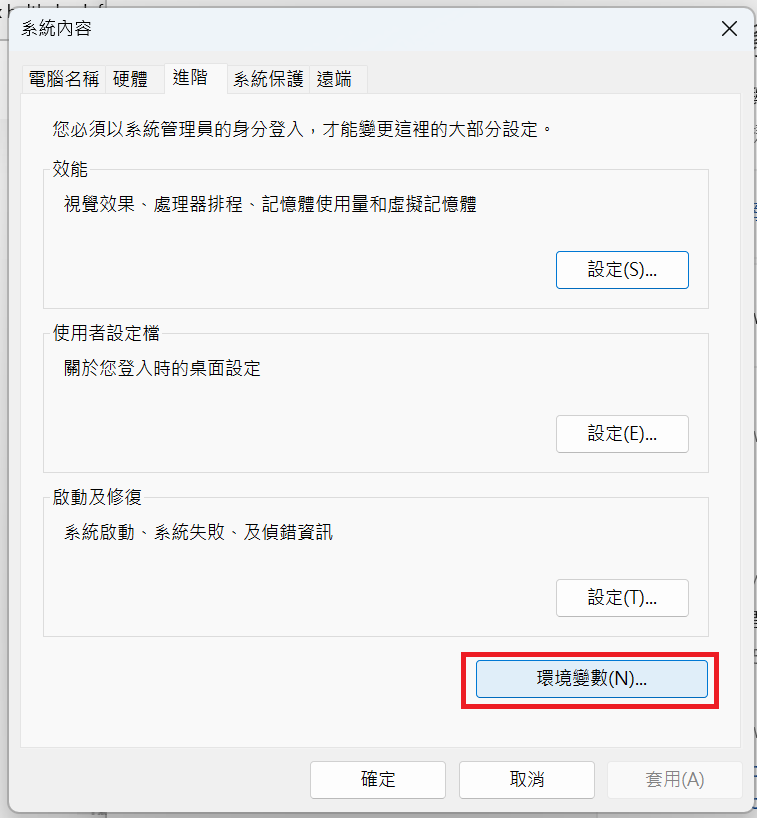
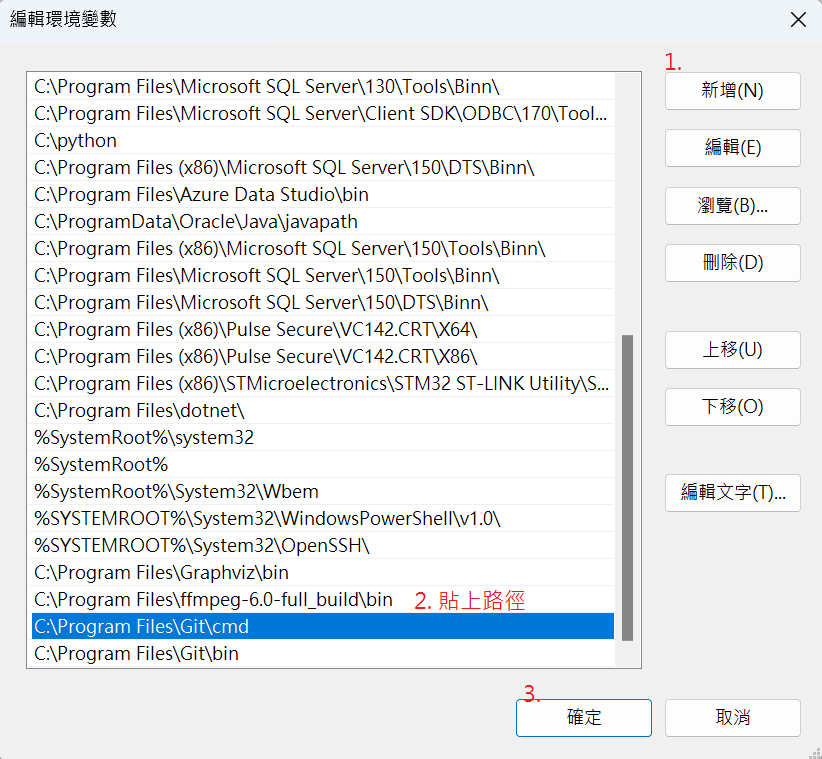
(c) 若安裝不成功,需將git添加到環境變數中:
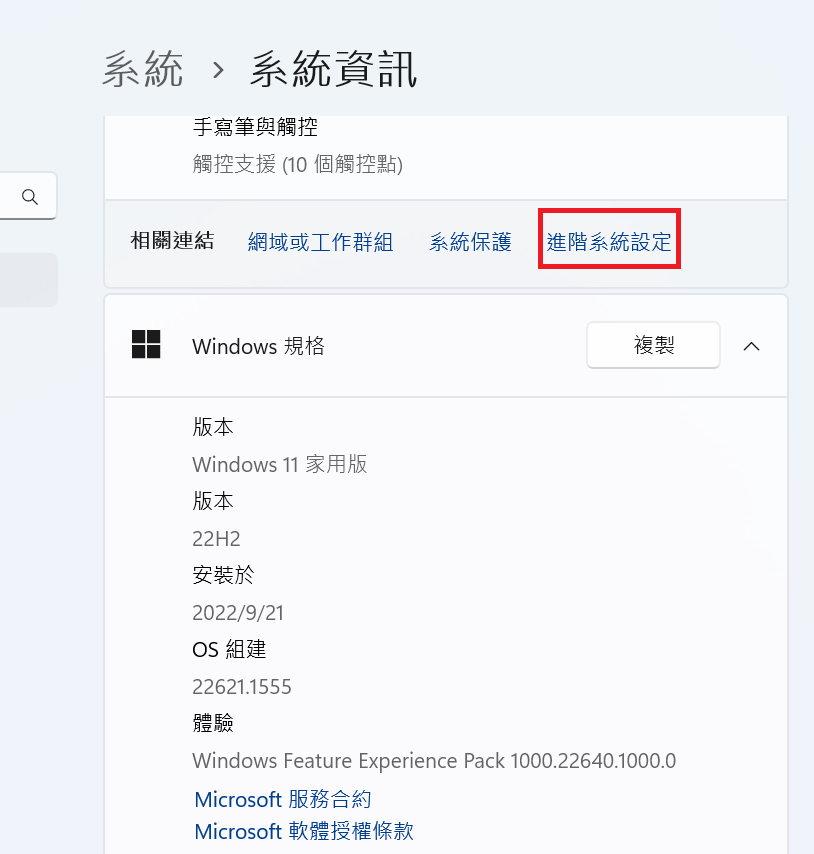
搜索 git.exe,找到它位于電腦上的路徑(譬如為 “C:\Program Files\Git\bin”),則將其加到環境變數中。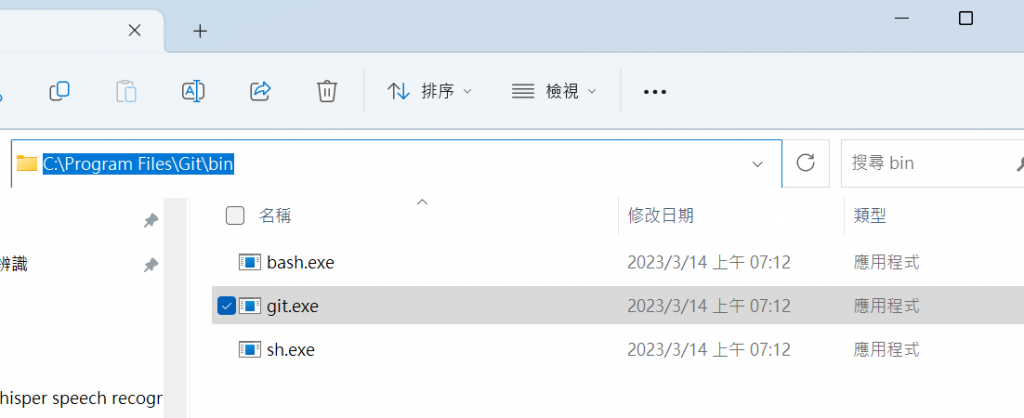
如先前步驟將路徑加入到環境變數中:
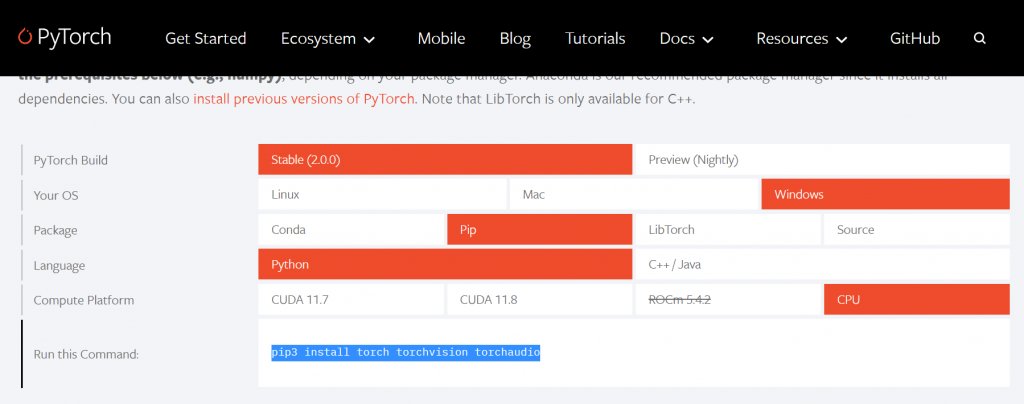
因為我電腦尚未額外配置GPU,只有標配 Intel(R) UHD Graphics 620,因此,我選擇的版本如下: "Windows系统"、"pip安装方式"、"Python语言"、"CPU版本的軟件"。
直接以 Command-line (CMD)下指令: pip3 install torch torchvision torchaudio
5.Whisper的安装
以上步驟都完成後,按照官方文檔,開啟 Command-line (CMD 視窗),下如下指令:
pip install git+https://github.com/openai/whisper.git
然后再運行:
pip install --upgrade --no-deps --force-reinstall git+https://github.com/openai/whisper.git (注意為一行)
完成whisper的安裝。
接下來,測試是否安裝成功:
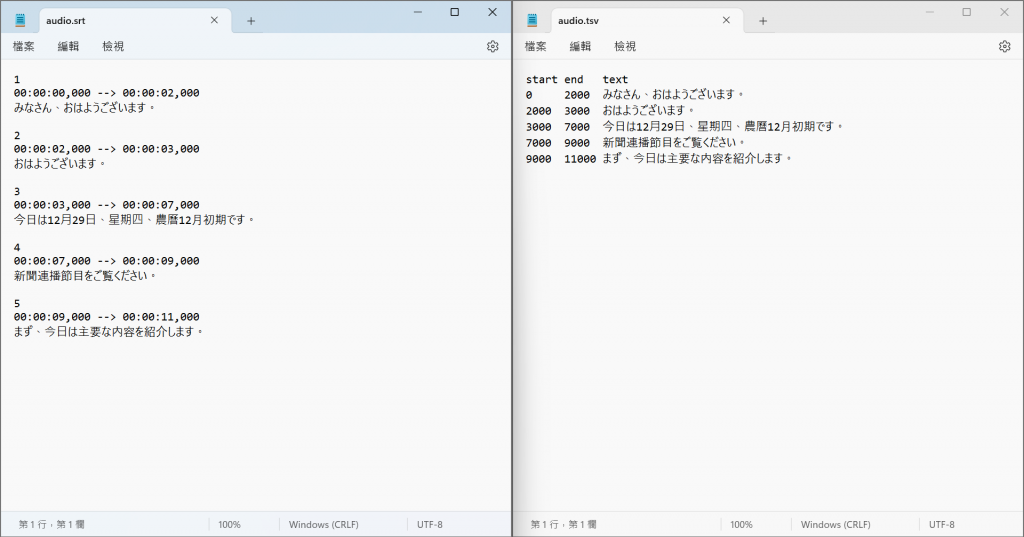
我們準備一段音檔(.mp3, .wav 或 .m4a 也可以),可以用 Windows 內建錄音機錄製,我這邊是.mp3 檔案,並將其命名為 audio.mp3,使用 Whisper 將其轉換為文字。在音檔所在文件夾中打開command-line (cmd 窗口),輸入 whisper audio.mp3
則會生成四個文檔: audio.srt,audio.tsv,audio.txt,audio.vtt。這四個文檔就是音檔的內容,只是其輸出格式不同。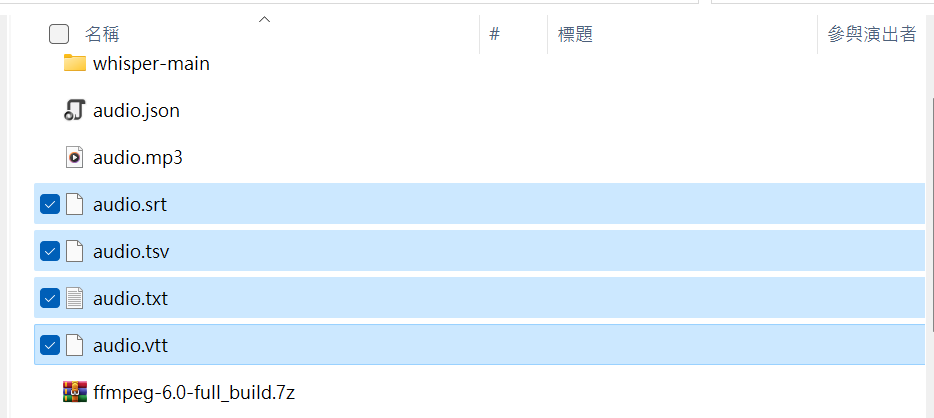

更換轉寫模型:
whisper audio.mp3 --model medium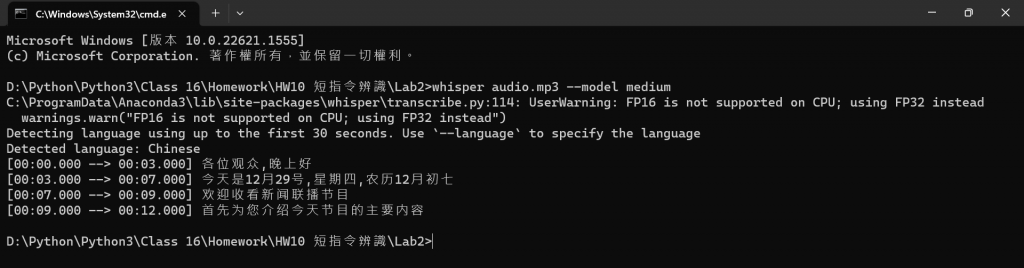
參考官方文檔 https://github.com/openai/whisper ,還有如下指令:
whisper japanese.wav --language Japanese
whisper japanese.wav --language Japanese --task translate
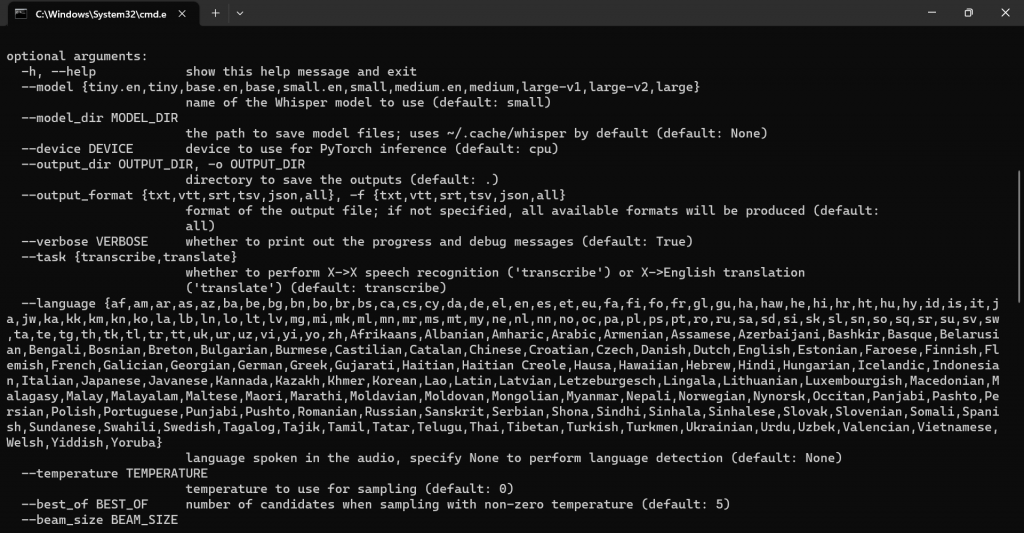
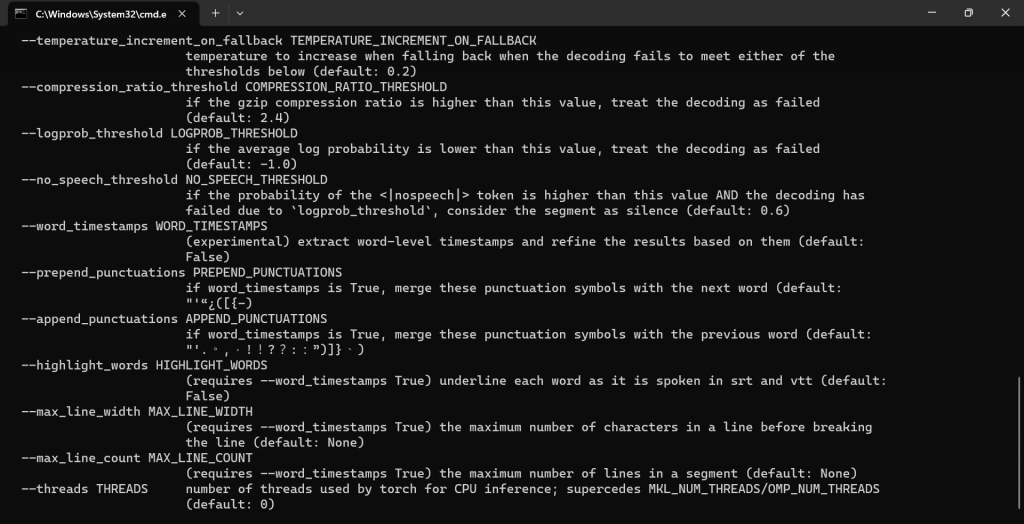
whisper --help
=> 這個指令可以 show 出相關資訊,包含 model 型態,支援語言種類,以及輸出格式(預設是 all,即包含 txt,vtt,srt,tsv,json)...等等。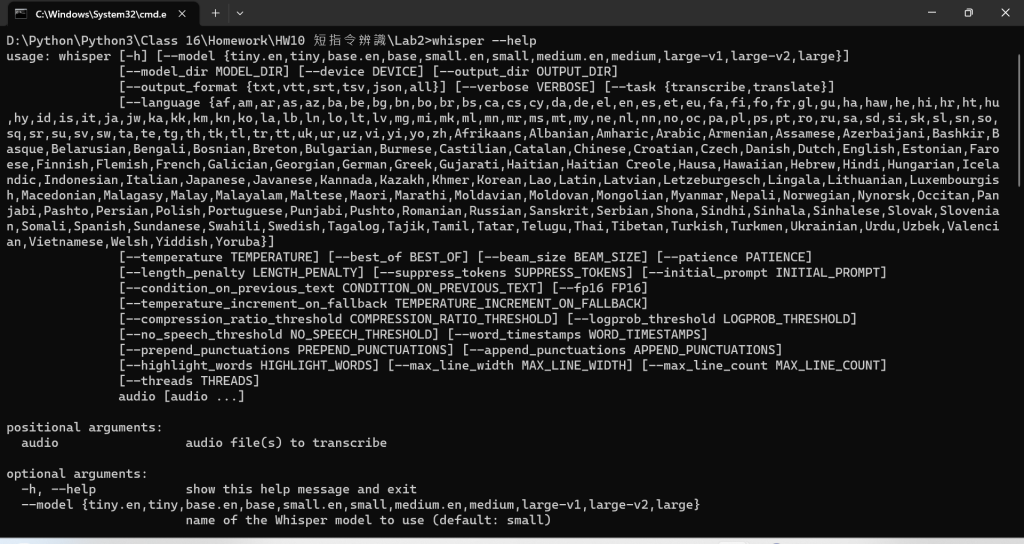
另外,在 jupyter notebook 上運行:
import whisper

model = whisper.load_model("base")
result = model.transcribe("audio.mp3")
print(result["text"])
或是
import whisper

model = whisper.load_model("base")

#load audio and pad/trim it to fit 30 seconds
audio = whisper.load_audio("錄製 (3).m4a")
audio = whisper.pad_or_trim(audio)

# make log-Mel spectrogram and move to the same device as the model
mel = whisper.log_mel_spectrogram(audio).to(model.device)

# detect the spoken language
_, probs = model.detect_language(mel)
print(f"Detected language: {max(probs, key=probs.get)}")

# decode the audio
#options = whisper.DecodingOptions()  #預設
options = whisper.DecodingOptions(fp16 = False) # 如果不支援 fp16,以 fp32 取代, 須改為 False
result = whisper.decode(model, mel, options)

# print the recognized text
print(result.text)
其實,還有很多很好玩的功能,請參考官網文件: https://github.com/openai/whisper
 M.H.
M.H.
