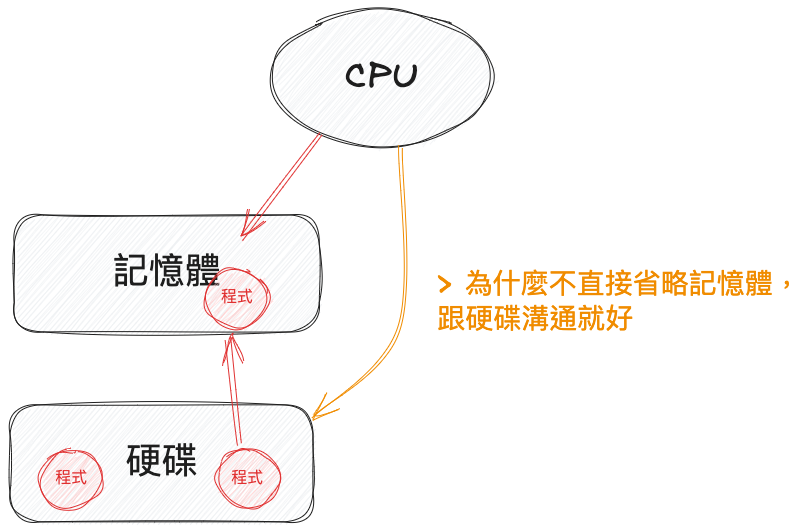
計算機三大核心硬體:
1.CPU
2.記憶體
3.硬碟

為什麼不直接省略記憶體,跟硬碟溝通就好?
1.記憶體的容量一般比硬碟小的多得多

2.CPU運行速度快,硬碟運行速度慢,記憶體搭配CPU運作,提升CPU運行效率

3.只要是運行的程序 產生的數據第一時間肯定在記憶體,突然斷電數據會立刻遺失
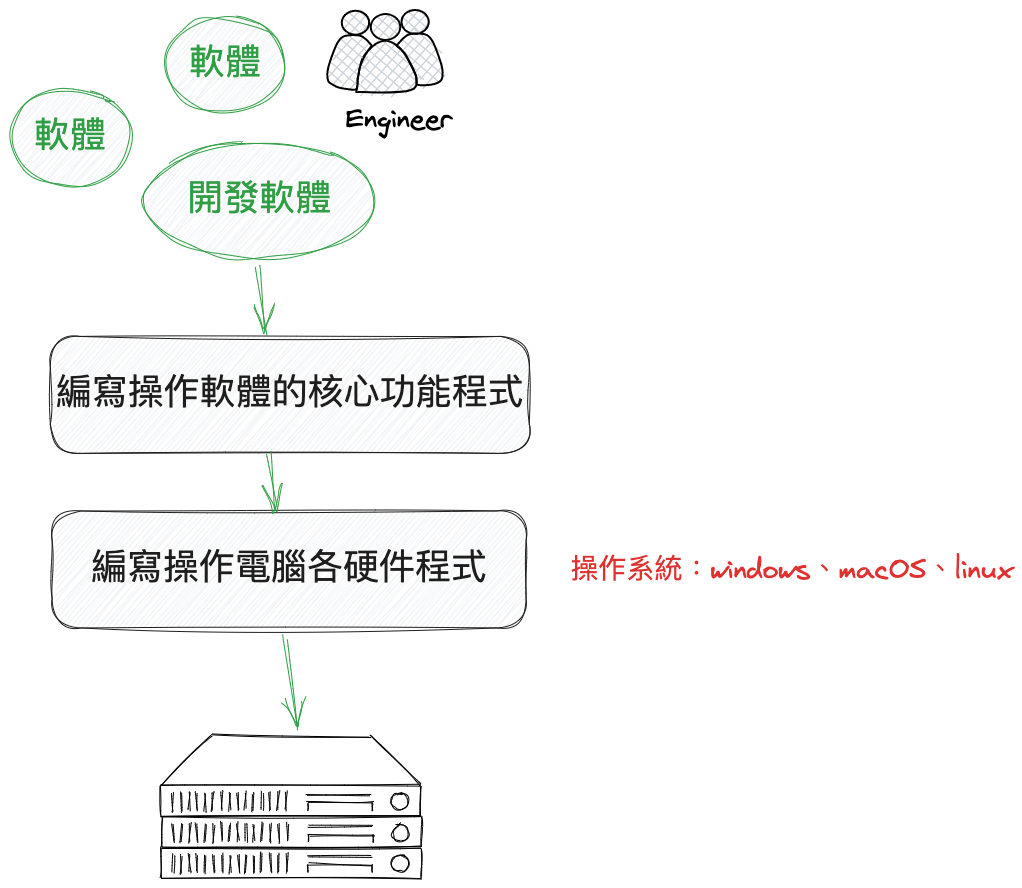
控制 協調 管理計算機各個硬體的工作

PC端常見操作系統:
	windows、macOS、linux
行動端常見操作系統:
	Android、IOS、
1.編譯型語言		C++、Java、Golang
	類似於GOOGLE翻譯(一次性翻譯) 翻譯之後可以反覆使用翻譯的結果
 		優勢: 一次翻譯可以反覆使用 執行效率高 速度快
  		劣勢: 當程序中頻繁出現bug 那麼需要反覆編譯
2.解釋型語言    python
	類似於翻譯官(說一句翻一句)
    	優勢: 有bug和沒有bug執行效率幾乎一樣
    	劣勢: 速度沒有編譯型語言快
'''要想讓計算機能夠識別並運行高級語言需要對應類型的翻譯官'''
1.python發展方向
web方向、自動化運維、自動化測試、自動化辦公、網路爬蟲、金融量化、人工智慧、機器學習、數據分析
2.python解釋器
1.歷史
荷蘭的Guido van Rossum因為當時的程式語言存在缺陷,聖誕節期間,他決定創建一種新的語言。一種更易於使用又功能強大的語言。
2.版本
版本其實是軟體更新疊代的紀錄
python1.X:初期版本 幾乎不用
python2.X:python2.7(2020年就已經不再維護更新)
python3.X:python3.6 python3.8 python3.10+
ps:學習python語法 對版本的區別差異不大
目前常用:python2.7 python3.6 python3.8
3.下載
官網:https://www.python.org/downloads/windows/
ps:蘋果電腦macOS、linux系統(centos7、rhel7...等)自帶python2.7
4.安裝(如本頁後面:mac、windows電腦安裝python解釋器(多版本))
自訂安裝 路徑盡量簡單一些
示範:windows電腦、mac電腦
5.使用
1.windows+r
2.輸入cmd回車
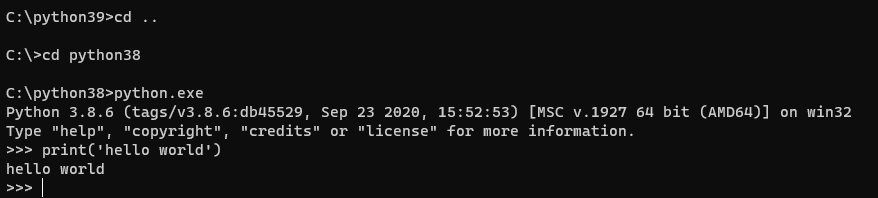
3.切換盤符 C:
4.切換目錄 cd python38
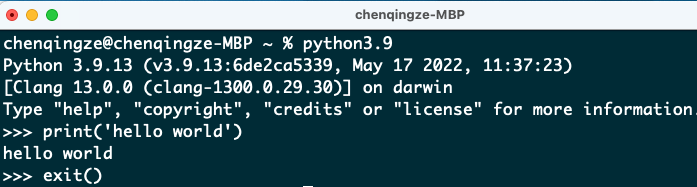
5.運行解釋器 python
6.退出解釋器 exit()
7.退到上一層目錄 cd ..
1.cmd直接編寫運行
適用於較短 臨時執行的代碼
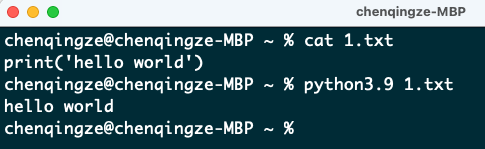
2.解釋器命令運行
可以編寫較長的代碼 並且可以長久保存
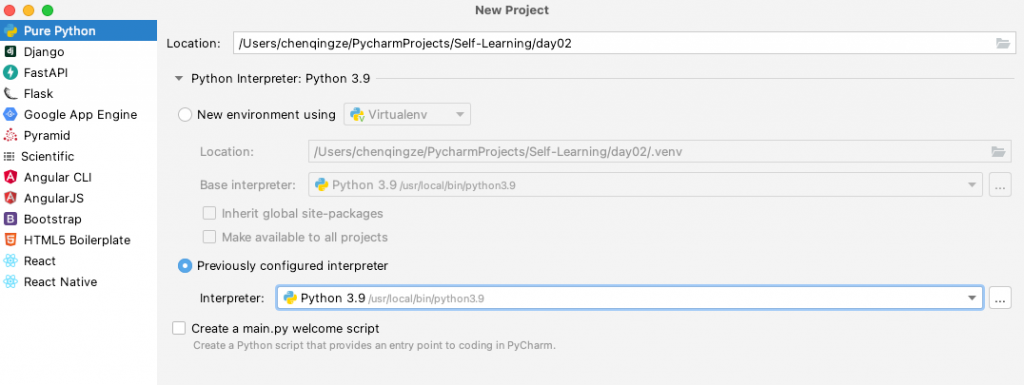
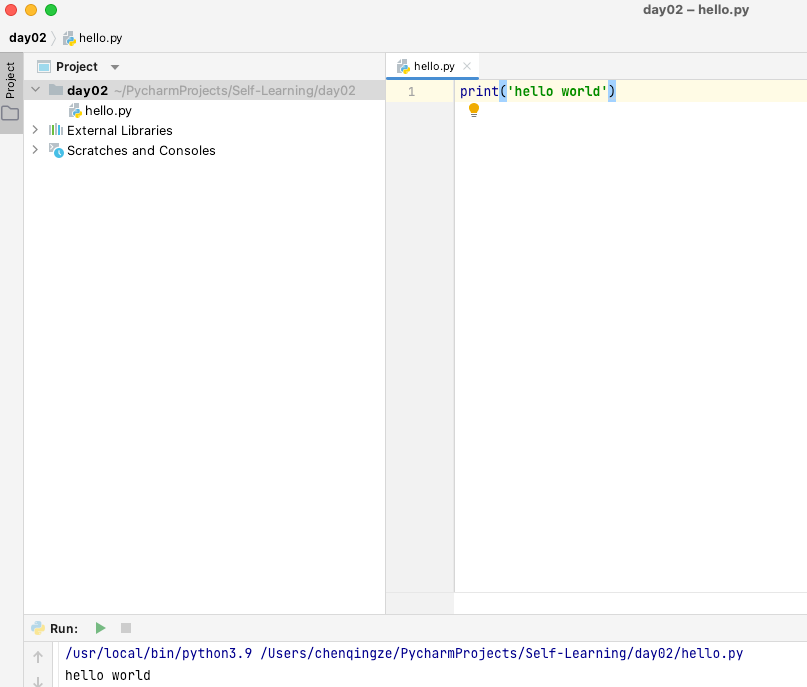
3.利用IDE工具編寫並運行
IDE開發者工具:自動提示 攜帶各種功能插件 編寫程式碼效率更高更快
1.sublime
2.vscode
3.pycharm
官網Downloads網址:https://www.python.org/downloads/macos/
1. Downloads
2. 找到要安裝的版本
3. 全程點繼續,完成安裝
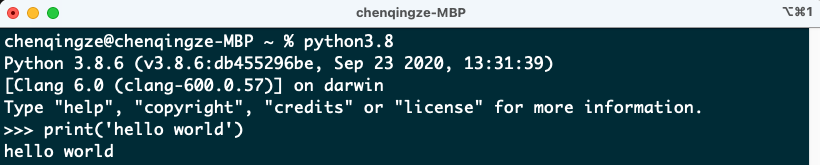
4. 打開termimel,可以看到使用者環境變數已自動加上python3.9路徑
5. 直接可以使用
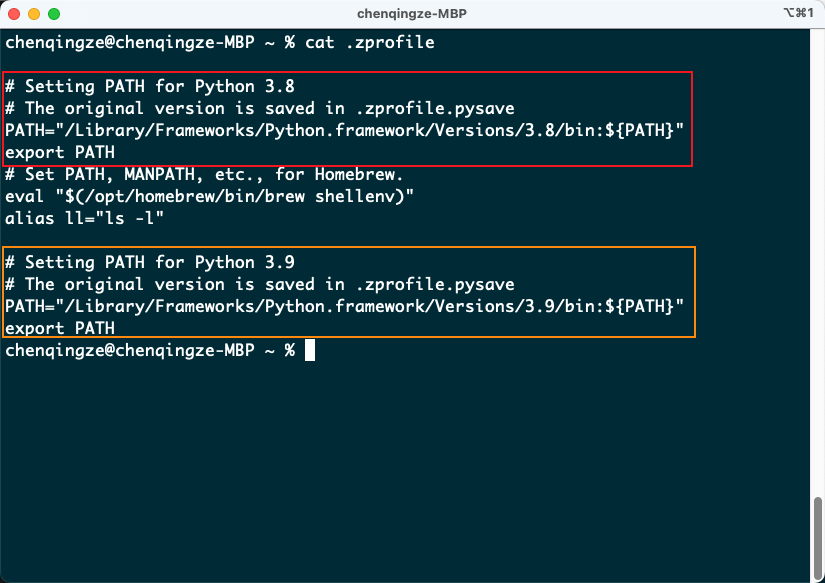
6. 要使用多版本共存,同前面1~3步驟,到官網下載並安裝版本即可,我這裡示範3.8.6本版的
Downloads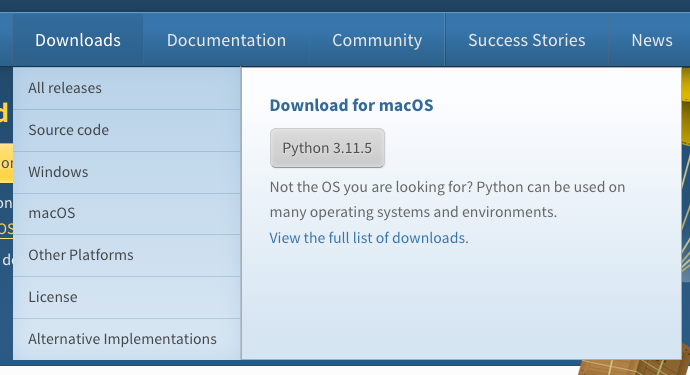
找到要安裝的版本,因為我的電腦是m1晶片,所以就不能選擇intel-only,選擇universal2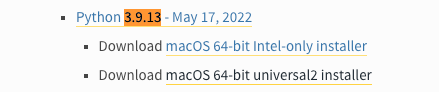
全程點繼續,完成安裝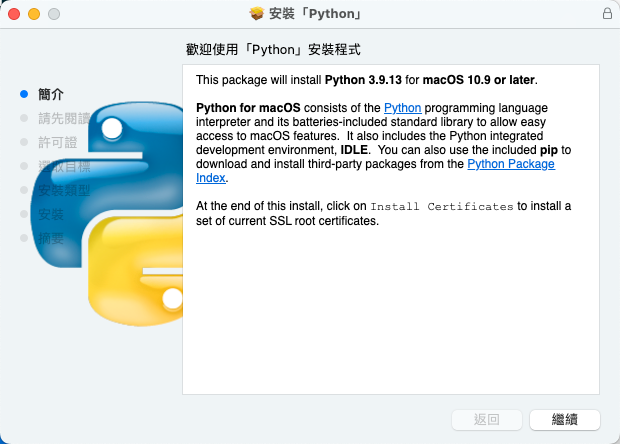
打開termimel,可以看到使用者環境變數已自動加上python3.9路徑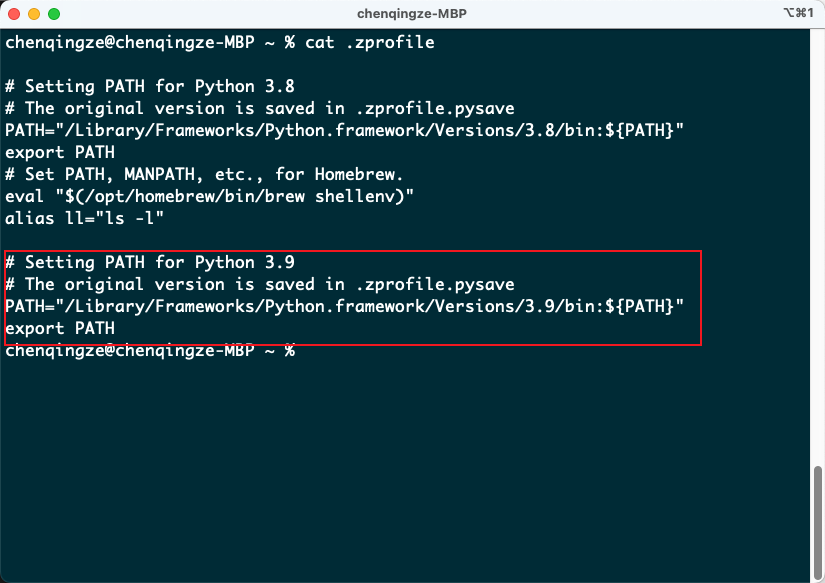
直接可以使用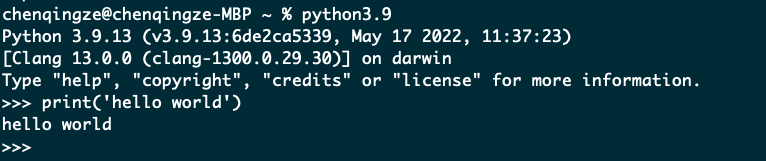
要使用多版本共存,同前面1~3步驟,到官網下載並安裝版本即可,我這裡示範3.8.6本版的
可以看到使用者環境變數也已自動加上python3.8路徑
官網Downloads網址:https://www.python.org/downloads/windows/
1. Downloads
2. 找到要安裝的版本
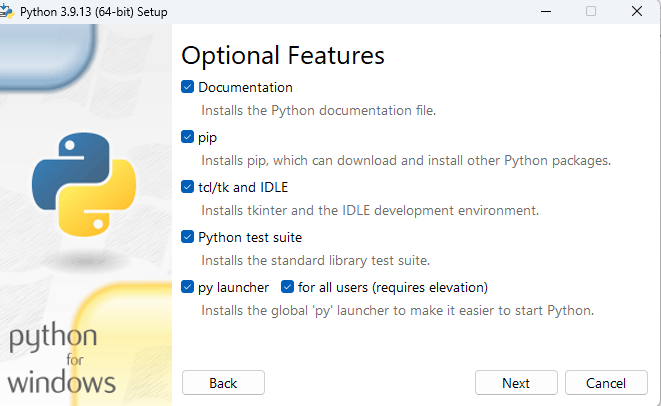
3. 注意,點選Customize installation
4. 打開termimel,到安裝目錄下
5. 可以看到有一個python.exe檔案,執行即可使用
6. 要使用多版本共存,同前面1~3步驟,到官網下載並安裝版本即可
7. 每次都要到安裝目錄下,才能使用python,故將路徑直接加入環境變數。
7.1 將各版本目錄下python.exe再複製出來,並命名為版本號
7.2 檔案總管->本機右鍵->內容
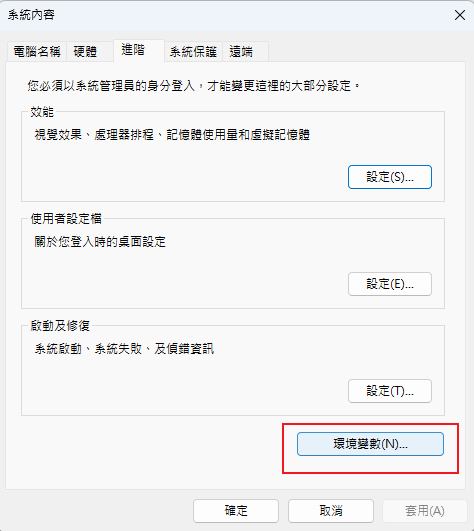
7.3 進階系統設定->環境變數
7.4 找到系統變數->path點兩下
7.5 新增C:\python38、C:\python38\Scripts、C:\python39、C:\python39\Scripts,確認
7.6 開啟terminel測試
Downloads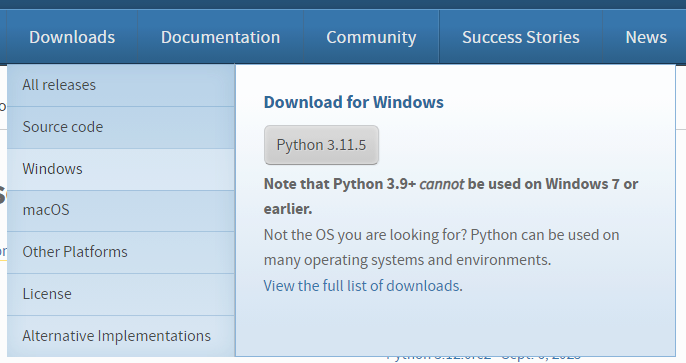
找到要安裝的版本,因為我的電腦是w11 64bit,所以選擇Windows installer (64-bit)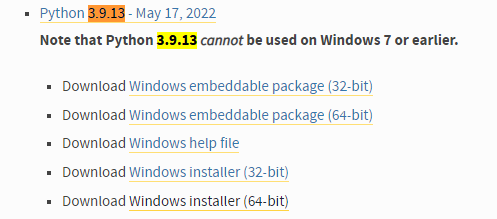
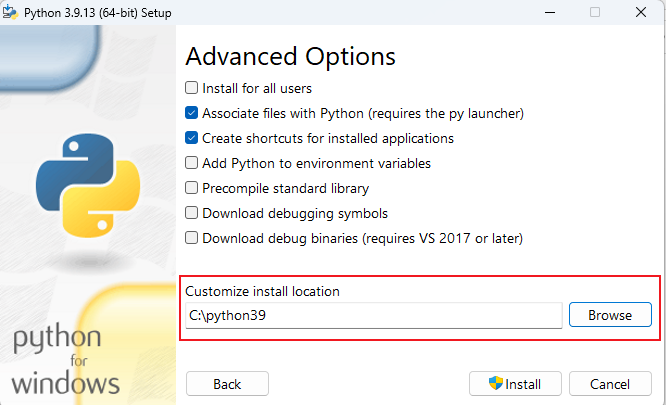
注意,點選Customize installation,自訂安裝路徑,不然原安裝路徑名稱非常長,以後要找,不易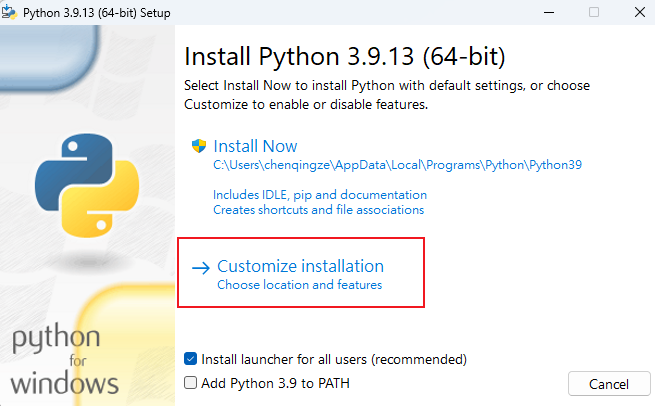
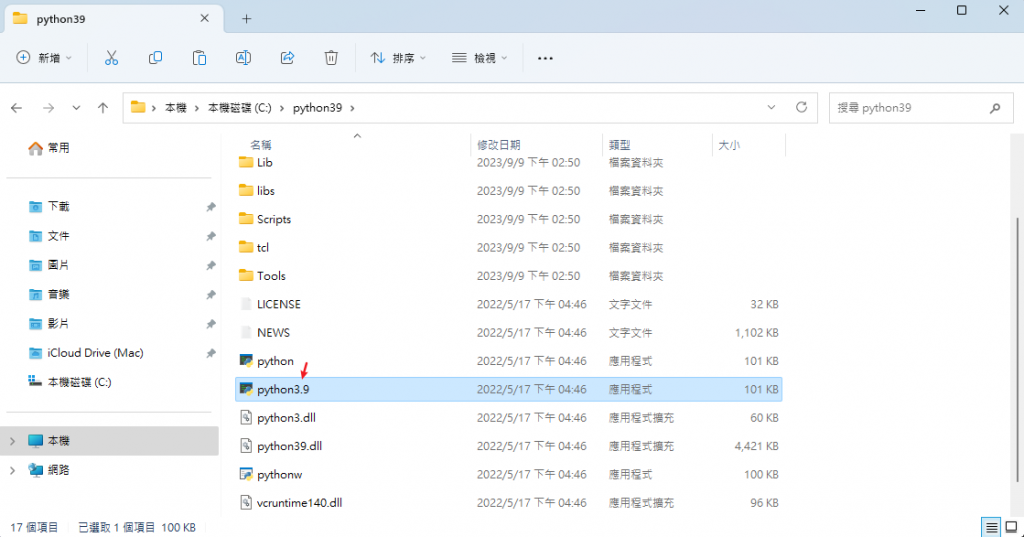
我選擇在C:\,創建一個python39資料夾,將python3.9安裝在此位置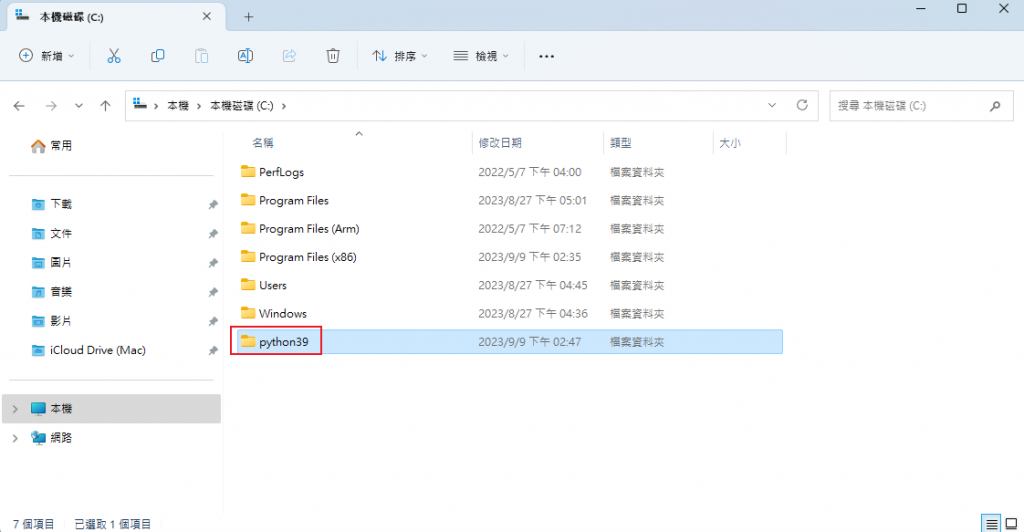
打開termimel,到安裝目錄下
可以看到有一個python.exe檔案,執行即可使用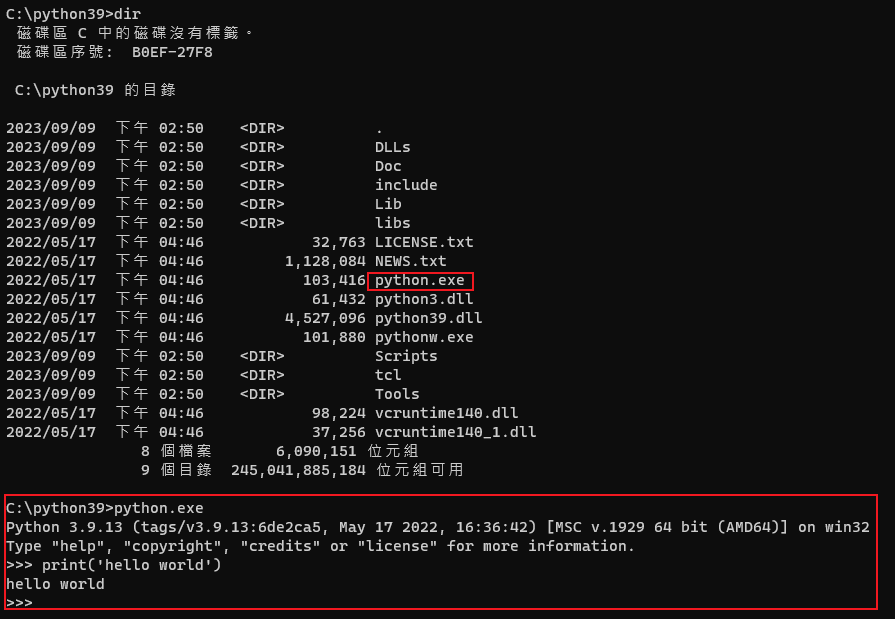
要使用多版本共存,同前面1~3步驟,到官網下載並安裝版本即可,我這裡示範3.8.6、本版的
我選擇在C:\,創建一個python38資料夾,將python3.8安裝在此位置
7.1 將各版本目錄下python.exe再複製出來,並命名為版本號
7.2 檔案總管->本機右鍵->內容
7.3 進階系統設定->環境變數
7.4 找到系統變數->path點兩下
7.5 新增C:\python38、C:\python38\Scripts、C:\python39、C:\python39\Scripts,確認
7.6 開啟terminel測試
7.1 將各版本目錄下python.exe再複製出來,並命名為版本號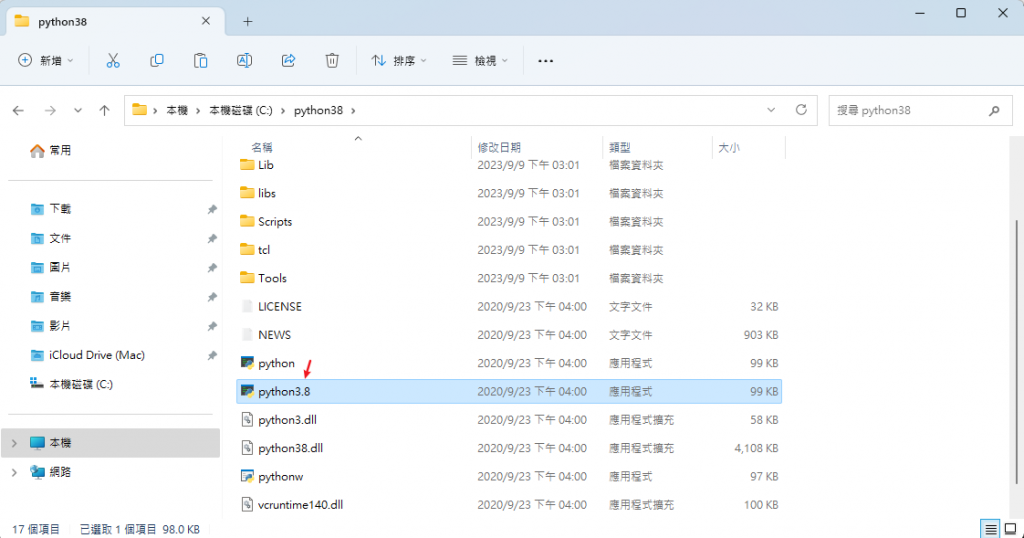
7.2 檔案總管->本機右鍵->內容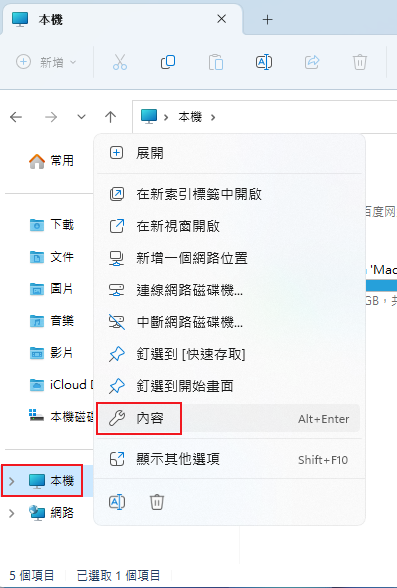
7.3 進階系統設定->環境變數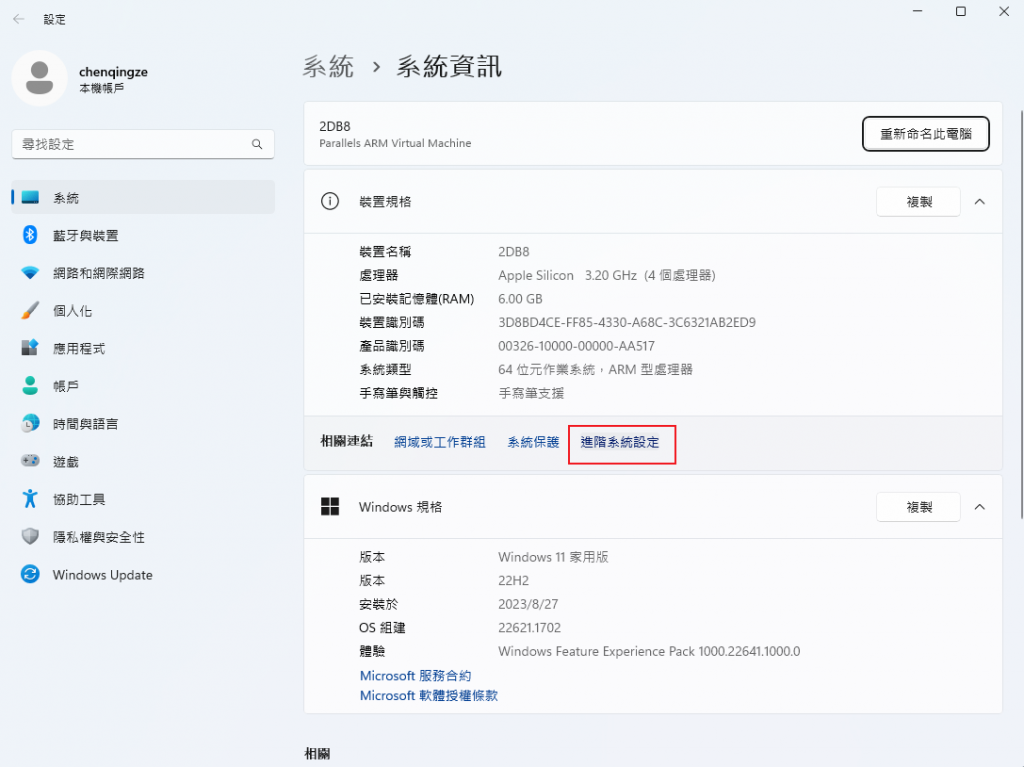
7.4 找到系統變數->path點兩下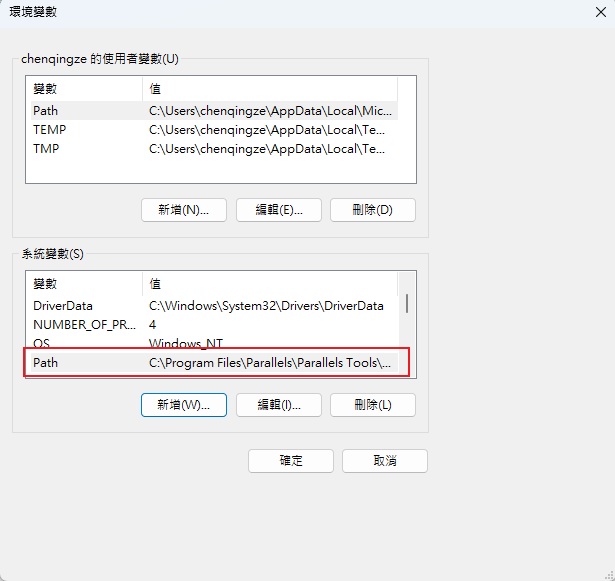
7.5 新增C:\python38、C:\python38\Scripts、C:\python39、C:\python39\Scripts,確認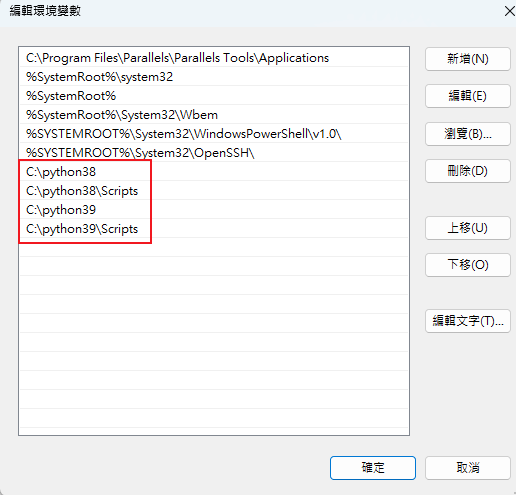
7.6 開啟terminel測試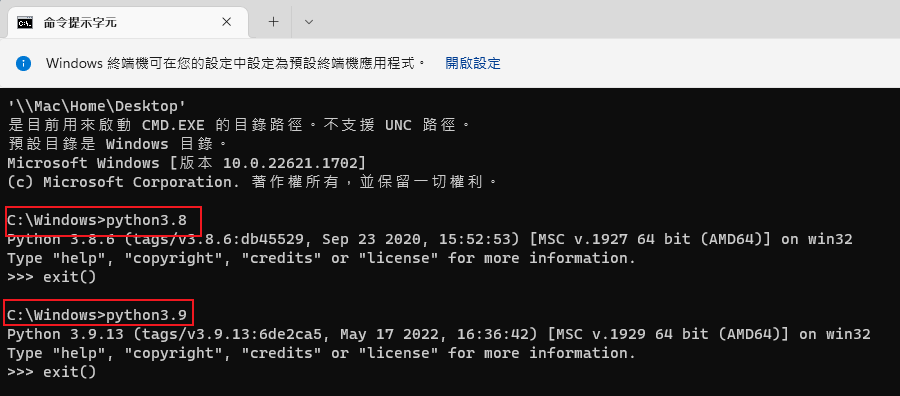
https://blog.goldfishbrain-fighting.com/2023/python-self-learning-day02/
 翻轉吧金魚腦
