在介紹完專案目錄的架構之後,我們現在開始正式進入'寫程式'這件事。
首先在昨天我們已經有看過這張圖了: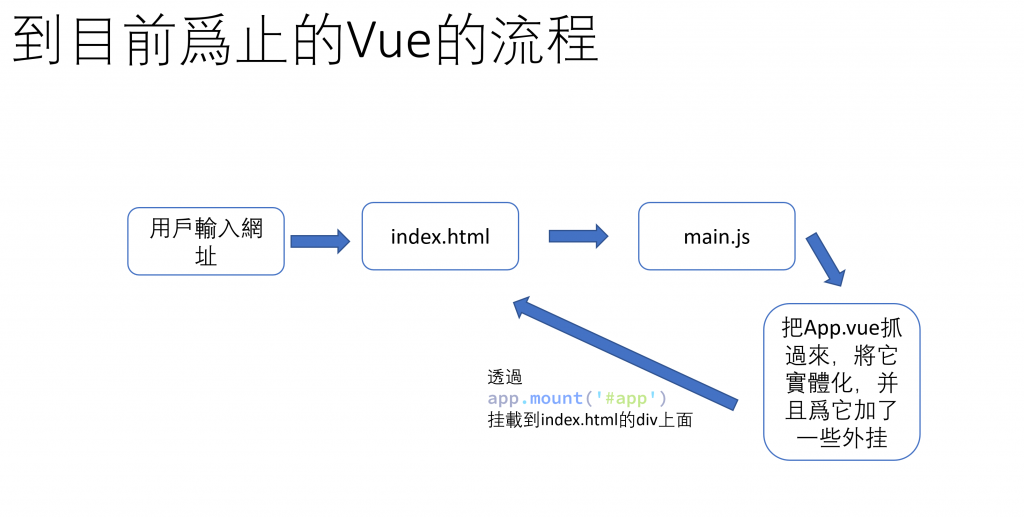
這時候我們就進入到了用Vue-Router來進入路由的循環了,基本上就沒有main.js和App.vue這兩個文件什麽事了,我們今天就來研究這張圖: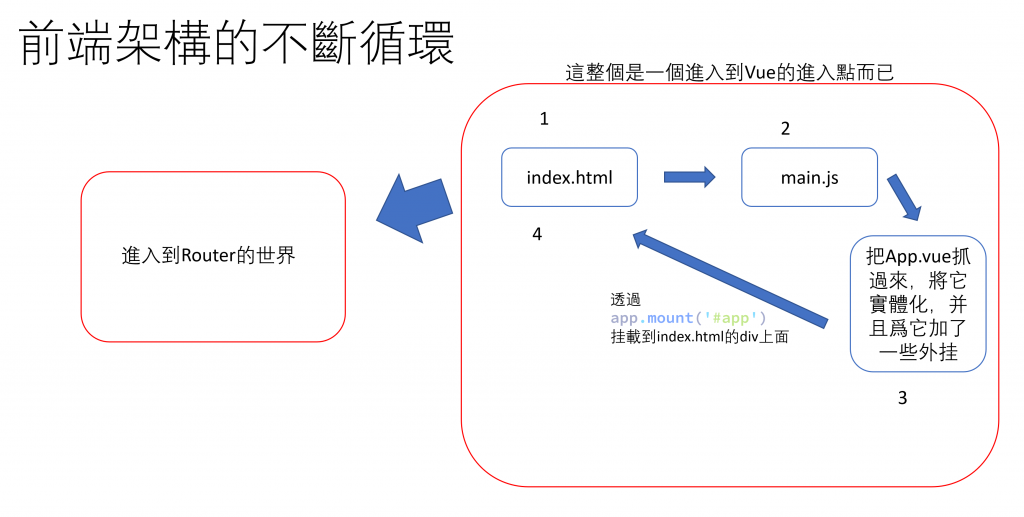
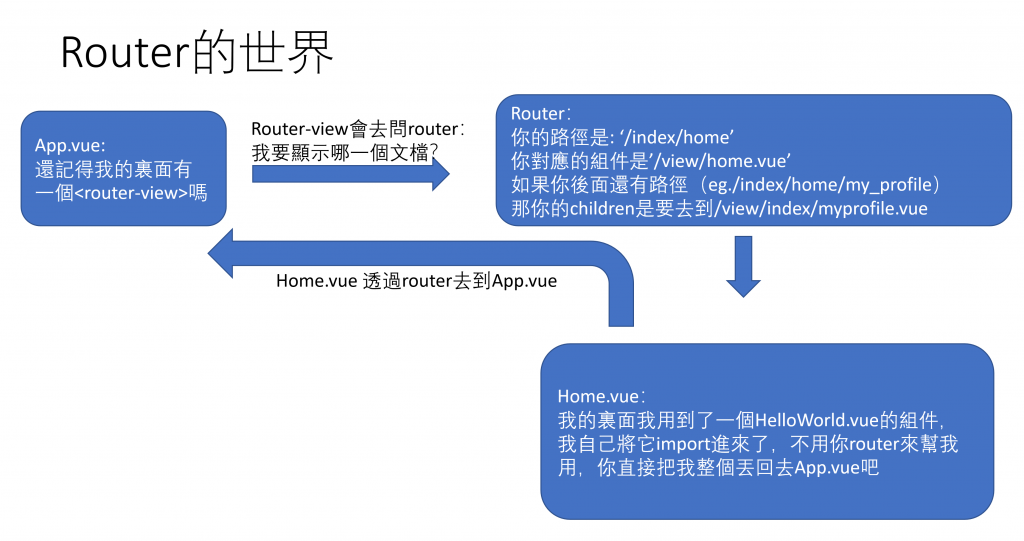
這樣看起來有沒有比較清楚一點,進入到Router的世界之後,我們的每一次換頁,就會一直透過router和import component的方式,不斷地去循環,以展示用戶想要的頁面。
這邊有一個分類的小知識(我們會分成Layout負責排版,View顯示那個頁面的主要内容,Component可以在Layout裏面被使用,也會在View裏面被使用):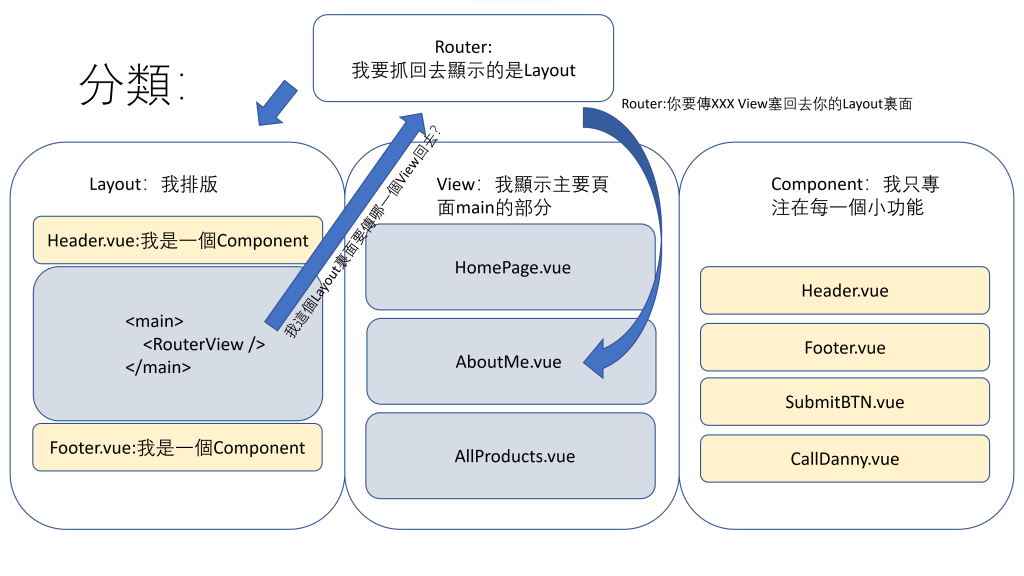
在瞭解了整個東西的運作原理,我們可以先來寫一個Layout出來:
我們進入src/layouts文件夾,在裏面新創兩個文件夾:
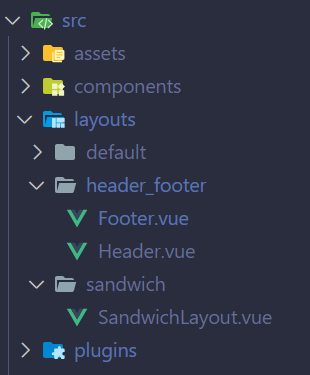
Header.vue裏面:
<script setup>
import { computed, onMounted, ref } from 'vue';
import { useRoute } from 'vue-router';
import { useDisplay } from 'vuetify';

const route = useRoute();
const path = computed(() => route.path.replace('/', ''));
const pageTitle = ref('');
const { mobile } = useDisplay()

onMounted(() => {
    pageTitle.value = path.value;
});

const buttons = [
    {
        value: 'index',
        text: 'Home',
        icon: 'mdi-home',
        textClass: 'text-green',
        to: '/index',
    },
    {
        value: 'resume',
        text: 'Resume',
        icon: 'mdi-file-account',
        textClass: 'text-brown-darken-1',
        to: '/resume',
    },
    {
        value: 'about',
        text: 'About Me',
        icon: 'mdi-information',
        textClass: 'text-blue',
        to: '/about',
    },
    {
        value: 'contact',
        text: 'Contact Me',
        icon: 'mdi-phone-incoming',
        textClass: 'text-yellow-darken-4',
        to: '/contact',
    },
];
</script>


<template>
    <v-app-bar app :elevation="5">
        <v-app-bar-nav-icon v-if="!mobile">
            <v-icon icon="mdi-human-greeting" color="green-darken-4" />
        </v-app-bar-nav-icon>
        <v-app-bar-title class="text-deep-purple-lighten-2" v-if="!mobile">
            Welcome!
        </v-app-bar-title>
        <v-spacer v-if="mobile"></v-spacer>

        <v-btn-toggle v-model="pageTitle">
            <v-btn v-for="button in buttons" :key="button.value" rounded="xl" size="large" :class="button.textClass"
                :value="button.value" :to="button.to">
                <v-icon :icon="button.icon" />
                <span v-if="!mobile">{{ button.text }}</span>
            </v-btn>
        </v-btn-toggle>

        <v-spacer></v-spacer>
    </v-app-bar>
</template>
Footer.vue裏面:
<script setup>
import { reactive } from 'vue';

const socialMedias = reactive([
    {
        icon: 'mdi-facebook',
        link: ''
    },
    {
        icon: 'mdi-twitter',
        link: ''
    },
    {
        icon: 'mdi-linkedin',
        link: ''
    },
    {
        icon: 'mdi-instagram',
        link: ''
    },
])
</script>


<template>
    <v-footer rounded class="bg-grey-lighten-1">
        <v-row justify="center" no-gutters>
            <v-btn color="white" variant="text" class="mx-2" rounded="xl" to="/index">Home</v-btn>
            <v-btn color="white" variant="text" class="mx-2" rounded="xl" to="/resume">Resume</v-btn>
            <v-btn color="white" variant="text" class="mx-2" rounded="xl" to="/about">About Me</v-btn>
            <v-btn color="white" variant="text" class="mx-2" rounded="xl" to="/contact">Contact Me</v-btn>


            <v-col class="text-center mt-4" cols="12">
                <v-btn v-for="media in socialMedias" :key="media" class="mx-4" :icon="media.icon" :href="media.link"
                    variant="text"></v-btn>
            </v-col>


            <v-col class="text-center mt-4" cols="12">
                <strong>All contents of this site, unless otherwise noted, are ©2000-{{ new Date().getFullYear() }} Daniel.
                    All Rights Reserved.</strong>
            </v-col>
        </v-row>
    </v-footer>
</template>
SandwichLayout.vue裏面:
<template>
    <v-app>
        <v-layout class="rounded rounded-md">
            <MyHeader />
            <default-view />
        </v-layout>
        <MyFooter />
    </v-app>
</template>

<script setup>
import DefaultView from '../default/View';
import MyFooter from '../header_footer/Footer.vue';
import MyHeader from '../header_footer/Header.vue';
</script>
再來,我們到routers目錄底下去修改index.js(注意,不要修改到plugins文件夾底下的index.js):
將它裏面的const routers =的内容改成下面這樣:
const routes = [
 {
    path: '/',
    component: () => import('@/layouts/sandwich/SandwichLayout.vue'),
    children: [
      {
        path: '',
        name: 'Home',
        // route level code-splitting
        // this generates a separate chunk (about.[hash].js) for this route
        // which is lazy-loaded when the route is visited.
        component: () => import(/* webpackChunkName: "home" */ '@/views/Home.vue'),
      },
    ],
  },
]
再來,我們打開terminal(終端機)(在vs code最上方點選新增終端):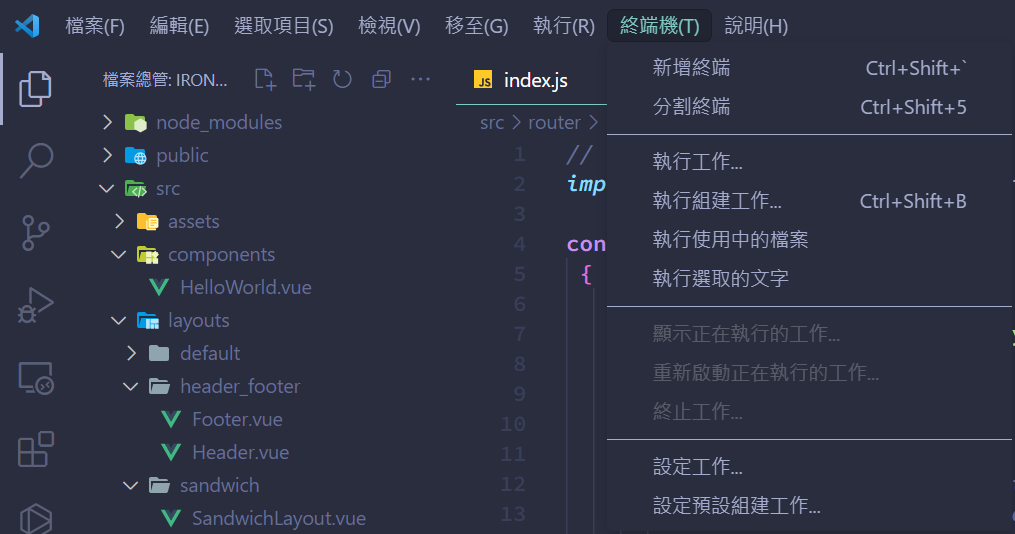
接著在終端機裏面輸入npm run dev,就會出現一個網址,按著ctrl不放點擊一下那個網址,就會打開你剛剛建制好的網站: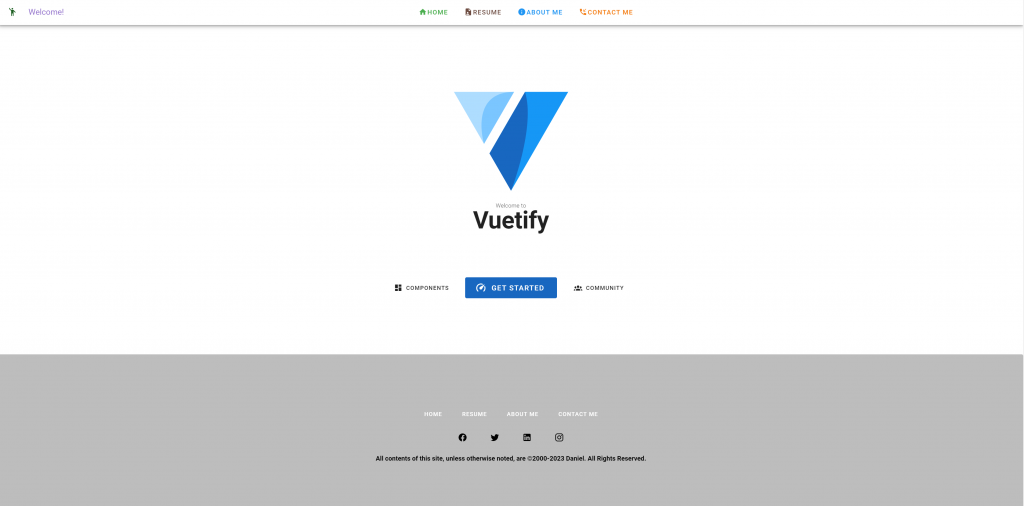
有沒有發現,跟原本的頁面相比,多了一個header和一個footer,那我們今天就到這裏爲止,明天開始會先爲大家講解Vue3的一些基礎架構,以及if/else 或是 for loop這些要怎麽用,至於現在這個頁面,我們在學習了幾天后再繼續將它完善。
本篇終。