Kotlin 基礎元件應用
由 Kotlin 基礎元件組合成常見應用實例
Card , TextView , ImageView
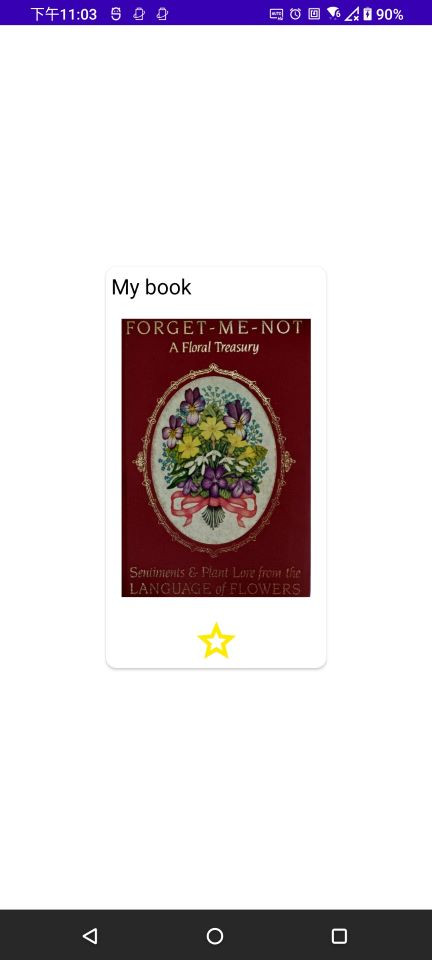
當有個可以查詢書籍的 App 時,會列出書籍清單,清單項目都會顯示標題、書本圖片和星星收藏按鈕。
點擊星星按鈕代表收藏書籍,再點擊一次按鈕代表不收藏書籍。
| 不收藏書籍 | 收藏書籍 |
|---|---|
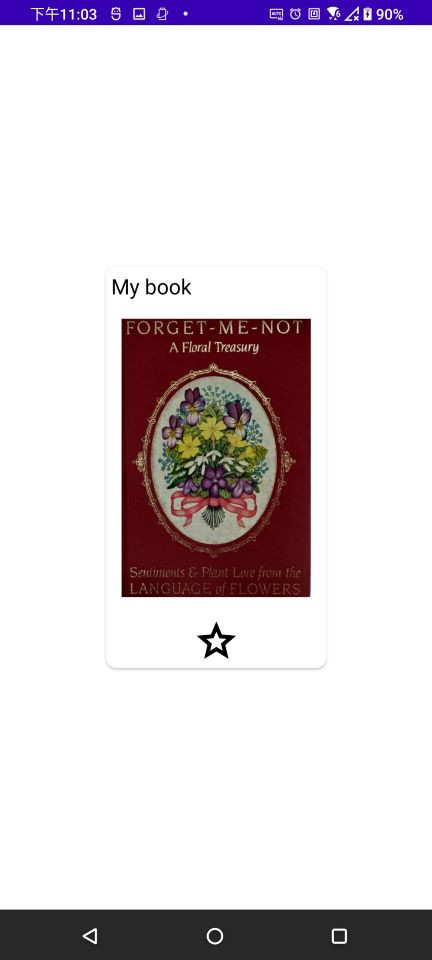 |
 |
activtiy_main.xml 檔案設定元件樣式排版。MainActivtiy.kt 設定資料,ViewModel 儲存會變化的資料,監聽點擊事件後執行對應判斷。在 res/drawable 資料夾下新增書籍圖片和按鈕圖片。
以下為 星星按鈕圖片內容:
star.xml檔案:未收藏狀態。
<vector xmlns:android="http://schemas.android.com/apk/res/android"
   android:width="24dp"
   android:height="24dp"
   android:viewportWidth="960"
   android:viewportHeight="960">
 <path
     android:fillColor="@android:color/black"
     android:pathData="M354,713L480,637L606,714L573,570L684,474L538,461L480,325L422,460L276,473L387,570L354,713ZM233,880L298,599L80,410L368,385L480,120L592,385L880,410L662,599L727,880L480,731L233,880ZM480,530L480,530L480,530L480,530L480,530L480,530L480,530L480,530L480,530L480,530L480,530Z"/>
</vector>
star_selected.xml檔案:收藏狀態。
<vector xmlns:android="http://schemas.android.com/apk/res/android"
    android:width="24dp"
    android:height="24dp"
    android:viewportWidth="960"
    android:viewportHeight="960">
  <path
      android:fillColor="@color/yellow"
      android:pathData="M354,713L480,637L606,714L573,570L684,474L538,461L480,325L422,460L276,473L387,570L354,713ZM233,880L298,599L80,410L368,385L480,120L592,385L880,410L662,599L727,880L480,731L233,880ZM480,530L480,530L480,530L480,530L480,530L480,530L480,530L480,530L480,530L480,530L480,530Z"/>
</vector>
activtiy_main.xml 檔案設定元件樣式排版Card , TextView , ImageView 元件樣式排版<?xml version="1.0" encoding="utf-8"?>
<androidx.constraintlayout.widget.ConstraintLayout xmlns:android="http://schemas.android.com/apk/res/android"
xmlns:app="http://schemas.android.com/apk/res-auto"
xmlns:tools="http://schemas.android.com/tools"
android:layout_width="match_parent"
android:layout_height="match_parent"
tools:context=".MainActivity">
<androidx.cardview.widget.CardView
android:id="@+id/cardView"
app:cardBackgroundColor="@color/white"
android:layout_width="wrap_content"
android:layout_height="wrap_content"
app:layout_constraintStart_toStartOf="parent"
app:layout_constraintTop_toTopOf="parent"
app:layout_constraintEnd_toEndOf="parent"
app:layout_constraintBottom_toBottomOf="parent"
app:cardCornerRadius="10dp"
app:contentPadding="5dp"
>
<androidx.constraintlayout.widget.ConstraintLayout
android:layout_width="match_parent"
android:layout_height="match_parent">
<TextView
android:id="@+id/textView"
android:layout_width="wrap_content"
android:layout_height="0dp"
android:textSize="20dp"
app:layout_constraintStart_toStartOf="parent"
app:layout_constraintTop_toTopOf="parent" />
<ImageView
android:id="@+id/imageView"
android:layout_width="200dp"
android:layout_height="300dp"
android:paddingLeft="10dp"
android:paddingRight="10dp"
app:layout_constraintStart_toStartOf="parent"
app:layout_constraintTop_toBottomOf="@id/textView"
app:srcCompat="@drawable/image_book"
/>
<ImageView
android:id="@+id/imageViewButton"
android:layout_width="45dp"
android:layout_height="45dp"
app:layout_constraintEnd_toEndOf="parent"
app:layout_constraintStart_toStartOf="parent"
app:layout_constraintTop_toBottomOf="@id/imageView"
/>
</androidx.constraintlayout.widget.ConstraintLayout>
</androidx.cardview.widget.CardView>
</androidx.constraintlayout.widget.ConstraintLayout>
MainActivtiy.kt 設定資料,ViewModel 儲存按鈕圖片資料,監聽點擊事件後執行對應判斷ViewModel 內容:儲存按鈕圖片資料package com.example.kotlin_demo
import androidx.lifecycle.MutableLiveData
import androidx.lifecycle.ViewModel
class MyViewModel: ViewModel() {
val ButtonColor = MutableLiveData<Int>()
}
MainActivtiy.kt 檔案內容:
ViewModel 星星圖片來源資料。ViewModel 觀察到資料改變後,透過重新設定星星圖片,改變星星顏色。package com.example.kotlin_demo
import android.graphics.Color
import androidx.appcompat.app.AppCompatActivity
import android.os.Bundle
import android.util.Log
import android.view.View
import android.widget.Button
import android.widget.ImageView
import android.widget.TextView
import androidx.core.content.ContextCompat
import androidx.lifecycle.LifecycleOwner
class MainActivity : AppCompatActivity() {
private val viewModel = MyViewModel()
override fun onCreate(savedInstanceState: Bundle?) {
super.onCreate(savedInstanceState)
setContentView(R.layout.activity_main)
//預設按鈕圖片
var defaulImage : Int = R.drawable.star
var buttonImage: Int = defaulImage
viewModel.ButtonColor.value = buttonImage
//設定圖片元件
val tv : TextView = findViewById<TextView>(R.id.textView)
tv.setText("My book")
tv.setTextColor(ContextCompat.getColor(baseContext,R.color.black))
//設定圖案按鈕元件
val starBtn : ImageView = findViewById<ImageView>(R.id.imageViewButton)
starBtn.setBackgroundResource(R.drawable.star)
//監聽按鈕點擊事件
//當圖片加上點擊事件監聽,則元件自動變為可點擊
starBtn.setOnClickListener(object : View.OnClickListener {
override fun onClick(p0: View?) {
viewModel.ButtonColor.value = if ( viewModel.ButtonColor.value== defaulImage) R.drawable.star_selected else defaulImage
}
})
///當按鈕圖片變數資料改變時,observer callback , 重新再設定一次按鈕圖片
viewModel.ButtonColor.observe(this,{
starBtn.setBackgroundResource(it)
})
}
}
下一篇會以相同畫面呈現結果示範 Flutter 範例專案 !!