今天要來分享如何撰寫.gitlab-ci.yml,今天會先介紹CI的部分。那在.gitlab-ci.yml格式中,可以用的Keyword其實很多,我這邊也不一一多做介紹,我會用一個最簡單的範例介紹,如何撰寫.gitlab-ci.yml的檔案。
開始之前,要強調一點,這個檔案的名稱不能修改,否則gitlab會沒辦法使用,根據官方文件說明
When you add a .gitlab-ci.yml file to your repository, GitLab detects it and an application called GitLab Runner runs the scripts defined in the jobs.
當你push程式碼的時候,gitlab偵測到.gitlab-ci.yml,runner才會開始動作。當然抱持著好奇心調皮一下也是可以XD
廢話不多說,我們直接進入程式碼
stages:
    - "build"

build-image:
  tags:
    - ithome
  stage: build
  image : docker
  variables:
    # using "docker" as the host is only possible if you alias the service below
    DOCKER_HOST: tcp://docker:2375
    # could be wrong here but although Docker defaults to overlay2,
    # Docker-in-Docker (DIND) does not according to the following GitLab doc:
    # https://docs.gitlab.com/ee/ci/docker/using_docker_build.html#use-the-overlayfs-driver
    DOCKER_DRIVER: overlay2
    DOCKER_TLS_CERTDIR: ""
    IMAGE_VERSION: "6.0"
  services:
    - name: docker:dind
      alias: docker
      command: ["--tls=false"]
  before_script:
    - echo "${CI_REGISTRY_PASSWORD}" | docker login -u "${CI_REGISTRY_USER}" --password-stdin "${CI_REGISTRY}"
  script:
    - echo "build start"
    - docker build .
      --tag ${CI_REGISTRY_IMAGE}:$IMAGE_VERSION
    - echo $CI_REGISTRY_USER ${CI_REGISTRY_PASSWORD} ${CI_REGISTRY} ${CI_REGISTRY_IMAGE}
    - echo "docker build finished"
    - echo "docker push started"
    - docker push ${CI_REGISTRY_IMAGE}:$IMAGE_VERSION
    - echo "docker push finished"
我們先來看到最上面有個stages,這個是全域的Keyword,也就是說最上面的stages的意思是先在外面定義pipeline有哪幾個階段,當我們定義完整個pipeline有哪幾個stage後,再來看到裡面job也會有stage,job裡面的stage就是定義,該job屬於哪個stage,那基本上我job的stage是對應到全域stages的幾個,一方面是怕搞混,另一方面對照下來也比較好看懂。
我將我的pipeline定義stage為【build】,接著底下增加一個名為【build-image】的job,工作要分配給tag為【ithome】的runner執行,而這個job被定義在【build】的stage。因為我executor當初選擇的是Docker,所以理所當然的job下都要有個【image】,這裡的image提供的是我Docker的環境,以利我後面執行將服務打包,接下來我會給job【variables】跟【services】,再來就是【script】【before_script】,這邊就是job主要會下的指令,那我就是在執行script前就會利用echo ${CI_REGISTRY_IMAGE},再透過管道傳入下一個指令,做docker 登入,這裡${CI_REGISTRY_IMAGE} 等環境變數需另外在gitlab 環境變數設定,我在後面會詳細說明。因為我script內build完會接著就會push,所以必須登入,那我這邊使用的registry是Docker hub,如果是gitlab container registry相對來說容易簡單,畢竟gitlab同平台來說支援就會相對好。
接著我要來設定內容中有用到的環境變數,首先一樣到側邊欄找到【CICD】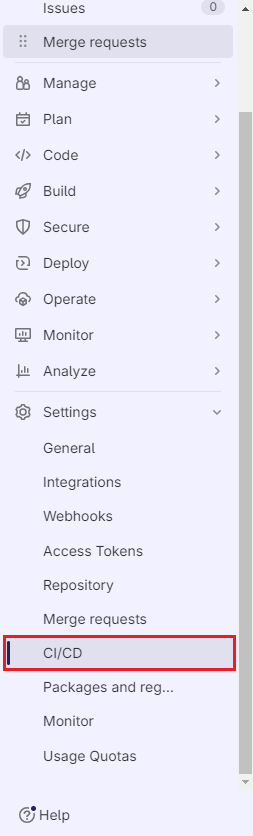
找到【Variables】Expand,然後選擇右上角的【Add variable】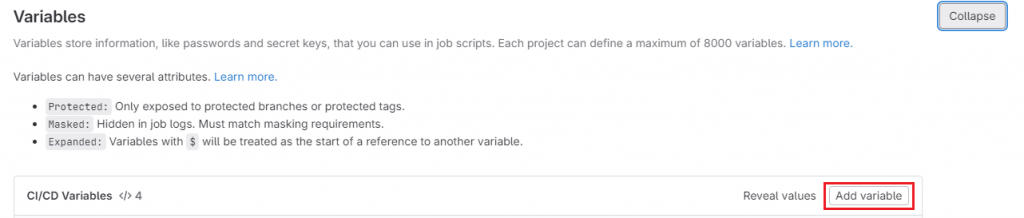
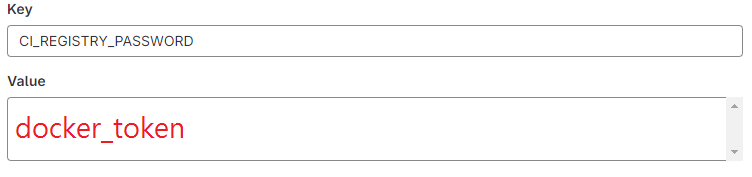
我們要新增四個環境變數
CI_REGISTRY : Container registry url,我用的是Docker hub,所以我設定為【docker.io】。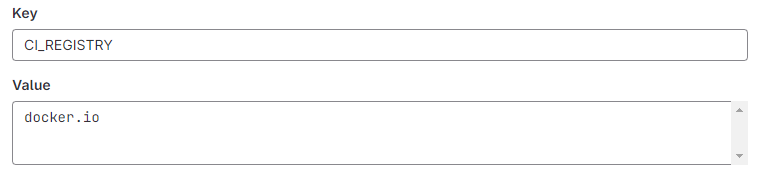
CI_REGISTRY_IMAGE : Image的名稱,格式沒有強制,這是我自己設定的。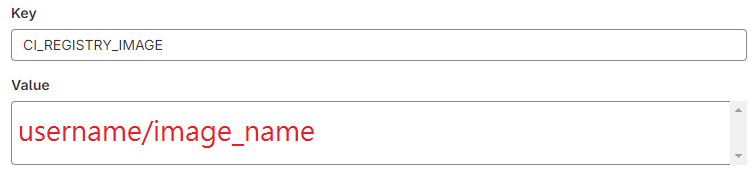
CI_REGISTRY_USER : Docker hub帳號的username。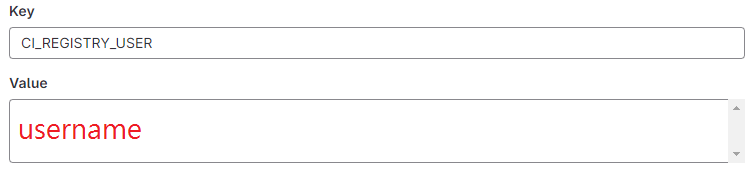
CI_REGISTRY_PASSWORD : Docker hub帳號的密碼,可是在環境變數或是第三方打自己的密碼,感覺超慌,所以可以使用token,作為第三方登入的密碼。
Docker hub要申請token,登入Docker hub後,可以從右上角使用者名稱進入【Account Settings】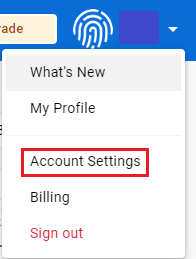
側邊選擇【Security】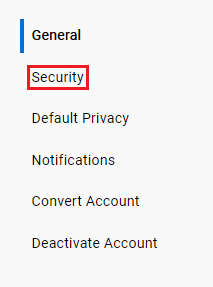
進入之後新增一組token
輸入這組token的描述,可以寫這組token用到的用途,或者是你想幫他取一個特別的名稱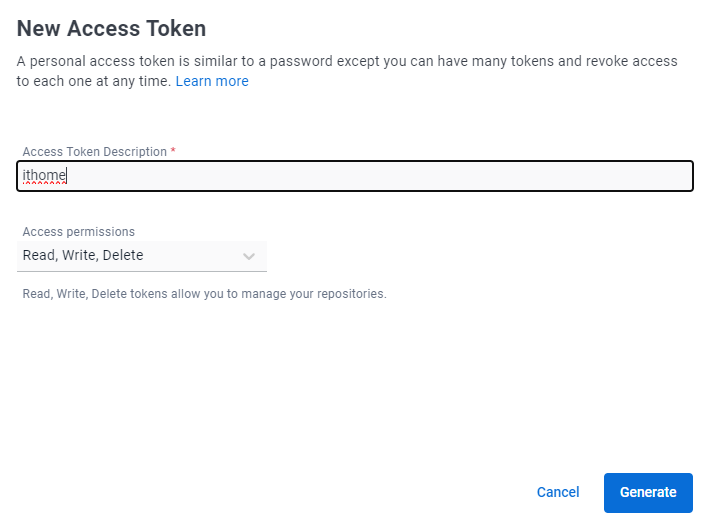
接著就會很貼心地就會提供Docker登入的指令以及token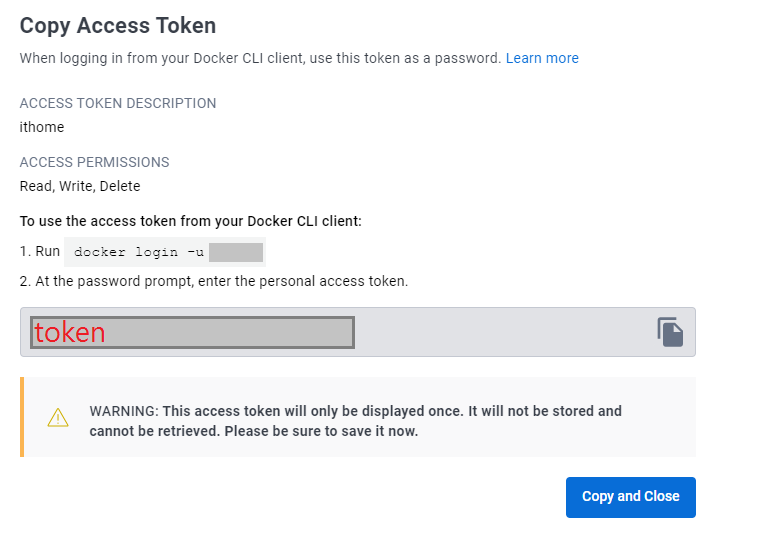
大致上說明完內容之後,在執行前必須補充幾件非常重要的事情。
首先就是可能會有人好奇,阿不是executor已經選Docker了嗎? 阿怎麼我image又給他Docker ,就是因為我executor選擇了Docker,根據官方的說法是使用Docker-in-Docker(dind),簡單來說如果不使用這樣的方法,executor選擇了Docker,還是沒有辦法build、push image之類的操作。
那再來是,如果要在CICD內使用Docker,會遇到一些各式各樣的問題,所以我才會給【variables】跟【services】這些內容。
最後是需要將runner 的特權模式打開,Docker才可以正常使用指令。sudo nano ./.gitlab-runner/config.toml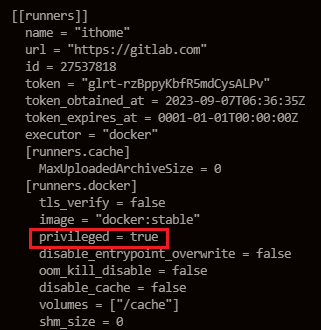
最後將你寫好的這些內容給推上你的gitlab repository,gitlab偵測到後就會開始執行,我們就可以到側邊欄打開【Pipelines】可以看到一列一列pipeline的資訊。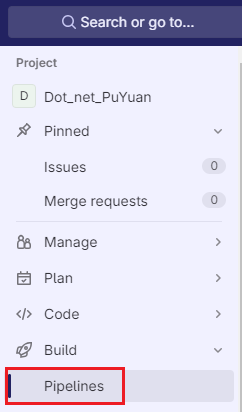
可以看到一列一列pipeline的資訊,例如各個job執行狀態、branch、commit、stage等,當pipeline發生錯誤,或者是想要查看詳細情況時,我們可以點下圖紅框中的地方。
如果你job像下圖一樣打勾勾,恭喜你那就成功運行完了,繼續點進去,看到每個job執行的狀況。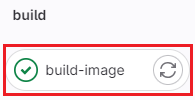
今天就先分享到這邊,明天我要來分享,我如何將本地資料庫遷移到Azure Sql Server。
參考資料:
The .gitlab-ci.yml file
Tutorial: Create and run your first GitLab CI/CD pipeline
.gitlab-ci.yml keyword reference
Use Docker to build Docker images