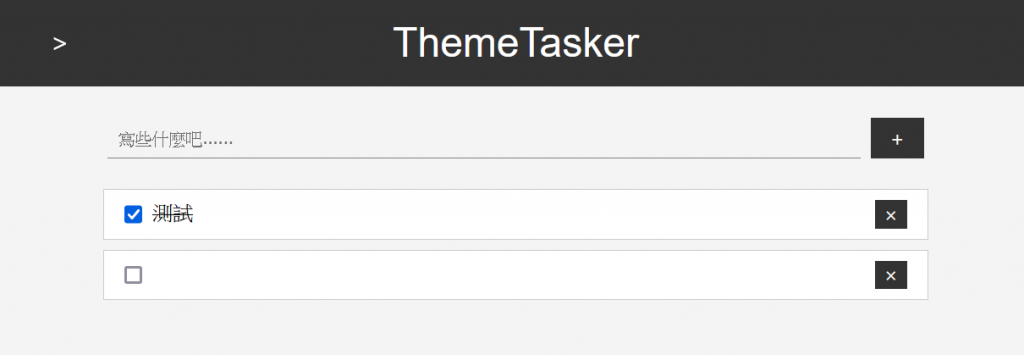
在今天的任務中,我將繼續解決待辦事項清單其他的JavaScript細節問題。我今天的目標是實現以下功能:
<p>標籤的文字樣式<p>文字樣式變化當我勾選 checkbox 時,我希望讓 <p> 標籤內的文字能夠呈現刪除線的樣式效果,就如同下圖所示:
在昨天的內容中,我已經創建了一個名為 checkboxInput 的元素,現在我需要為它添加事件監聽器。當 checkbox 的勾選狀態改變時,將會更新 <p> 元素的文字樣式。
在這裡,我會使用到CSS中的 "text-decoration" 屬性,這個屬性可以控制文字樣式的下劃線。也就是使用 "text-decoration" 屬性中的 "line-through" 值,來實現文字樣式的刪除線效果。
下面為相對應的 JavaScript 程式碼:
checkboxInput.addEventListener("change", () => {
  if (checkboxInput.checked) {
    textParagraph.style.textDecoration = "line-through";
  } else {
    textParagraph.style.textDecoration = "none";
  }
});
在測試過程中,我發現即使未填寫內容,仍可以建立空的待辦事項項目,以下為示意圖:
首先,我先回到待辦事項輸入表單的事件監聽器中。為了防止提交空值,我將增加一個 if-else 條件句。
if (this.inputText.value === "") {
    alert("請輸入待辦事項!");
} else {
    let inputValue = this.inputText.value;
    this.createTodoItem(inputValue);
    this.todoForm.reset();
}
上述程式碼會檢查輸入框的值是否為空值。如果為空,會顯示警告框,提醒使用者輸入待辦事項。否則,會創建一個新的待辦事項項目,並重置表單。
接下來,我要新增一個 <section> 用來放置已經被勾選的項目。
首先,我先添加 HTML 程式碼:
<section class="todo-completed-container">
    <h3>已完成項目</h3>
</section>
然後,由於大多數 CSS 樣式會被重複使用,所以我將它們寫在一起,並在稍後再獨立寫一個「已完成項目」區塊的樣式。以下為示意圖,將不同的類別用逗號隔開:
main .todolist-container,
main .todo-completed-container {
  flex-grow: 1;
  display: flex;
  flex-direction: column;
  align-items: center;
  margin: 0.5rem 0;
}
接著,我將單獨處理 "todo-completed-container" 及內部的 <h3> 元素。
因為一開始還沒有已經完成的項目,所以我將「todo-completed-container」的 display 設定為 none:
main .todo-completed-container {
  display: none;
}
然後,設計 <h3> 元素的樣式。
main .todo-completed-container h3 {
  width: 80%;
  margin-bottom: 0.5rem;
  color: gray;
  text-align: left;
}
最後,為了讓 "todolist-container" 和 "todo-completed-container" 平均分配剩餘空間,我將 <main> 設為 Flex 容器,並且將它們的 flex-grow 設定為 1。
在這個部分,我將會改寫 createTodoItem() 方法中的兩個事件監聽器。首先,我先從 checkboxInput.addEventListener 開始。當使用者勾選 checkbox 時,我會執行下列操作:
appendChild() 方法將該待辦項目移動到 "completedContainer" 容器中checkboxInput.addEventListener("change", () => {
if (checkboxInput.checked) {
textParagraph.style.textDecoration = "line-through";
this.completedContainer.appendChild(todoItemDiv);
this.completedContainer.style.display = "flex";
} else {
textParagraph.style.textDecoration = "none";
this.todoContainer.appendChild(todoItemDiv);
if(!this.completedContainer.querySelector("input[type=checkbox]:checked")) {
this.completedContainer.style.display = "none";
}
}
});
接下來,我需要更新 "deleteButton" 的程式碼,由於事件綁定時它的父容器是 "todolist-container",因此我會使用 Element.closest() 方法,此方法是用於獲取距離當前元素最近的父元素。
首先,我設定一個變數 "parentContainer",然後檢查 "parentContainer" 是否存在。如果存在,就刪除 "todoItemDiv"。然後,我再檢查 "completedContainer" 容器內是否還有其他已勾選項目,已確保顯示方式設定正確。
const parentContainer = todoItemDiv.closest(
   ".todolist-container, .todo-completed-container"
);

if (parentContainer) {
   parentContainer.removeChild(todoItemDiv);
}

if (!this.completedContainer.querySelector("input[type=checkbox]:checked")) {
   this.completedContainer.style.display = "none";
}
此外,由於兩個事件監聽器都有一段相同的程式碼,所以我將它提取成一個獨立的方法。
hideCompletedContainer() {
    if (
      !this.completedContainer.querySelector("input[type=checkbox]:checked")
    ) {
      this.completedContainer.style.display = "none";
    }
}
測試待辦事項時,我注意到一個小問題,當我在待辦事項中添加多個項目並且側邊欄出現滾動條時,我發現<header>中的「開啟側邊欄」按鈕會固定在左上角,而不會隨著<header>一起滾動。
當我檢查 CSS 樣式時發現我將 "openSidebarButton" 的 position 設為 fixed,但實際上應該要設定為 absolute,這樣它才會將位置固定在<header>中。
待辦事項的部分已經告一段落。明天,我將開始處理更改背景顏色的相關內容。
mdn:text-decoration
mdn:Element.closest()
