圖片來源:https://www.gliyao.com/57/為什麼導入-gitlab-ci
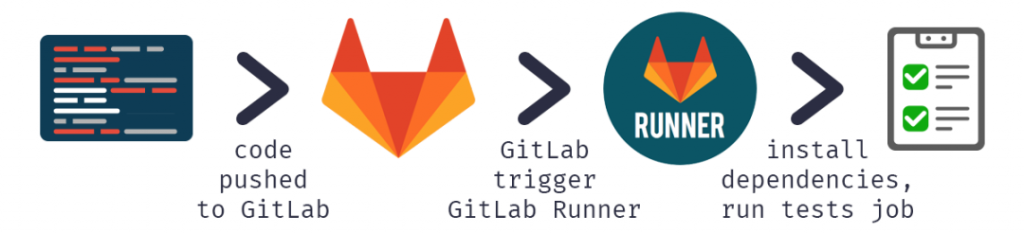
.gitlab-ci.yml 就是讓你撰寫要使用測試腳本的地方
GitLab CI Runner 是為你代勞執行 CI Job 的 Worker,會依照 Gtialb-ci.yml 設定檔案來啟用 Runner,確認每一個 Job 執行完之後,且無任何錯誤,才能在 gitlab 頁面上合併分枝。
以下是官方提供的示意文件
// 定義不同的階段,以及相對應的工作(jobs)
stages:
  - build // 先執行 build
  - test // 後再執行 test

build-code-job:
  stage: build
  script: //這個 job 裏包含了哪些要做的事情,至少要包含一個執行的工作
    - echo "Check the ruby version, then build some Ruby project files:"
    - ruby -v
    - rake

test-code-job1:
  stage: test
  script:
    - echo "If the files are built successfully, test some files with one command:"
    - rake test1

test-code-job2:
  stage: test
  script:
    - echo "If the files are built successfully, test other files with a different command:"
    - rake test2
另外,在設定腳本時,也有些 keywords 可以參考:
**variables**
variables: #CI/CD 會使用到的變數
	DEPLOY_SITE: "https://example.com/"

deploy_review_job:
  stage: deploy
  variables:
    REVIEW_PATH: "/review" #另外指定了要部署的特定路徑(path)
  script:
    - deploy-review-script --url $DEPLOY_SITE --path $REVIEW_PATH
  environment: production
**要在正式 script 執行前或後就要先完成的設定**
.preset:
  before_script:
    - echo "It's before script time"
	after_script:
		- echo "It's after script time"
**image**
	# 再執行 CI/CD 時需要先有如 php、composer、npm的等容器,
	# 若一開始沒有安裝相關的工具,你也可以自定義要指定使用的容器。
manual:
  stage: manual
  when: manual
  tags: #List of tags that are used to select a runner
    - docker
  image: #Use Docker images
逐步建立完之後, 在 gitLab 上的 pipeline 就會根據上述流程來進行。
接下來,我們就要動動手來實測一次 gitLab Pipeline啦!
參考文章:


 iThome鐵人賽