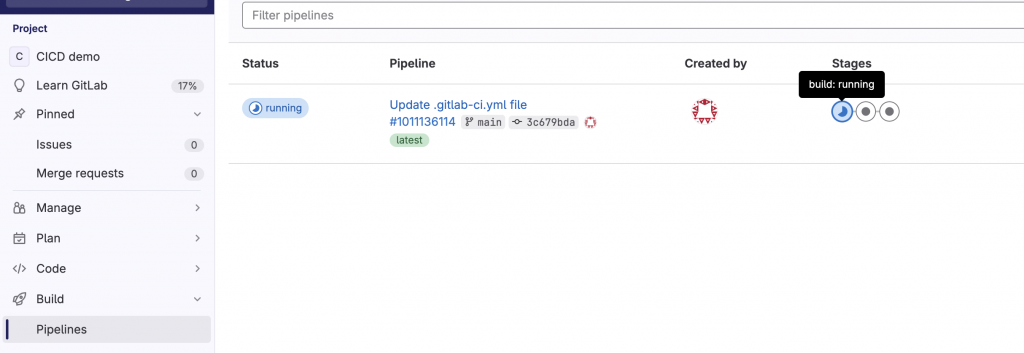
你需要一個 gitLab 帳號,帳號建立完成後,我們先來試試點選下方的 Setup CI/CD
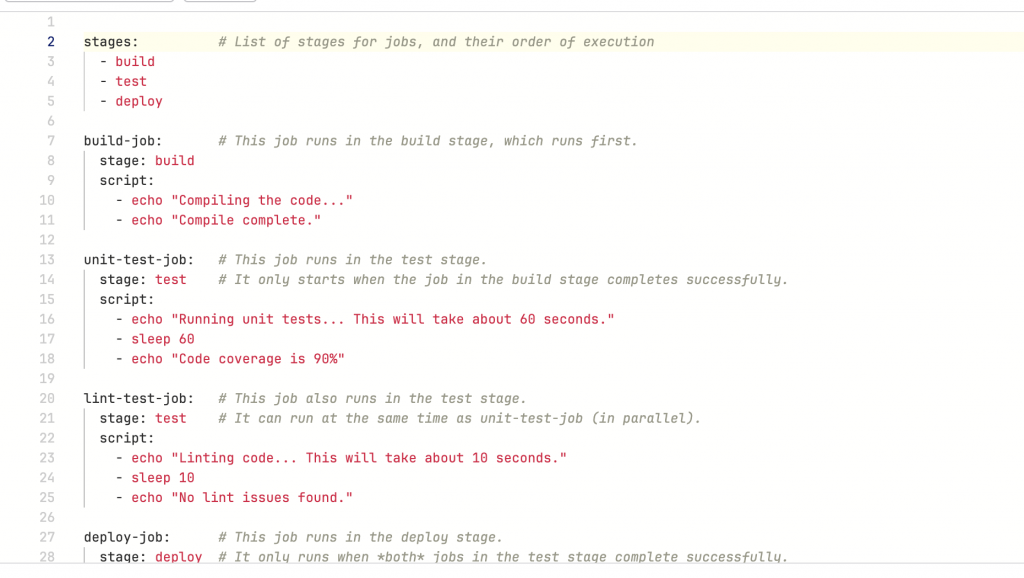
可以看到有一個 template 檔案,那就來跑跑看吧!
從第二張圖可以看到,stages 的順序第一個會是 build,因此在 pipeline 的第一個圈圈就會是 build 啦!


假設我想要有兩條 Pipeline 的話,我們可以在 ymal 檔裡面做以下設定:
stages:
  - build
  - deploy
  - test

dev-build:
  stage: build
  only:
    - develop
  script:
    - echo "is build time"

dev-deploy:
  stage: deploy
  only:
    - develop
  script:
    - echo "is deploy time"

dev-test:
  stage: test
  only:
    - develop
  script:
    - echo "is testing time"

stg-build:
  stage: build
  only:
    - master
  script:
    - echo "stg build"

stg-deploy:
  stage: deploy
  only:
    - master
  script:
    - echo "stg deploy"

stg-test:
  stage: test
  only:
    - master
  script:
    - echo "stg testing"
這時候我們可以看到有兩條 Pipeline

小試身手一下,讓我搞定一下 gitLab 的帳號權限,明天來用 vscode 實作一遍看看!
參考文章:
https://ithelp.ithome.com.tw/articles/10219427
影片參考:
https://www.youtube.com/watch?v=yFw5zoABS8M&list=PLBd8JGCAcUAEwyH2kT1wW2BUmcSPQzGcu&index=4
