在持續交付(Continuous Delivery, CD)的世界中,軟體的質量和穩定性成為開發團隊的首要目標。錯誤監控就在這裡扮演一個關鍵角色。本文將指導你如何在 Flutter 應用中整合 Sentry,一個強大的實時錯誤追蹤平台。
註冊 Sentry 的帳號,會獲得 14 天的免費額度,趁著他還免費,趕快開始適用吧。
在 pubspec.yaml 中加入:
dependencies:
  flutter:
    sdk: flutter
  sentry_flutter: ^5.0.0
然後運行 flutter pub get。
在 main.dart,改寫後並填入你自己的 sentry-dsn
import 'package:sentry_flutter/sentry_flutter.dart';

void main() async {
  await SentryFlutter.init(
    (options) {
      options.dsn = 'YOUR-SENTRY-DSN';
    },
    appRunner: () => runApp(MyApp()),
  );
}
可以使用 Sentry.catpureException,Sentry 就會幫你把錯誤送到他的後台。
try {
  // 你的代碼
	throw Exception("Test Exception");
} catch (error, stackTrace) {
  await Sentry.captureException(
    error,
    stackTrace: stackTrace,
  );
}
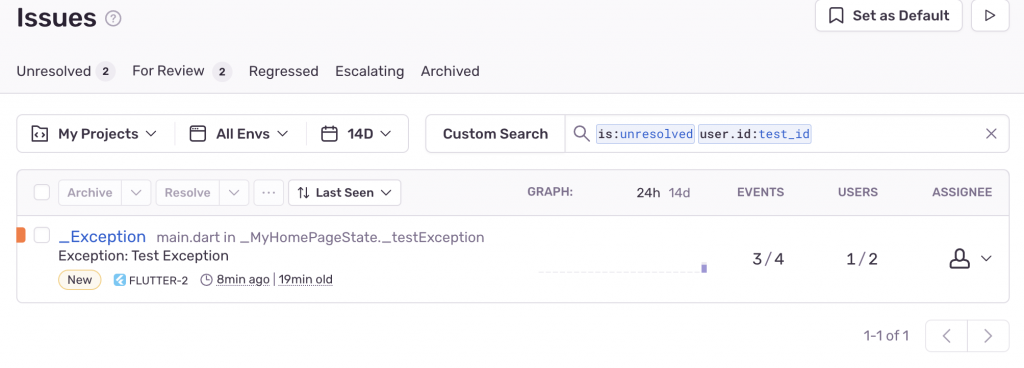
回到 Sentry 後台 可以看到我們的錯誤已經被收錄進去摟!

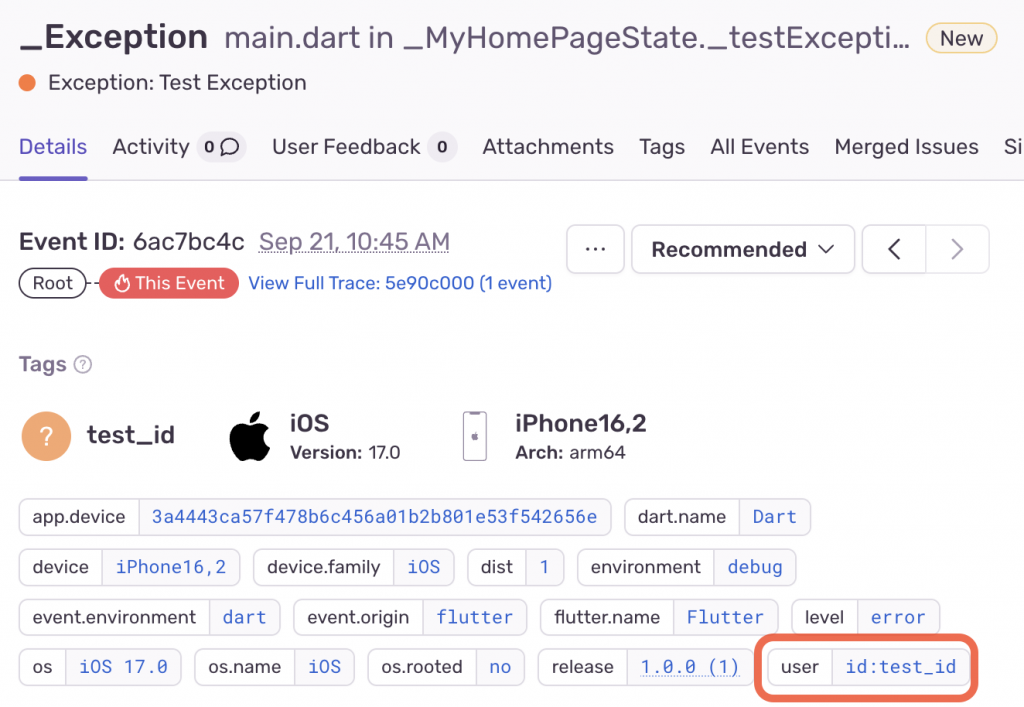
添加額外的信息來協助除錯,例如把你的用戶 id 加入 user
Sentry.configureScope((scope) => scope.setUser(SentryUser(id: 'test_id')));
到 Sentry 後台的詳細頁面就可以看到,user 已經被我們紀錄上去

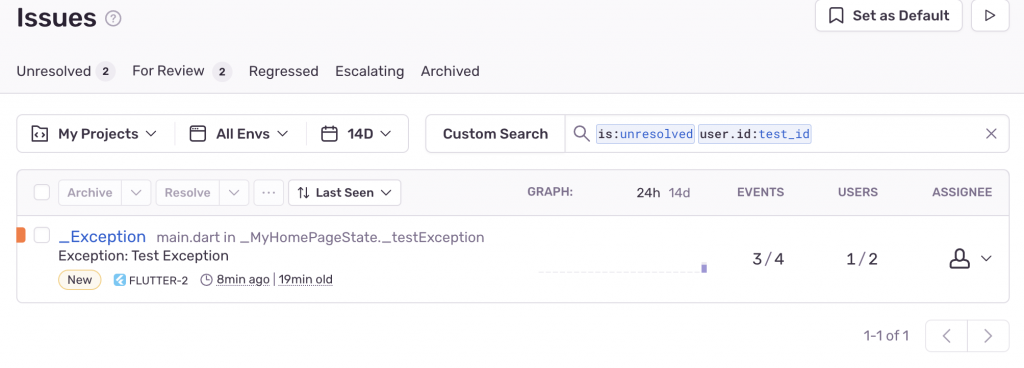
接下來如果需要針對某位 user 的行為做追蹤也很方便,可以到搜尋欄位直接打上 user.id:test_id

除了上面提到的功能,Sentry 還提供 performance 的報告。首先建立 transaction,代表我們要測試的 Performance 的區塊。第一個參數填入紀錄名稱,這裡我們先填入 processOrderBatch,第二個參數代表 operation ,可以方便我們後續在後台 filter 出我們需要的 event。
final transaction = Sentry.startTransaction('processOrderBatch()', 'task');
下面完善一下要測試的 function ,首先呼叫 startChild 開始這個 task。我們讓這個 function 執行 3 秒後結束,結束時呼叫 innerSpan.finish()
Future<void> processOrderBatch(ISentrySpan span) async {
    final innerSpan = span.startChild('task', description: 'operation');

    try {
      await Future.delayed(const Duration(seconds: 3));
    } catch (exception) {
      innerSpan.throwable = exception;
      innerSpan.status = const SpanStatus.notFound();
    } finally {
      await innerSpan.finish();
    }
  }
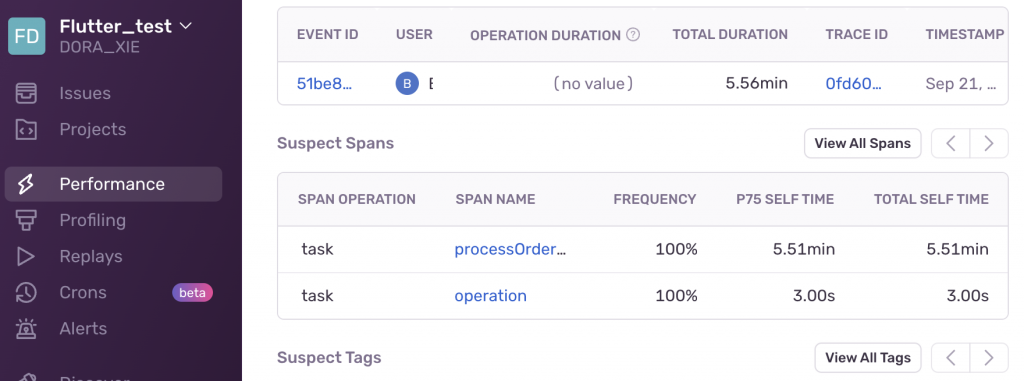
回到 Sentry 後台

就能找到我們追蹤的 function ,看到他執行的時間有確實的被記錄下來。
監控在持續交付中是不可或缺的一環,不僅能提高產品質量,還能提升用戶體驗。Sentry 提供了全面而實用的錯誤追蹤功能,是 Flutter 開發者的強力工具。希望本文能幫助你順利地在 Flutter 應用中整合 Sentry。
