
在程式設計的世界中,優化往往是一個重要但容易被忽視的環節。許多開發者在碼出功能後,往往對性能優化掉入次要考量。但當你深入了解 Flutter 這個框架時,你會發現,即使是最細微的變化,也可能會對整體性能產生顯著的影響。今天,我們就來探索一下 Flutter 中的幾個性能優化的小細節。
https://www.youtube.com/watch?v=cVAGLDuc2xE
我們都知道,在 Flutter 送到渲染引擎之前,會先被打包成 Layer tree 然後才進到實際渲染。那這一層層的 Layer 是如何分成哪些群組的,這裡先不展開討論。
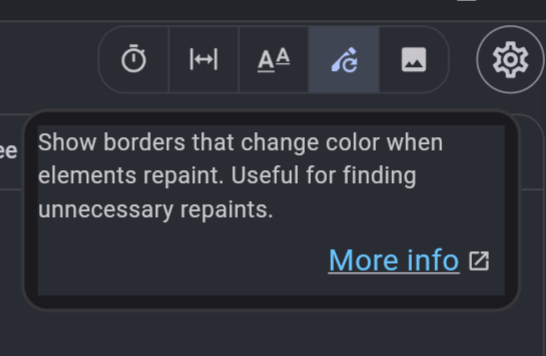
想要看你的 Layer 是如何被分配的,最快的方式就是打開 repaintRainbow ,他可以讓你的 Widget 顯示渲染框,如果持續被 repaint 就會一直閃爍彩虹的光芒 🌈
可以直接從程式碼打開:
void main() {
  debugRepaintRainbowEnabled = true;
  runApp(const MyApp());
}
或是在 widget inspector 打開
打開後就能看到彩虹邊框的效果: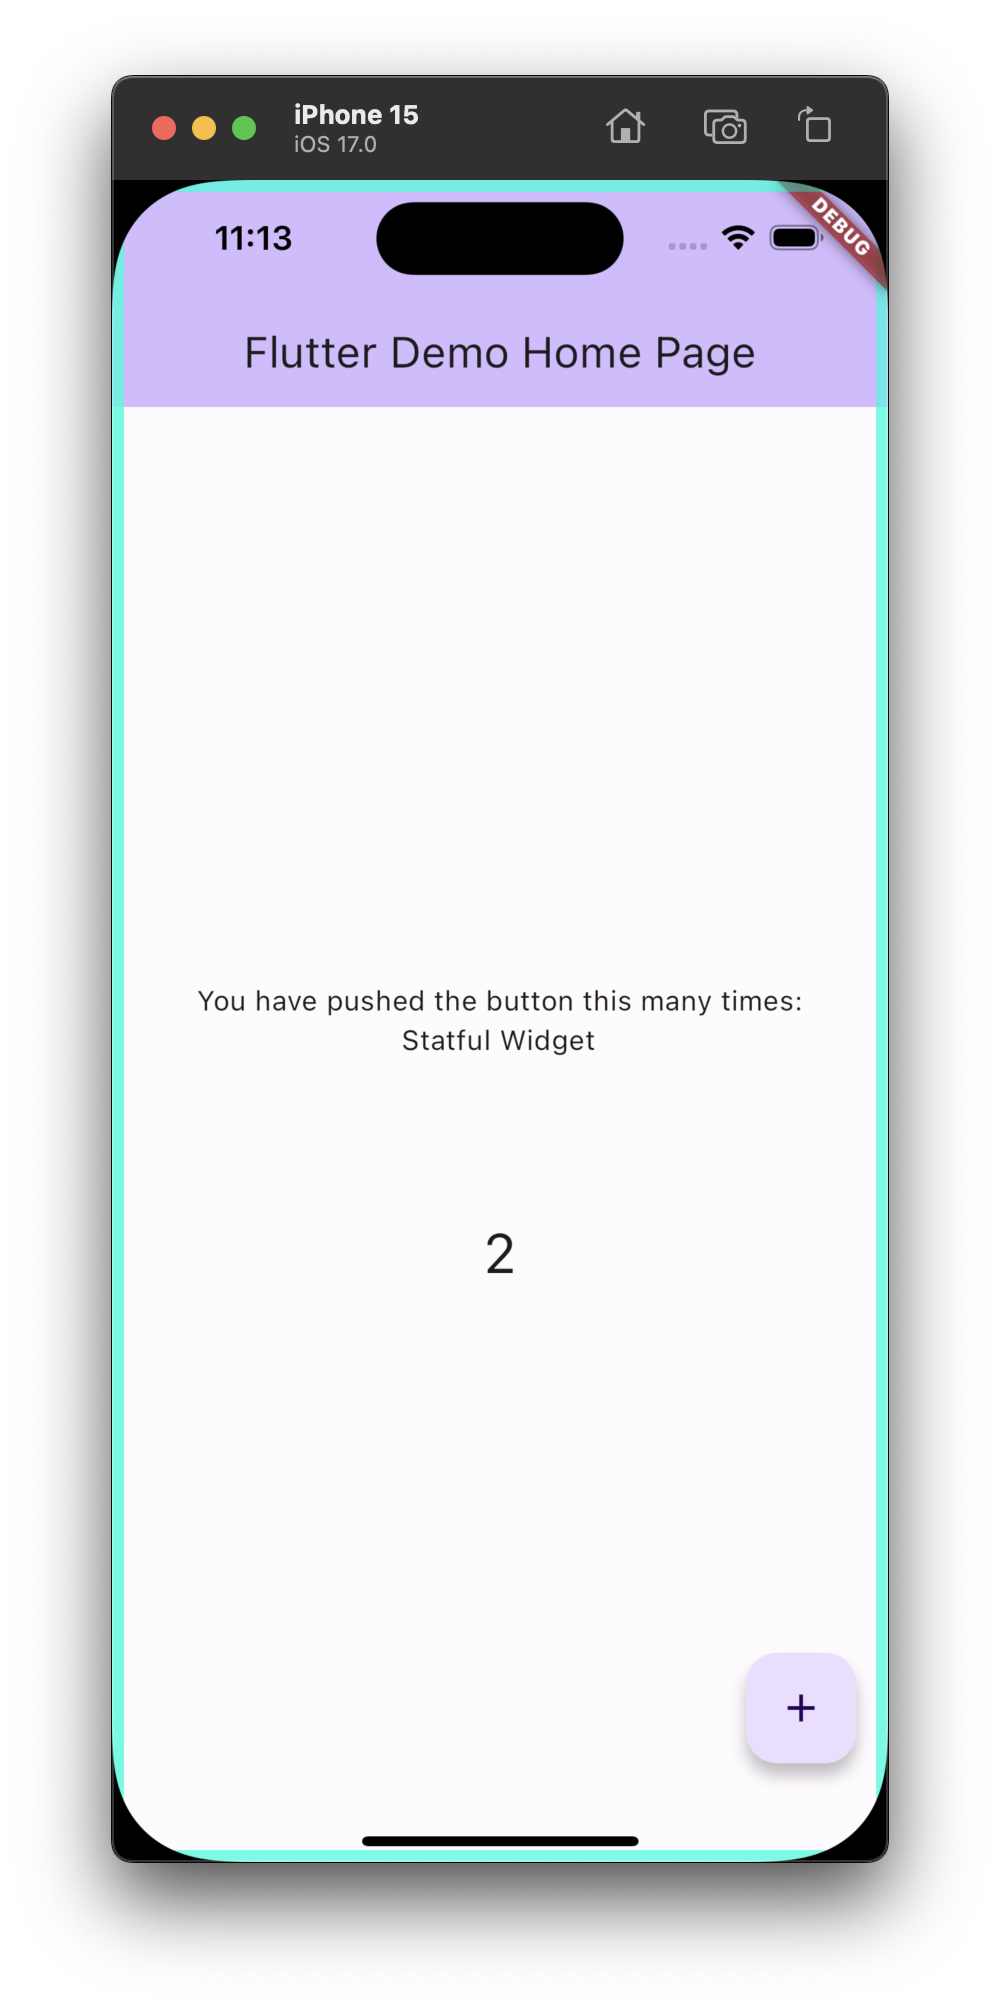
接下來就可以觀察 App 裡面有哪裡會被重複繪製,我們接下來可以看一個例子:
class MyApp extends StatelessWidget {
  const MyApp({super.key});

  @override
  Widget build(BuildContext context) {
    return const MaterialApp(
      debugShowCheckedModeBanner: false,
      home: MyHomePage(title: 'Flutter Demo Home Page'),
    );
  }
}

class MyHomePage extends StatefulWidget {
  const MyHomePage({super.key, required this.title});

  final String title;

  @override
  State<MyHomePage> createState() => _MyHomePageState();
}

class _MyHomePageState extends State<MyHomePage> {
  @override
  Widget build(BuildContext context) {
    return const Scaffold(
      body: Center(
        // Center is a layout widget. It takes a single child and positions it
        // in the middle of the parent.
        child: Column(
          mainAxisAlignment: MainAxisAlignment.center,
          children: <Widget>[
            TestWidget(data: "Stateful Widget"),
          ],
        ),
      ),
    );
  }
}

class TestWidget extends StatefulWidget {
  const TestWidget({super.key, required this.data});
  final String data;

  @override
  State<TestWidget> createState() => _TestWidgetState();
}

class _TestWidgetState extends State<TestWidget> {
  @override
  Widget build(BuildContext context) {
    return SizedBox(
        width: 100,
        height: 500,
        child: SingleChildScrollView(
          child: Column(children: [
            Center(
              child: CustomPaint(
                painter: MyPainter(),
                child: const SizedBox(
                  width: 100,
                  height: 50,
                ),
              ),
            ),
            ...List.generate(
              100,
              (index) => Column(
                children: [
                  Text(widget.data),
                ],
              ),
            ),
            // painter
          ]),
        ));
  }
}

class MyPainter extends CustomPainter {
  @override
  void paint(Canvas canvas, Size size) {
    debugPrint('======paint : paint=========');
    final paint = Paint()..color = const Color.fromARGB(255, 255, 162, 156);
    canvas.drawRect(
      const Rect.fromLTWH(0, 0, 100, 100),
      paint,
    );
  }

  @override
  bool shouldRepaint(covariant CustomPainter oldDelegate) {
    return false;
  }
我們在 MyPainter 被重繪時,印出 paint ,接下來滑動中間的 SingleChildScrollView,就會注意到 paint 一直被打印出來,顯示我們的 widget 一直不斷被重繪。
接下來掏出秘密武器 RepaintBoundary,再來看看會是什麼效果:
RepaintBoundary(
  child: CustomPaint(
    painter: MyPainter(),
    child: const SizedBox(
      width: 100,
      height: 50,
    ),
  ),
),
可以看到重新繪製的情形就消失了,這會大大的提升你的畫面性能
看完效果以後,結合一開始說的 Layer Tree 的概念,你大概就可以猜到,RepaintBundary 他的作用在於幫助這個 Widget 建立自己獨立的 Layer。獨立出來以後就不會受到外部的影響,這部分可以直接查看 RepaintBundary 的 RenderObject : RenderRepaintBundary,他會把 isRepaintBoundary 設置為 true,建立出自己的 Render 屏障從而不再往上尋找需要重新繪製的對象。
class RenderRepaintBoundary extends RenderProxyBox {
  /// Creates a repaint boundary around [child].
  RenderRepaintBoundary({ RenderBox? child }) : super(child);

  @override
  bool get isRepaintBoundary => true;
	...
}
RepaintBoundary 想像成一個“盾牌”或“屏障”。當你把它放在某個 Widget 前面,你基本上是在說:“只有這個 Widget 和它內部的子組件需要重繪,其他的部分都不需要。” 因此,即使它內部的某個小部件有變化,只有這部分內容會被重新繪製,而不是整個界面。還有時間就來講講另一個可能會拖慢你的執行速度,但你卻沒發現的小地方:async。如果裡面的程式碼相同,僅僅只是加上 async 這個關鍵字會有什麼區別嗎?
我們寫兩個測試的方法,差別只在於有沒有加上 async 關鍵字,
void main() {
	final stopwatch = Stopwatch()..start();
	testAsyncFunc();
	stopwatch.stop();
	print('testAsyncFunc() took ${stopwatch.elapsedMilliseconds}ms');

	final stopwatch = Stopwatch()..start();
  testFunc();
  stopwatch.stop();
  print('testFunc() took ${stopwatch.elapsedMilliseconds}ms');
}

testAsyncFunc() async {
    debugPrint('======testAsync : start=========');
    int i = 0;
    for (var i = 0; i < 10000000000; i++) {}
    debugPrint('======testAsync : end=========');
  }

testFunc() {
  debugPrint('======normal : start=========');
  int i = 0;
  for (var i = 0; i < 10000000000; i++) {}
  debugPrint('======normal : end=========');
}
在運行之前不知道你有沒有猜到結果了,testAsyncFunc 的執行時間比沒有 async 的方法多了一倍!有沒有很驚訝啊?
flutter: testAsyncFunc() took 6367ms

flutter: testFunc() took 3601ms
這是為什麼呢?
當看到 Dart 中的 async 關鍵字,你可能會誤以為該功能是平行運行的或非同步的。但實際上,async 關鍵字並不會使函數的執行變得平行或非同步。相反,它只是使該函數能夠返回一個 Future 對象,並允許在該函數中使用 await 關鍵字。
testAsyncFunc 仍然會在事件循環的當前迭代中順序執行,並不會創建一個新的執行緒或非同步地運行任何代碼。
那麼,為什麼 testAsyncFunc 的執行時間會比 testFunc 長呢?有以下幾個原因:
函數包裝成Future:
當你標記一個函數為 async 時,Dart 會為該函數創建一個包裝,使它返回一個 Future。即使在沒有真正的非同步操作的情況下,這種包裝和相關的操作都會引入一定的性能開銷。
Event loop 的影響:
儘管你的 testAsyncFunc 函數中沒有真正的非同步操作,但由於它被標記為 async,所以返回的 Future 會被丟到 event queue 才執行,所以每次 event loop 開啟後他都是最後才被執行到的,所以時間會被越拖越慢。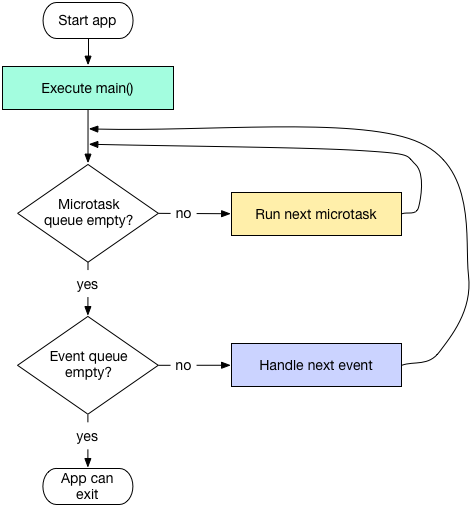
用一個簡單的範例來測試一下 event loop:
void main() {
  print('main start');

  Future(() => print('future'));

  scheduleMicrotask(() => print('microtask'));

  print('main end');
}
這會輸出:
main start
main end
microtask
future
從這裡就可知道 Future 確實是在裡面最後一個被執行到的。
如果你不需要非同步功能,就不應該使用 async 關鍵字,因為它可能會引入不必要的性能開銷。當你真正需要進行非同步操作時(例如,當你需要等待一些外部數據或進行耗時的計算時),async/await 是非常有用的,但在這種情況下,它可能只是多餘的。
優化程式並不僅僅是為了讓它運行得更快,更是為了提供使用者更好的體驗。從 Flutter 的 Layer Tree 到 Dart 中的使用時機,每一個細節都對我們的應用有深遠的影響。因此,我們應當對每一行程式碼持續問題和思考,確保在提供功能的同時,也確保了最佳的性能表現。從今天開始,不妨將這些優化的小細節加入到你的開發中,並體驗它帶來的驚人變化。
