還記得我們開啟了 http://localhost:8080/ 了嗎?忘記了沒關係,從頭再來一次~
還沒安裝的,可以回到 Day3:快樂安裝
如果已經安裝完就繼續往下吧~
cd 進入也可以。source airflow-env/bin/activate

(airflow-env) 代表進入虛擬環境了。airflow webserver -p 8080
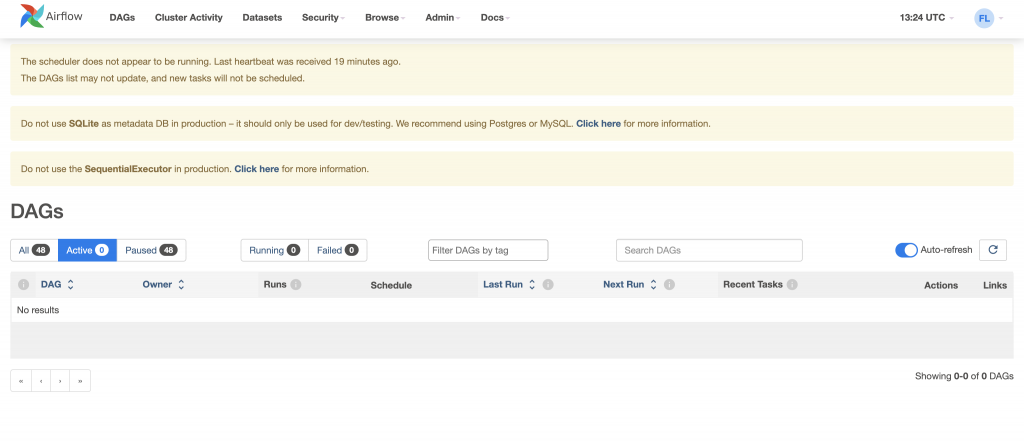
SequentialExecutor 是第一次安裝 Airflow 時的預設執行器,也是唯一一個可以和 sqlite 協作的執行器,但缺點就是一次只能執行一項任務,所以執行效率很差,但目前測試也沒關係。
Ref: 官方說明
開啟一個新的 terminal,運行 airflow scheduler ,接著打開 http://localhost:8080/ 按 F5 刷新頁面,第一行通知就會消失了。
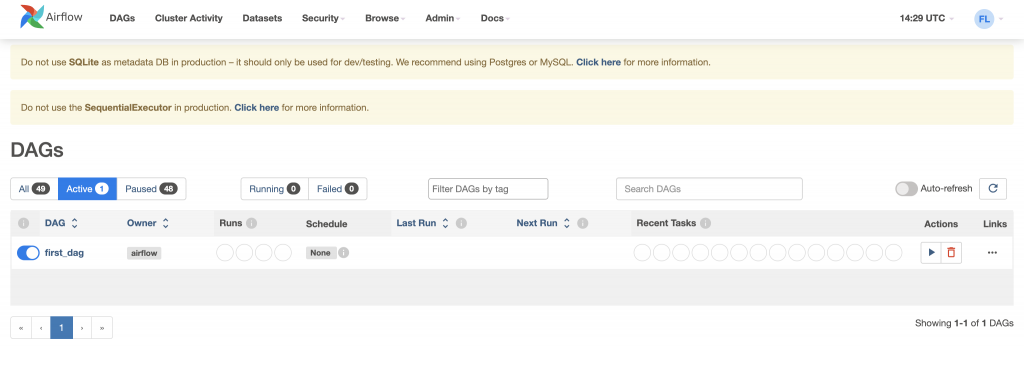
首先我們要創建一個 dags/ 資料夾在 ~/airflow/ 專案當中,並在裡面建立一個 python 檔案,dags/first_dag.py
--- dags/
    --- first_dag.py
--- logs/
--- airflow.cfg
--- airflow.db
--- webserver_config.py
from datetime import datetime
from airflow import DAG
from airflow.operators.bash import BashOperator
with DAG(
    dag_id = 'first_dag',
    start_date = datetime(2023, 9, 22),
    schedule_interval='@daily'
) as dag:
dag_id 就是在 dag 的唯一識別名稱!強烈建議!要和 python 檔案用相同名稱,不然之後 DAG 一多就會很混亂
start_date 就是 DAG 要開始執行的日期schedule_interval 是時間間隔,'@daily' 代表以天為單位在 ) as dag:下方我們就可以直接來寫任務了
...
) as dag:
    task1 = BashOperator(
        task_id='task1',
        bash_command="echo start!!"
    )

    task2 = BashOperator(
        task_id='task2',
        bash_command="echo finish!!"
    )
task_id: task 的名稱bash_command:我們要執行的 bash 指令echo start!!:echo 就是 Python 當中的 print 意思,印出 start!!
task2 以此類推task1 >> task2
airflow webserver -p 8080
airflow scheduler
很好奇大家都是先準備好貼文才參加鐵人賽嗎 ,我目前都是當天現打,然後整理之前的筆記,每天都感覺來不及,希望假日趕緊多補幾篇,看能不能比較有彈性,真的快虛脫了
 (這週補班又少一天假了~),哎~~~繼續努力吧!
from datetime import datetime
from airflow import DAG
from airflow.operators.bash import BashOperator

with DAG(
    dag_id = 'first_dag',
    start_date = datetime(2023, 9, 22),
    schedule_interval=None
) as dag:
    task1 = BashOperator(
        task_id='task1',
        bash_command="echo start!!"
    )

    task2 = BashOperator(
        task_id='task2',
        bash_command="echo finish!!"
    )

    task1 >> task2