在 DAY 07 我們曾討論過在 dbt Cloud 要如何建立定時排程。
那麼如果我們用的是 dbt Core,該怎麼做呢?
許多團隊會使用 Airflow, Dagster, Prefect 等 orchestration tool 和其他 data pipelines 結合,但如果專案較單純的話,我們也可以用其他較陽春的方式。
今天要示範的就是其中一種簡便的方式 -- GitHub Actions,不需要自架 Cloud VM 或其他額外的設定,就可以跑排程。
依據 dbt 官方文件,BigQuery 的 Authentication Methods 有以下四種:
本地開發建議使用 OAuth,正式運行的 production server 則建議用 service account。
在 DAY 23 我們使用的是第三種:service account file,我們建立的 profiles.yml,檔案中包含了本機 key file 的路徑,讓我們在執行 dbt 指令時,能抓到該檔案。而 key file 中儲存了連線到 BigQuery 所需要的 private_key 等資訊。
這些檔案比較是個人的設定,且包含機密資訊,我們都沒有上傳到 GitHub。
但今天我們需要在 GitHub Actions 跑 dbt,卻需要這些檔案包含在 dbt repo,因此我們要來做一些調整。
我們要改用第四種方式:serivce account json
將 profiles.yml 改為 method: service-account-json 並加上 keyfile_json 的資訊,可以參考 官方文件 的內容。
另外,務必注意,如果我們照著 key file 的內容原封不動 push 上 GitHub,我們的密碼就外洩了。
因此我會把 private key 用環境變數設定,如下
private_key: "{{ env_var('PRIVATE_KEY') }}"
我的 profiles.yml完整內容如下:
default: # this needs to match the profile in your dbt_project.yml file
  target: dev
  outputs:
    dev:
      type: bigquery
      method: service-account-json
      project: dbt-demo-2023 # Replace this with your project id
      dataset: dbt_dev_stacy # Replace this with dbt_your_name, e.g. dbt_bilbo
      threads: 1
      timeout_seconds: 300
      location: US
      priority: interactive
      # These fields come from the service account json keyfile
      keyfile_json:
        type: service_account
        project_id: dbt-demo-2023
        private_key_id: 8c9d822e3da9caa357c5d780822e7f51136dfbfe
        private_key: "{{ env_var('PRIVATE_KEY') }}"
        client_email: dbt-demo-service-account@dbt-demo-2023.iam.gserviceaccount.com
        client_id: 116885331645342010738
        auth_uri: https://accounts.google.com/o/oauth2/auth
        token_uri: https://oauth2.googleapis.com/token
        auth_provider_x509_cert_url: https://www.googleapis.com/oauth2/v1/certs
        client_x509_cert_url: https://www.googleapis.com/robot/v1/metadata/x509/dbt-demo-service-account%40dbt-demo-2023.iam.gserviceaccount.com
今天我不從本機上傳,直接由 GitHub 新增檔案,並直接 commit to main branch: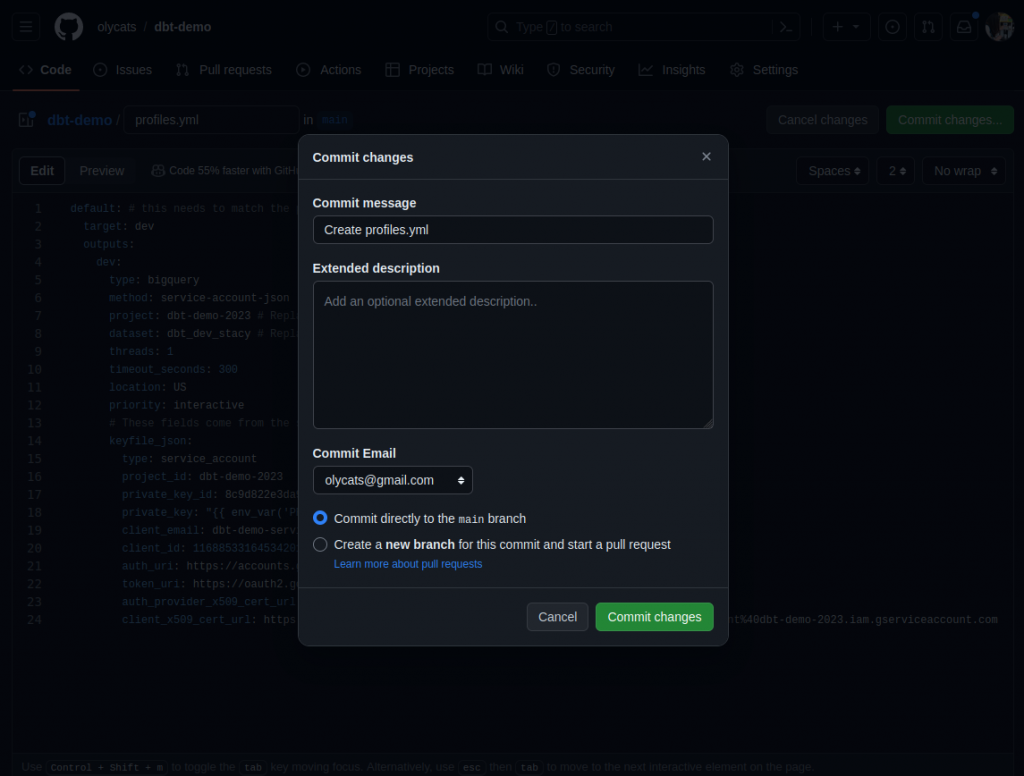
從 GitHub repo,選擇 Actions 頁籤。
此處 GitHub 有提供範本讓我們參考,不過我們先不使用範本,直接點選 set up a workflow yourself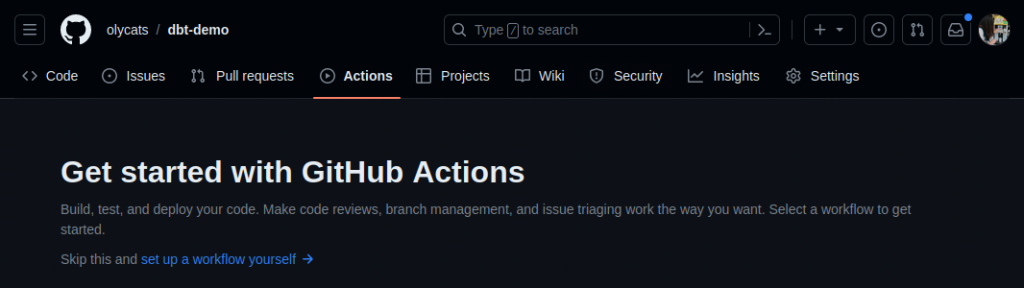
直接貼入以下檔案內容
name: dbt build

on:
  workflow_dispatch:

env:
  PRIVATE_KEY: ${{ secrets.PRIVATE_KEY }}

jobs:
  dbt_build:
    runs-on: ubuntu-latest
    steps:
      - name: Checkout to the branch
        uses: actions/checkout@v3
      - name: Set up Python
        uses: actions/setup-python@v4
        with:
          python-version: '3.x'
      - name: Install dependencies
        run: python -m pip install --upgrade pip
      - name: Install requirements.txt
        run: pip install -r requirements.txt
      - name: Install dbt dependencies
        run: dbt deps
      - name: dbt Build
        run: dbt build
直接進 commit 到 main branch。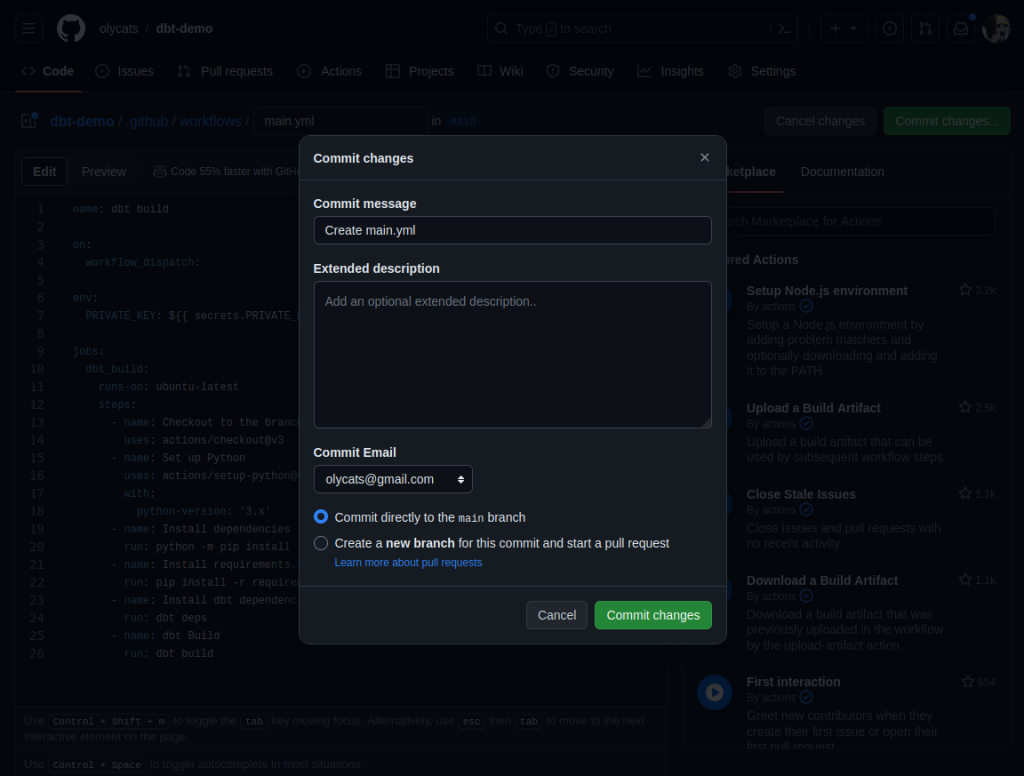
GitHub Action 的內容除了參考 dbt Cloud 的 job 內容,也可以想成拿到一台全新安裝的VM,我們需要先設定環境:從 GitHub 抓下 repo 內容、安裝 Python、虛擬環境、dbt 套件等等,最後才能執行 dbt 指令,如同我們在 DAY 23 談過的內容。
另外我們設定了 PRIVATE_KEY 的環境變數,我們要使用下一步所設定的 GitHub Action secret 傳入,避免外洩。
由 repo 的 Settings 頁籤,選取 Security -> Secrets and variables -> Actions。
再點選 New repository secret。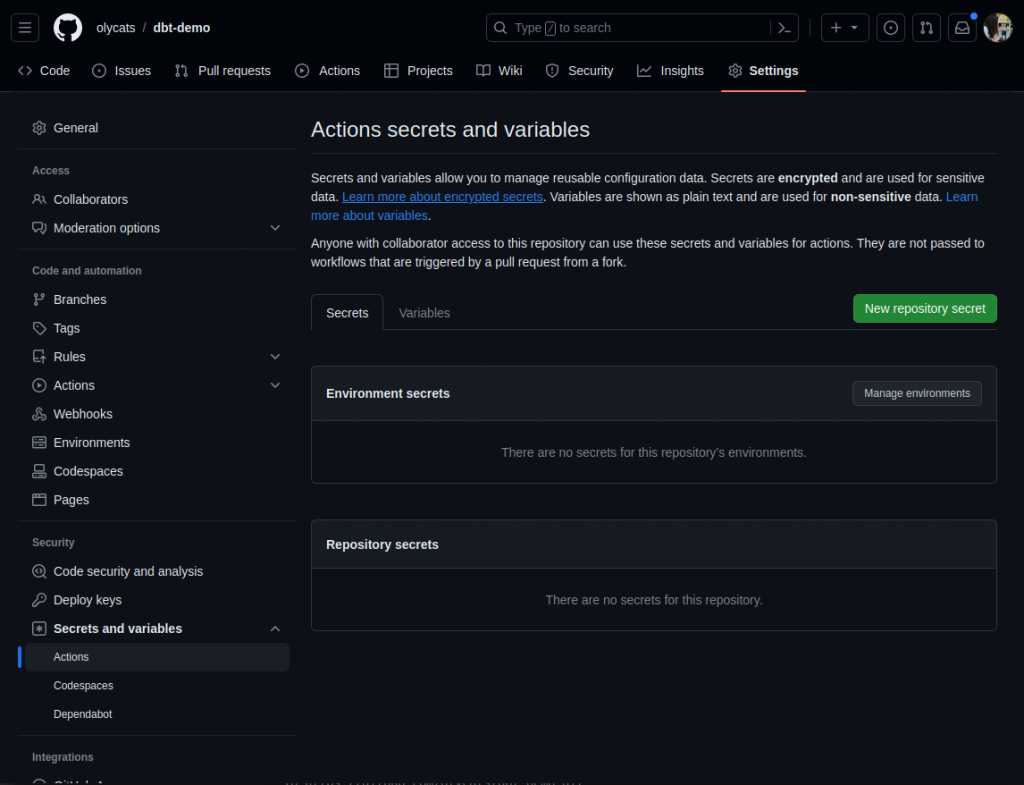
Name 輸入 PRIVATE_KEY,Secret 就輸入 json 檔中的 PRIVATE_KEY 內容。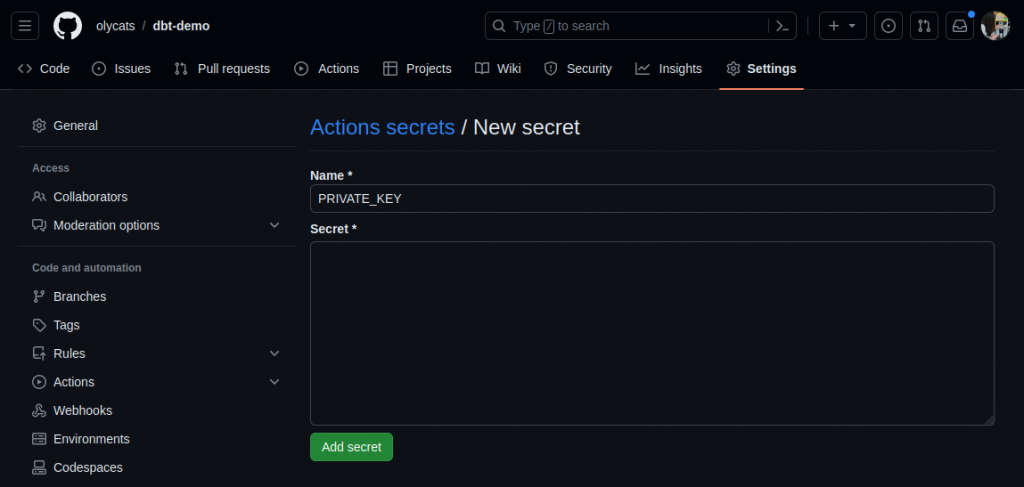
此處輸入的內容就可以在 GitHub actions 中,以 ${{ secrets.PRIVATE_KEY }} 的方式傳入。
設定完成後,我們回到 Actions 頁籤,就可以看到 dbt build 的 Action 已經被建立起來。
讓我們來試跑看看...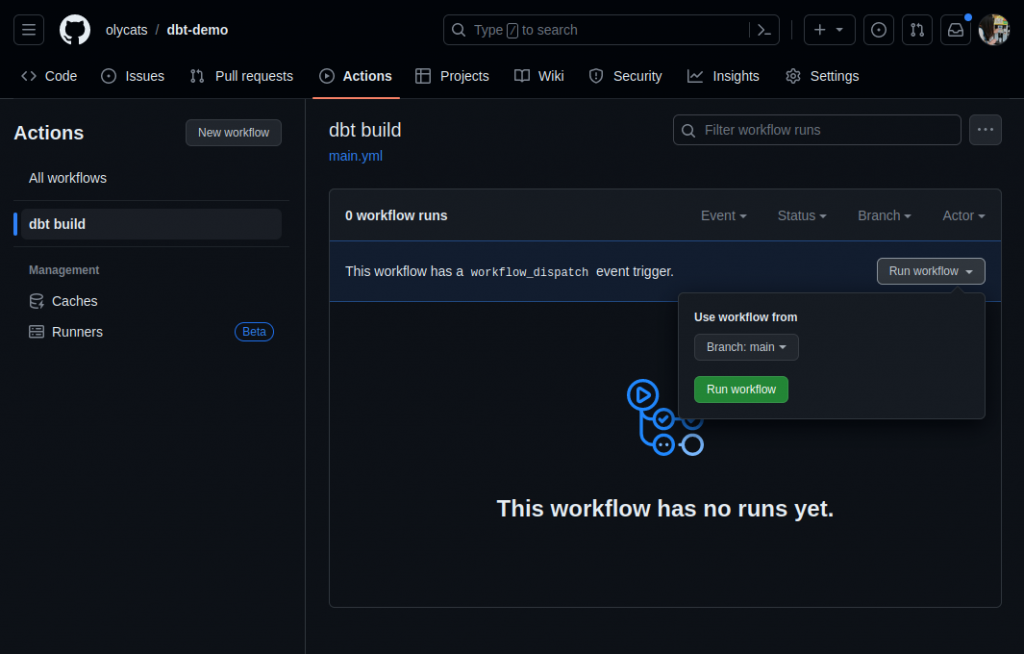
執行成功則顯示綠色勾勾,點進 job 也可以看各個步驟的 log。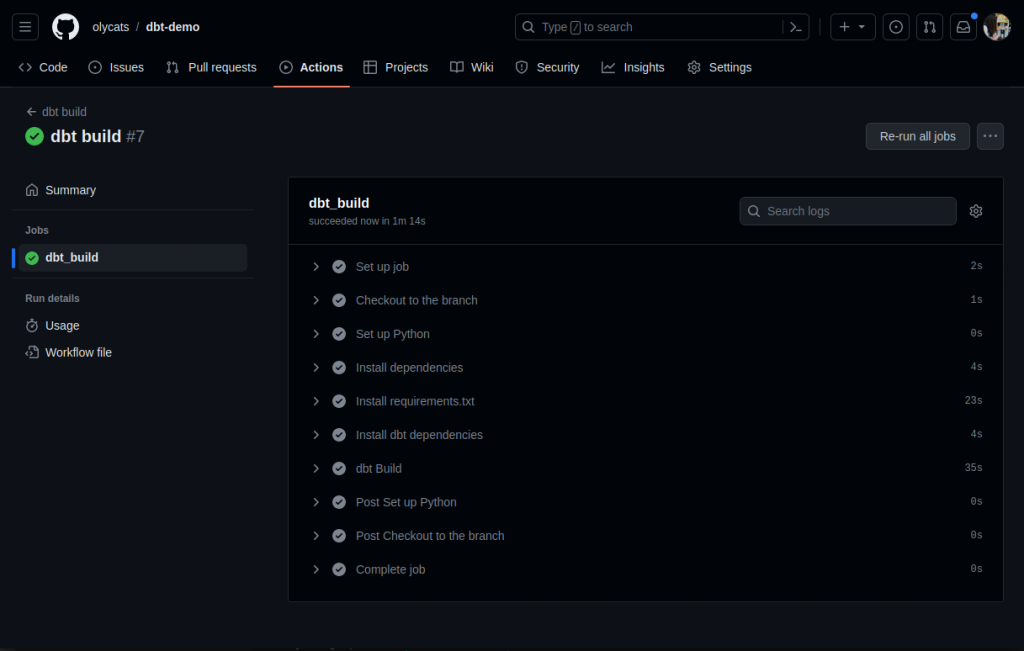
dbt Core 的入門介紹就到這裡告一段落,最後幾天會聊些和 dbt 工具無關的。
明天的主題:我在 Teamson 當初如何決定要用dbt的小故事
歡迎加入 dbt community
對 dbt 或 data 有興趣 👋?歡迎加入 dbt community 到 #local-taipei 找我們,也有實體 Meetup 請到 dbt Taipei Meetup 報名參加