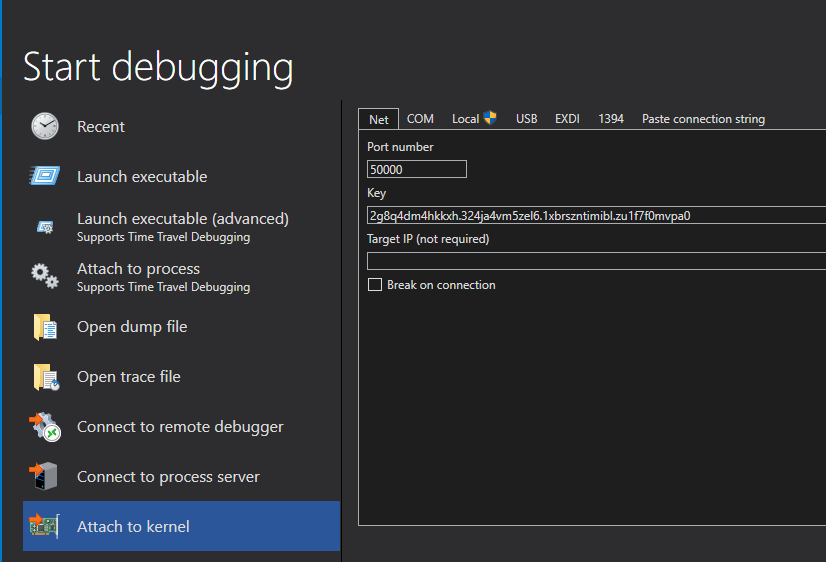
在成功執行測試程式後,我們接著介紹如何偵錯驅動程式。有許多方式可以偵錯驅動程式,我們會介紹其中兩種方式,WinDbg和WPP軟體追蹤。
在安裝WDK時也有安裝WinDbg,以我的編譯環境為例子,是位於C:\Program Files (x86)\Windows Kits\10\Debuggers\x64,另外microsoft也有提供使用者介面較為現代的版本,可以在Microsoft Store或是至安裝Windows偵錯工具頁面下載。WinDbg可以透過多種方式連接,例如USB2、USB3或網路,這次示範會使用WinDbg透過網路來偵錯。
cdedit /set DEBUG YES
cdedit /set TESTSIGNING ON
``
[](https://raw.githubusercontent.com/papa12804/pics/master/debug-1.png)
cdedit /dbgsettings net hostip:192.168.1.118 port:50000
``
[](https://raw.githubusercontent.com/papa12804/pics/master/debug-3.png)
cdedit /dbgsettings
``
[](https://raw.githubusercontent.com/papa12804/pics/master/debug-4.png)


.symfix去設定符號路徑。
symfix
``
.sympath將Non-PnP driver sample的路徑新增至符號路徑,+代表將保留現存的符號路徑
sympath+ <your path of Windows Driver Samples>\general\ioctl\kmdf\exe\x64\Debug
sympath+ <your path of Windows Driver Samples>\general\ioctl\kmdf\sys\x64\Debug
``
.srcpath將Non-PnP driver sample的路徑新增至來源路徑,+代表將保留現存的來源路徑
srcpath+ <your path of Windows Driver Samples>\general\ioctl\kmdf\exe
srcpath+ <your path of Windows Driver Samples>\general\ioctl\kmdf\sys
``
.exepath將Non-PnP driver sample的路徑新增至可執行檔路徑,+代表將保留現存的可執行檔路徑
exepath+ <your path of Windows Driver Samples>\general\ioctl\kmdf\exe\x64\Debug
``
.reload重載符號,/f會刪除指定模組的所有符號資訊。
reload /f
``
nonpnpapp.exe。nonpnpapp.exe執行完成後回到主機端,確認WinDbg是否有顯示Non-PnP驅動程式裡使用KdPrint印出的偵錯訊息。
今天介紹了如何使用WinDbg偵錯,WinDbg的功能非常強大,可以加入中斷點和逐行執行,但今天只有簡單介紹如何安裝和基本使用方法,如果想要更加了解可以到下方參考內容連結自行閱讀。
