Day 24 介紹了幾種優化 build process 效率的方式
雖然理論上是有用的, 但是口說無憑, 今天就來實際看看那些優化方式能加速多少吧!
為了達到測試的目的, 我們寫一個自動產生 headers, source files, executables 的 script generate-sources.py
#!/usr/bin/env python3

import argparse

LIB_DIR = "src/lib"
INCLUDE_DIR = "src/include"
BIN_DIR = "src/bin"

def generate_headers(nfunc: int, id: int):
    dummy_functions = [f"void foo{id}_{i}();" for i in range(nfunc)]
    dummy_functions = "\n".join(dummy_functions)
    with open(f"{INCLUDE_DIR}/header{id}.h", "w") as f:
        f.write(f"#pragma once\n{dummy_functions}")
    return;


def generate_sources(nfunc: int, id: int):
    dummy_functions = [f"void foo{id}_{i}() {{ return; }}" for i in range(nfunc)]
    dummy_functions = "\n".join(dummy_functions)
    with open(f"{LIB_DIR}/header{id}.cpp", "w") as f:
        f.write(f"#include <header{id}.h>\n\n{dummy_functions}")
    return;


def generate_binary(n: int, id: int = -1):
    include_headers = [f"#include <header{i}.h>" for i in range(n)]
    include_headers = "\n".join(include_headers)
    call_funcs = [f"foo{i}_0();" for i in range(n)]
    call_funcs = "\n".join(call_funcs)
    filename = f"{BIN_DIR}/main.cpp" if id < 0 else f"{BIN_DIR}/main_{id}.cpp"
    with open(filename, "w") as f:
        f.write(f"{include_headers}\n\nint main() {{\n{call_funcs}\nreturn 0;\n}}")
    return;


def create(n: int, nfunc: int, nexec):
    generate_binary(n)
    for i in range(n):
        generate_headers(nfunc, i)
        generate_sources(nfunc, i)

    for i in range(nexec):
        generate_binary(n, i)
    return;


def main():
    parser = argparse.ArgumentParser(description="Generate source files")
    parser.add_argument("n", type=int, help="Number of files to generate")
    parser.add_argument("nfunc", type=int, help="Number of functions to generate")
    parser.add_argument("nexec", type=int, help="Number of executables to generate")
    args = parser.parse_args()
    create(args.n, args.nfunc, args.nexec)

if __name__ == "__main__":
    main()
用法如下
./generate-sources.py -h

usage: generate-sources.py [-h] n nfunc nexec

Generate source files

positional arguments:
  n           Number of files to generate
  nfunc       Number of functions to generate
  nexec       Number of executables to generate

options:
  -h, --help  show this help message and exit
n
nfunc
nexec
舉例來說, ./generate-sources.py 5 5 5 會產生
如圖所示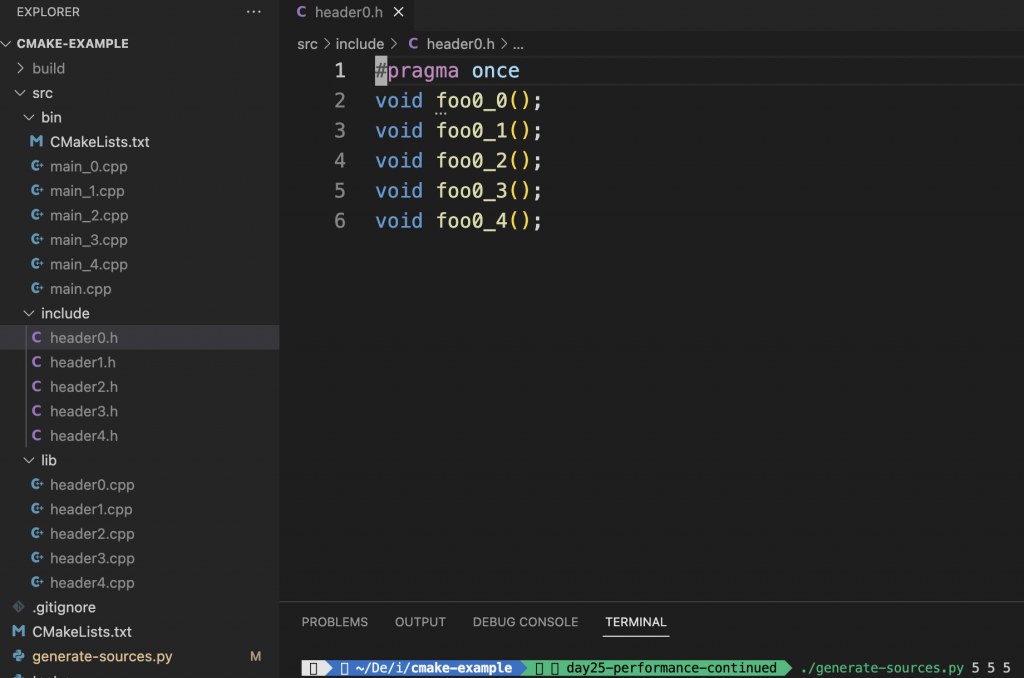
當然, 為了凸顯優化前後的速度差異, 我們會用以下配置
並用 Linux 原生的指令 time 來測量 build process 所花費的時間
比如
# setup projects
./generate-sources.py 50 10 5

# configure project
cmake -S . -B build -DCMAKE_UNITY_BUILD:BOOL=ON

# estimate elapse time
time cmake --build build
那就讓我們開始吧!!!
我們只要在 configure 時加上 cache variable CMAKE_UNITY_BUILD 即可
cmake -S . -B build -DCMAKE_UNITY_BUILD:BOOL=ON
| real | user | system | |
|---|---|---|---|
| w/o unity build | 0m9.456s | 0m5.954s | 0m3.267s |
| w/ unity build | 0m2.216s | 0m1.476s | 0m0.655s |
單單只是加了個 cache variable, 總時間就快了 76.5%!
我們可以用 target_precompile_headers 來產生 pch (precompiled header) 檔案
file(GLOB _headers ${CMAKE_SOURCE_DIR}/src/include/*.h)
target_precompile_headers(Main PRIVATE ${_headers})
可以在 build/src/bin/CMakeFiles/Main.dir 底下看到有了 cmake_pch.hxx 等一系列檔案
| real | user | system | |
|---|---|---|---|
| w/o pch | 0m8.644s | 0m5.194s | 0m3.135s |
| w/ pch | 0m9.581s | 0m5.924s | 0m3.388s |
由於 precompiled header 第一次多了產生 pch 的時間, 反而比原本沒有 precompiled header 還慢
但不確定是否是專案設計有誤, 即使第二次用了第一次先 compile 好的 headers, 差異也不明顯
| real | user | system | |
|---|---|---|---|
| w/o pch | 0m0.252s | 0m0.141s | 0m0.086s |
| w/ pch | 0m0.262s | 0m0.153s | 0m0.093s |
我們需要先安裝 ccache
apt install ccache
然後我們先用 ccache -sv 來看一下目前的 cache 狀況
Summary:
  Cache directory:  /root/.cache/ccache
  Primary config:   /root/.config/ccache/ccache.conf
  Secondary config: /etc/ccache.conf
  Stats updated:    never
  Hits:                0 /    0
    Direct:            0 /    0
    Preprocessed:      0 /    0
  Misses:              0
    Direct:            0
    Preprocessed:      0
Primary storage:
  Hits:                0 /    0
  Misses:              0
  Cache size (GB):  0.00 / 5.00 (0.00 %)
  Files:               0
可以看到都是空的, 完美!
然後我們在 src/bin/CMakeLists.txt 中設定 CMAKE_CXX_COMPILER_LAUNCHER 為 ccache
find_program(CCACHE_EXECUTABLE ccache)
if(CCACHE_EXECUTABLE)
  set(CMAKE_CXX_COMPILER_LAUNCHER ${CCACHE_EXECUTABLE})
endif()
來 build 一次看看效果
| real | user | system | |
|---|---|---|---|
| w/o ccache | 0m8.644s | 0m5.194s | 0m3.135s |
| w/ ccache | 0m11.964s | 0m6.864s | 0m4.645s |
嗯? 怎麼看起來沒有效果呢? 我們再來看看 cache 的狀況
Summary:
  Cache directory:  /root/.cache/ccache
  Primary config:   /root/.config/ccache/ccache.conf
  Secondary config: /etc/ccache.conf
  Stats updated:    Mon Sep 25 13:30:32 2023
  Hits:                0 /  306 (0.00 %)
    Direct:            0 /  306 (0.00 %)
    Preprocessed:      0 /  306 (0.00 %)
  Misses:            306
    Direct:          306
    Preprocessed:    306
Primary storage:
  Hits:                0 /  612 (0.00 %)
  Misses:            612
  Cache size (GB):  0.00 / 5.00 (0.05 %)
  Files:             612
可以看到 Stats 已經被更新過了, 且 cache files 也多了 612 個! 但是同樣也 miss 了 612 次
這是因為我們才第一次 build, 所以還沒有 cache 能用
現在有了之後我們再 build 一次試試吧
| real | user | system | |
|---|---|---|---|
| w/o ccache | 0m8.644s | 0m5.194s | 0m3.135s |
| w/ ccache | 0m2.504s | 0m1.288s | 0m1.121s |
可以看到這次的速度非常明顯提升了, 總共快了 71%!
再來看看 cache 有什麼變化
Summary:
  Cache directory:  /root/.cache/ccache
  Primary config:   /root/.config/ccache/ccache.conf
  Secondary config: /etc/ccache.conf
  Stats updated:    Mon Sep 25 13:34:29 2023
  Hits:              306 /  612 (50.00 %)
    Direct:          306 /  612 (50.00 %)
    Preprocessed:      0 /  306 (0.00 %)
  Misses:            306
    Direct:          306
    Preprocessed:    306
Primary storage:
  Hits:              612 / 1224 (50.00 %)
  Misses:            612
  Cache size (GB):  0.00 / 5.00 (0.05 %)
  Files:             612
嗯...cache hits 上升到 50% 了, 當然, 這是因為第一次的 cache miss 也被算進去了, 所以不是很準確, 我們先 ccache -z 重置統計數字後再試試
Summary:
  Cache directory:  /root/.cache/ccache
  Primary config:   /root/.config/ccache/ccache.conf
  Secondary config: /etc/ccache.conf
  Stats updated:    Mon Sep 25 13:37:55 2023
  Hits:              306 /  306 (100.0 %)
    Direct:          306 /  306 (100.0 %)
    Preprocessed:      0 /    0
  Misses:              0
    Direct:            0
    Preprocessed:      0
Primary storage:
  Hits:              612 /  612 (100.0 %)
  Misses:              0
  Cache size (GB):  0.00 / 5.00 (0.05 %)
  Files:             612
因為我們並沒有改變任何的 code 或是 dependency, 所以這次很明顯就能看出 cache hits 是 100% 了🎉🎉🎉
最後來看看平行化, 我們用 nproc --all 來取得最大核心數, 作為平行處理的 job 數量 (我的 Colab session 只有 2 核QQ)
time cmake --build build -j $( nproc --all )
| real | user | system | |
|---|---|---|---|
| w/o parallelism | 0m8.644s | 0m5.194s | 0m3.135s |
| w/ parallelism | 0m7.404s | 0m6.928s | 9m3.747s |
由於核心數比較少, 改善效果比較不明顯, 僅提升了約 14.3%
效能的部分到這裡告一個段落, 下一篇要來認識一下新的 generator: Ninja!