今天跟大家分享如何通過昨天寫的測試。
原始碼可以參考 D09/component-test
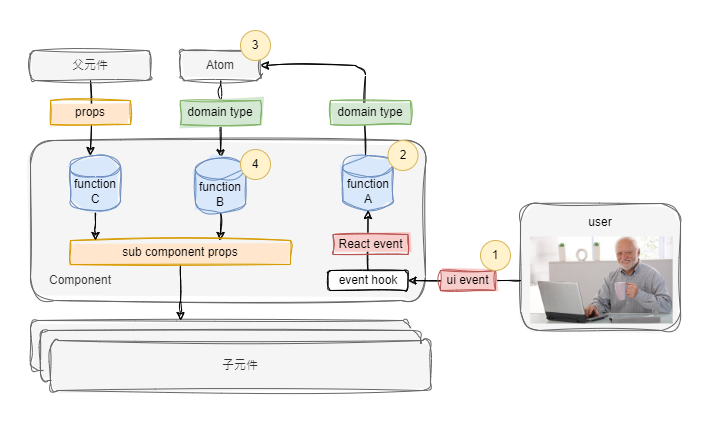
再次回顧整個工作流程,我們在 D06 - 測試驅動開發 把 步驟2 完成了,現在的目標是完成 步驟3 和 步驟4。
使用前請先安裝 jotai
npm i jotai
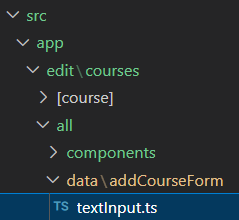
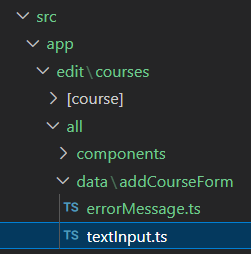
在 textInput.ts 新增初始值與 Atom
import atom from 'jotai'

// 1. 建立 textInput 初始值
export const initialCourseName = Data.tagged<InitialTextInput>(
  'InitialTextInput'
)({ value: '' })

// 2. 新增 courseNameAtom,設定 atom 的初始值為 initialCourseName
export const courseNameAtom = atom<TextInput>(initialCourseName)
接著在測試的檔案 import 初始值與 Atom
import {
  InitialTextInput,
  courseNameAtom,
} from '../../data/addCourseForm/textInput'
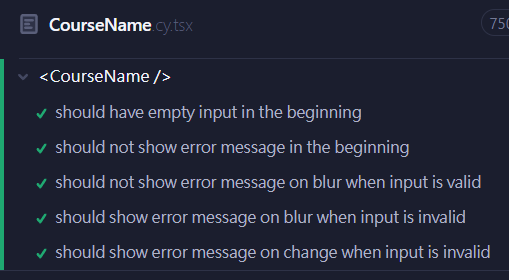
完成以上動作後存檔,就可以看到前面三個不顯示錯誤訊息的測試已經通過了
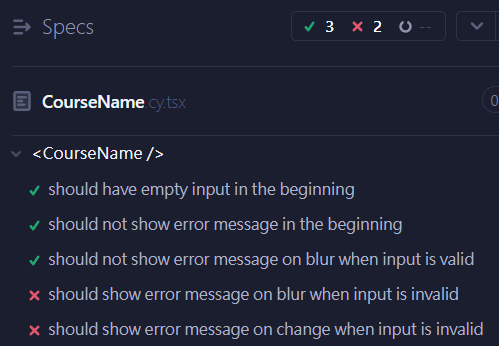
接下來為了完成 步驟4,我們需要新增一個錯誤訊息元件
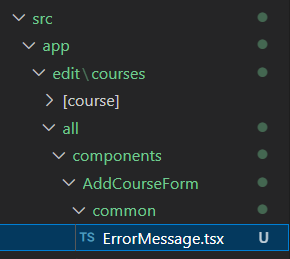
由於後面的 DateRange 或是 Description 欄位可能也會用到錯誤訊息元件,所以我們把它放在 common 資料夾下面。
import { Match, pipe } from 'effect'
import { FC } from 'react'
import {
  InvalidTextInput,
  TextInput,
} from '../../../data/addCourseForm/textInput'

// 把顯示元件和邏輯元件分開,比較好讀

// 顯示元件
const Displayed: FC<InvalidTextInput> = ({ reason }) => (
  <p className={'error-message h-5 text-sm text-red-600 dark:text-red-500'}>
    {reason}
  </p>
)

// 邏輯元件
export const ErrorMessage: FC<TextInput> = (input) =>
  pipe(
    Match.value(input),
    Match.tag('InvalidTextInput', (input) => <Displayed {...input} />),
    Match.tag('InitialTextInput', (input) => <></>),
    Match.tag('ValidTextInput', (input) => <></>),
    Match.exhaustive
  )
ErrorMessage 其實還隱含了根據同的 tag 決定是否顯示的邏輯,因此我們在撰寫時把它拆成兩部分,一部分負責顯示元件,例如設定 css 屬性,另外一部分則是做邏輯判斷。
import { flow } from 'effect/Function'
import { useAtom } from 'jotai'
import { courseNameAtom } from '../../data/addCourseForm/textInput'
import { ErrorMessage } from './common/ErrorMessage'

// 1. 設定上下限
const limit = { minLen: 1, maxLen: 50 }

export const CourseName = () => {
  // 2. 從 atom 取 value 跟 set function
  const [textInput, setTextInput] = useAtom(courseNameAtom)

  return (
    <div>
      <label
        data-for="course-name"
        className="block mb-2 text-sm font-medium text-gray-900 dark:text-white"
      >
        Course Name
      </label>
      <input
        // 3. 設定受控的 input value
        value={textInput.value}
        // 4. 設定 onChange 處理函式
        onChange={flow(textInputOfEvent(limit), setTextInput)}
        // 5. 設定 onBlur 處理函式
        onBlur={flow(textInputOfEvent(limit), setTextInput)}
        type="text"
        id="course-name"
        placeholder="Enter course name"
        className="... 忽略"
      />
      <!-- 6. 使用上面寫的 ErrorMessage 元件 -->
      <ErrorMessage {...textInput} />
    </div>
  )
}
// 新增一個 constructor
export const textInputOfEvent =
  (limit: TextInputLimit) =>
  (event: ChangeEvent<HTMLInputElement>): InvalidTextInput | ValidTextInput =>
    textInputOf(limit)(event.target.value)
完成以上步驟就可以看到一整排綠色勾勾
由於 label 和 input 將會被表單重複利用,因此我們把它抽出來放到 \common 裡面

import { flow } from 'effect/Function'
import { useAtom } from 'jotai'
import {
  courseNameAtom,
  textInputOfEvent,
} from '../../data/addCourseForm/textInput'
import { ErrorMessage } from './common/ErrorMessage'
import { Label } from './common/Label'
import { TextInput } from './common/TextInput'

const limit = { minLen: 1, maxLen: 50 }

export const CourseName = () => {
  const [courseName, setCourseName] = useAtom(courseNameAtom)

  return (
    <div>
      <Label htmlFor="course-name">Course Name</Label>
      <TextInput
        value={courseName.value}
        onChange={flow(textInputOfEvent(limit), setCourseName)}
        onBlur={flow(textInputOfEvent(limit), setCourseName)}
        id="course-name"
        placeholder="Enter course name"
      />
      <ErrorMessage {...courseName} />
    </div>
  )
}
因為我們已經完成了測試,所以重構時會顯得特別的安心,只要最後測資都有過就行了。
明天來說明這些程式碼用到的 FP 技巧


 iThome鐵人賽