接著從 Try the Tutorial 網頁來開始學習
網址為 https://vuejs.org/tutorial
接續上一篇,接下來是
6. Conditional Rendering
App.vue
<script setup>
import { ref } from 'vue'

const awesome = ref(true)

function toggle() {
  awesome.value = !awesome.value
}
</script>

<template>
  <button @click="toggle">toggle</button>
  <h1 v-if="awesome">Vue is awesome!</h1>
  <h1 v-else>Oh no</h1>
</template>
有了上一篇的學習,對於接下來的內容,會越來越習慣Vue的概念與語法。
這裡引入了 v-if, v-else的用法,用來當作條件式一般,控制不同的內容呈現
首先 宣告一個變數 const awesome = ref(true)
初始值是 true 代表 awesome 是一個布林變數
接著宣告一個function toggle() 執行 awesome.value = !awesome.value
就是交替切換 awesome.value的值 為true/false
然後將 awesome 設定到 <h1>的 v-if的條件上
不過這個 v-if, v-else 條件式在使用上是整組的
像是雖然 awesome 設定到 <h1>的 v-if上
但是 <h1 v-else> 是跟著 awesome 連動的
若 awesome 改成是 0, 1, 2循環數字的切換時
<script setup>
import { ref } from 'vue'

const awesome = ref(0)

function toggle() {
  awesome.value = (awesome.value+1)%3;
}
</script>

<template>
  <button @click="toggle">toggle</button>
  <h1 v-if="awesome === 0">0</h1>
  <h1 v-else-if="awesome === 1">1</h1>
  <h1 v-else>2</h1>
</template>
這時 awesome 設定到 <h1>的 v-if的條件上,
可以是有判斷式的 <h1 v-if="awesome === 0">0</h1>
第2個條件 可以用 v-else-if
最後其他則為 v-else
在判斷式中,使用 === 全等於的語法
在JS中的 相等比較 因應不同的物件型別,
有分 == 一般相等 ("雙等於") 及 === 嚴格相等 (或稱 "三等於"、"全等")
== 一般相等 是指 數值相等(數字,字串)
=== 嚴格相等 是指 同時為數值相等,型別相等,物件相等
接下來是
7. List Rendering
App.vue
<script setup>
import { ref } from 'vue'

// give each todo a unique id
let id = 0

const newTodo = ref('')
const todos = ref([
  { id: id++, text: 'Learn HTML' },
  { id: id++, text: 'Learn JavaScript' },
  { id: id++, text: 'Learn Vue' }
])

function addTodo() {
  todos.value.push({ id: id++, text: newTodo.value })
  newTodo.value = ''
}

function removeTodo(todo) {
  todos.value = todos.value.filter((t) => t !== todo)
}
</script>

<template>
  <form @submit.prevent="addTodo">
    <input v-model="newTodo">
    <button>Add Todo</button>
  </form>
  <ul>
    <li v-for="todo in todos" :key="todo.id">
      {{ todo.text }}
      <button @click="removeTodo(todo)">X</button>
    </li>
  </ul>
</template>
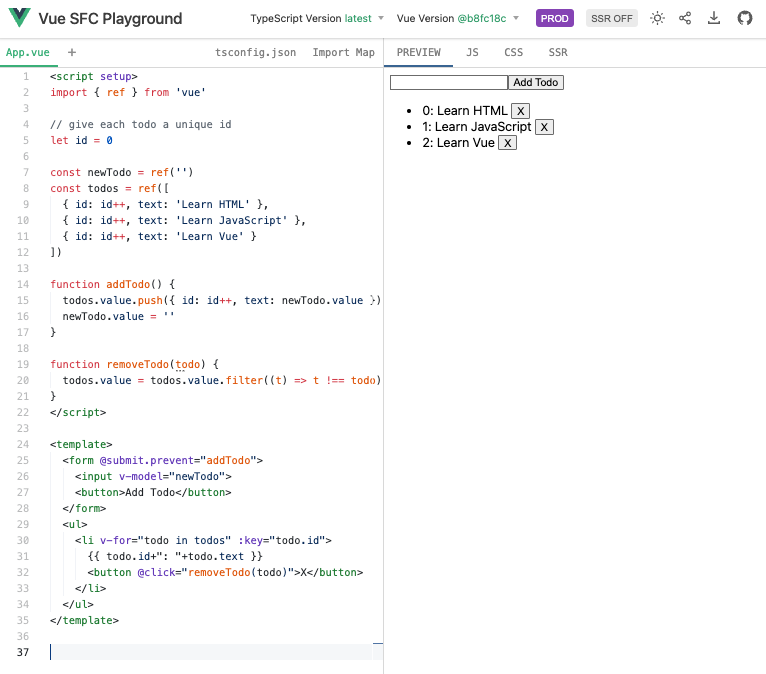
這裡引入了 v-for 的用法
首先 看到<script setup>中,宣告了一個數字變數 id
還有宣告了一個陣列變數 todos,陣列的元素組成是具有2個參數id, text的物件
接著是 function addTodo() 及 function removeTodo(todo)
其中 todos.value.push({ id: id++, text: newTodo.value }) 是加入陣列元素
這裡比較不一樣的是 todos是vue的ref元件,todos.value才是陣列本身,所以加入元素用到的是陣列的功能push()
在加入元素的物件中 有看到 text: newTodo.value,其中 newTodo也是宣告成 字串變數
在這裡要確認一下是
在JS中let newTodo = ''; 是宣告字串變數,可以直接用 newTodo = 'A' 更改內容
但在Vue中const newTodo = ref('') 嚴格來說要看做是宣告字串ref()物件,
所以 newTodo.value才是字串本身,要用 newTodo.value = 'A' 更改內容
另外 在 removeTodo(todo)中
看到 todos.value = todos.value.filter((t) => t !== todo)
todos.value.filter( (t) => t !== todo ) 使用到陣列的filter()功能filter( (t) => t !== todo ) 是指 從todos.value的每個元素中,filter出 除了todo以外的元素,然後再設定回原本的 todos.value,
所以removeTodo(todo)中的todo是要被刪除的元素
接著看到 <template>的部份
<input v-model="newTodo"> 是指 v-model綁定 newTodo<form @submit.prevent="addTodo"> 綁定事件@submit.prevent 到 addTodo
submit.prevent是指停止表單真實送出及更新網頁的動作,單純只是觸發有按下送出按鈕的事件而已
當輸入文字後 newTodo 就更新成輸入的文字了,接著執行 addTodo 的動作
todos.value.push({ id: id++, text: newTodo.value })
其中{ id: id++, text: newTodo.value }
id 指定給todo.id
newTodo.value指定給todo.text
加完新的陣列元素後 再執行 newTodo.value = '' 清除輸入的文字
最後在 v-for的部份
<li v-for="todo in todos" :key="todo.id">
  {{ todo.text }}
  <button @click="removeTodo(todo)">X</button>
</li>
v-for="todo in todos" 將todos中的元素todo都列出來,
其中將 todo.id 綁定到 <li>的屬性 :key
todo.text 綁定到 <li>的內容 {{ todo.text }}
也可改以 加入todo.id 的內容 {{ todo.id+": "+todo.text }}
當按下 <button>時,觸發<form> submit事件,todos就會新增一筆元素,並更新到<li>中
另外在<button @click="removeTodo(todo)">X</button>
因為是在 <li v-for="todo in todos" :key="todo.id"> 內
所以 todo 可以傳送到 removeTodo(todo) 中
這時的 todo 就是for在loop中,當下的 todo
當按下 X <button>時,todos就會傳到 removeTodo(todo) 將該todo從陣列中刪除,並更新到中

接下來是
8. Computed Property
App.vue
<script setup>
import { ref, computed } from 'vue'

let id = 0

const newTodo = ref('')
const hideCompleted = ref(false)
const todos = ref([
  { id: id++, text: 'Learn HTML', done: true },
  { id: id++, text: 'Learn JavaScript', done: true },
  { id: id++, text: 'Learn Vue', done: false }
])

const filteredTodos = computed(() => {
  return hideCompleted.value
    ? todos.value.filter((t) => !t.done)
    : todos.value
})

function addTodo() {
  todos.value.push({ id: id++, text: newTodo.value, done: false })
  newTodo.value = ''
}

function removeTodo(todo) {
  todos.value = todos.value.filter((t) => t !== todo)
}
</script>

<template>
  <form @submit.prevent="addTodo">
    <input v-model="newTodo">
    <button>Add Todo</button>
  </form>
  <ul>
    <li v-for="todo in filteredTodos" :key="todo.id">
      <input type="checkbox" v-model="todo.done">
      <span :class="{ done: todo.done }">{{ todo.text }}</span>
      <button @click="removeTodo(todo)">X</button>
    </li>
  </ul>
  <button @click="hideCompleted = !hideCompleted">
    {{ hideCompleted ? 'Show all' : 'Hide completed' }}
  </button>
</template>

<style>
.done {
  text-decoration: line-through;
}
</style>


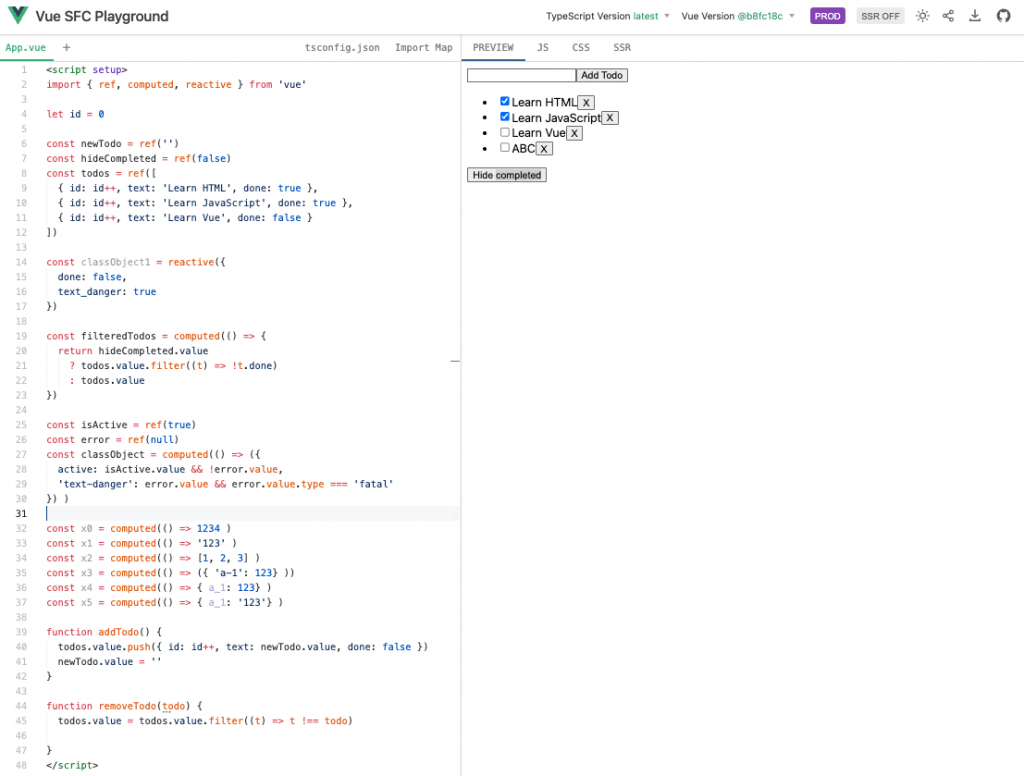
這個範例延續上一個範例
針對增加的部份說明
首先看到新增一個布林變數 const hideCompleted = ref(false)
在 todos 中新增 done:true 的參數
然後是宣告一個變數 filteredTodos
const filteredTodos = computed(() => {
  return hideCompleted.value
    ? todos.value.filter((t) => !t.done)
    : todos.value
})
這裡使用了一個功能 computed() 這個像是一個有回傳值的function
return 值是ideCompleted.value? todos.value.filter((t) => !t.done) : todos.value
如果 ideCompleted.value 為true, 則執行 todos.value.filter((t) => !t.done) 將t.done為false的元素排除後的陣列,並回傳回 filteredTodos
若 ideCompleted.value 為false,則回傳原陣列回 filteredTodos
有點像是 filteredTodos 關連到 computed() 的傳回值
接著是
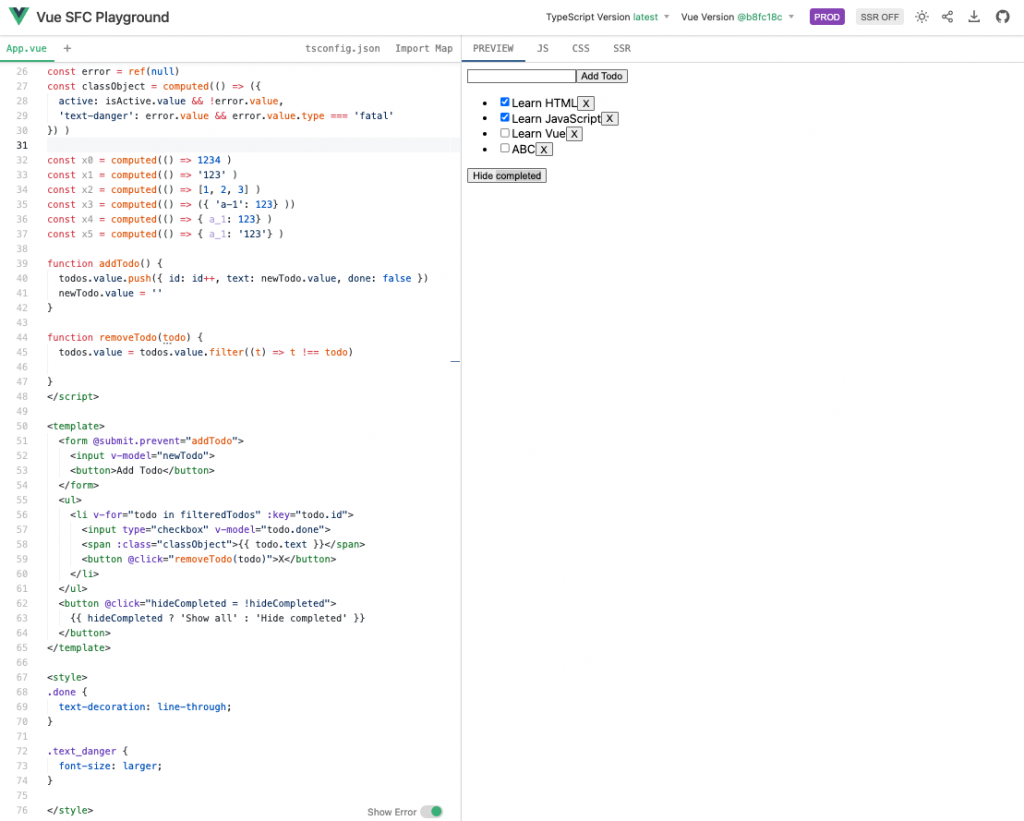
<li v-for="todo in filteredTodos" :key="todo.id">
從 todos 改成 filteredTodos
<input type="checkbox" v-model="todo.done">
checkbox 的 value 綁定v-model到 todo.done,
todo.done 的 true/false 關連到 checkbox是否勾選
<span :class="{ done: todo.done }">{{ todo.text }}</span>
todo.text 綁定到 <span> 的內容{{ todo.text }}{ done: todo.done } 綁定到 <span>的class
其中 根據 todo.done 是true或false來決定 樣式done是否要作用在 <span>上
<style>
.done {
  text-decoration: line-through;
}
</style>
有關 class的綁定方法,可以參考Vue官網的詳細說明
Class and Style Bindings
https://vuejs.org/guide/essentials/class-and-style.html
<div :class="{ active: isActive }"></div>
這個是指 根據 isActive 是true或false來決定 樣式active是否要作用在 上
也可以寫成多個樣式(active, 'text-danger')的設定,
<script setup>
import { ref } from 'vue'

const isActive = ref(true)
const hasError = ref(false)

</script>

<template>
  <div :class="{ active: isActive, 'text-danger': hasError }"></div>
</template>
在此有看到 class名稱 'text-danger' 的寫法,是因為名稱中有出現 '-' 的符號,
要特別寫成 'text-danger',不然就要寫成 textDanger 或是 text_danger
就不用另外加單引號了,
變成
<div :class="{ active: isActive, text_danger: hasError }"></div>
或
<div :class="{ active: isActive, textDanger: hasError }"></div>
除了用 { active: isActive } 語法之外
也可以用宣告變數的方式
<script setup>
import { ref, computed, reactive } from 'vue'

//------- 第1種
const classObject = reactive({
  active: false,
  text_danger: true
})


//------- 第1種
const isActive = ref(true)
const error = ref(null)

const classObject = computed(() => ({
  active: isActive.value && !error.value,
  'text-danger': error.value && error.value.type === 'fatal'
}))

</script>

<template>
  <div :class="classObject"></div>
</template>

<style>
.done {
  text-decoration: line-through;
}

.text_danger {
  font-size: larger;
}

</style>
在上面的computed()中,沒有看到return,主要是 箭頭函式 有幾種語法
原本有return的語法
const classObject = computed(() => { return {
  active: isActive.value && !error.value,
  'text-danger': error.value && error.value.type === 'fatal'
} })
簡約寫法
const classObject = computed(() => ({
  active: isActive.value && !error.value,
  'text-danger': error.value && error.value.type === 'fatal'
}))
以下是一些簡約寫法的範例
const x0 = computed(() => 1234 )
const x1 = computed(() => '123' )
const x2 = computed(() => [1, 2, 3] )
const x3 = computed(() => ({ 'a-1': 123} ))
const x4 = computed(() => { a_1: 123} )
const x5 = computed(() => { a_1: '123'} )
其中 return 是物件時,若 參數名稱是字串('a-1')時, 則需要再加上小括號
像是這樣 computed(() => ({ 'a-1': 123} ))
最後是
<button @click="hideCompleted = !hideCompleted">
  {{ hideCompleted ? 'Show all' : 'Hide completed' }}
</button>
@click事件 關連到 toogle 切換hideCompleted變數
同時 根據hideCompleted 切換不同的內容 {{ hideCompleted ? 'Show all' : 'Hide completed' }}
