如同前面說的,我們先來幫開發人員在開發階段,可以不用再去打開遠端桌面連線,把自己電腦的東西往伺服器放了,而且也不用用電話或是email的方式去跟需求人員告知已經可以驗證了。
目標就是,只讓開發人員接觸到開發工具、Git以及Azure DevOps Service,電話out、email out。
這次的用來作範例的,就是一個.net framework 4.8的網站,我們透過hosted pipeline 幫我們把程式碼丟上去進行編譯後,把產物打包回來。
讓我們來看看下面的yaml的分段解說。
# ASP.NET
# Build and test ASP.NET projects.
# Add steps that publish symbols, save build artifacts, deploy, and more:
# https://docs.microsoft.com/azure/devops/pipelines/apps/aspnet/build-aspnet-4


resources:
 repositories:
  - repository: mysite
    type: git
    name: mysite/mysite #敘明我要抓source code 的repo
    ref: develop #敘明要抓develop這個branch 的head
    trigger:
      branches:
        include:
          - develop  #mysite 的develop branch 會發動
          - pipeline #mysite 的pipeline branch是給pipeline 這邊用來實驗的

trigger:
- pipeline_test #因為有Bug,所以限制pipeline repo的branch 除了main以外,都要帶pipeline的前綴

pool:
  vmImage: 'windows-latest'  #hosted pipeline要用的image
variables:
  solution: 'SourceCode/mysite/mysite.sln'
  buildPlatform: 'Any CPU'
  buildConfiguration: 'Release'

stages:
- stage: 'Build'
  displayName: 'Build'
  jobs:
     - job:
       steps:
        - checkout: mysite
        - task: printAllVariables@1  #習慣性把所有變數印出來
          displayName: 'Print all variables'
        - task: NuGetToolInstaller@1

        - task: NuGetCommand@2  #restore solition
          inputs:
            restoreSolution: '$(solution)'

        - task: VSBuild@1  # 編譯的作業
          inputs:
           solution: '$(solution)'
           msbuildArgs: '/p:DeployOnBuild=true /p:DeployOnBuild=true /p:PublishProfile=FolderProfile.pubxml'
           platform: '$(buildPlatform)'
           configuration: '$(buildConfiguration)'
        - task: ArchiveFiles@2 #將編譯後的產物,打包成zip
          displayName: '封存 $(Build.ArtifactStagingDirectory)\mysite'
          inputs:
            rootFolderOrFile: '$(Build.ArtifactStagingDirectory)\mysite'
            includeRootFolder: false
        - task: PublishBuildArtifacts@1 #將zip傳到pipeline artifact
          displayName: '發行成品: drop'
          inputs:
            PathtoPublish: '$(Build.ArtifactStagingDirectory)/$(Build.BuildId).zip'
到此為止,我們一個CI Build的過程基本已經成形,我們把程式碼給進行編譯後,把產物丟到了pipeline artifact中,所以來看看跑起來的成果。
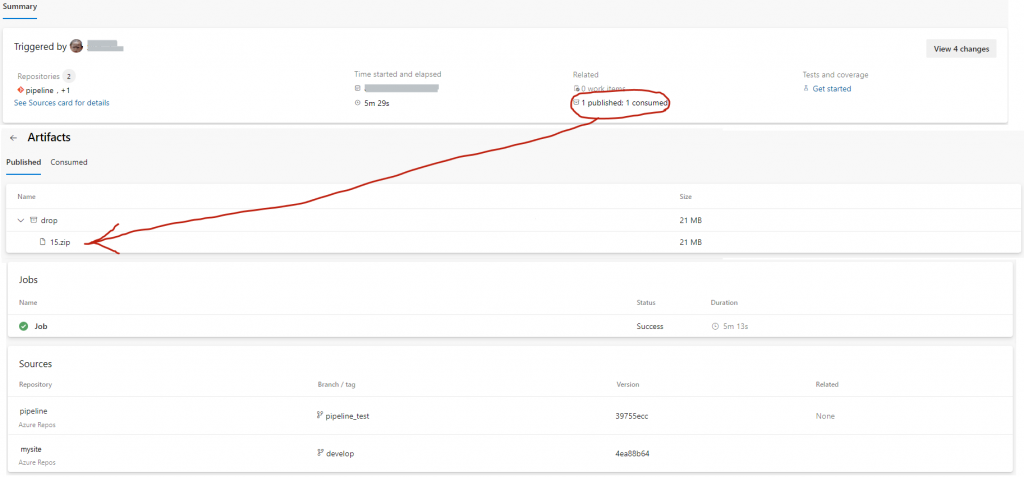
可以看到,撰寫的yaml 在hosted pipeline建置成功,同樣的解說一下:
今天寫很多了,明天再來寫 cd的部分。
寫yaml跟寫程式一樣,完成某件任務,都會有那種小小的成就感


 iThome鐵人賽