準備物品:在 arts 資料夾下新建 backgrounds 資料夾,裏面放入和昨天設定畫面大小相同的背景圖數個(這裡以三個為例)
介紹 ParallaxBackground
A node used to create a parallax scrolling background.
A ParallaxBackground uses one or more ParallaxLayer child nodes to create a parallax effect. Each ParallaxLayer can move at a different speed using ParallaxLayer.motion_offset. This creates an illusion of depth in a 2D game. If not used with a Camera2D, you must manually calculate the scroll_offset.
這個節點可以將一或多個 ParallaxLayer 子節點做出視差的效果(近快遠慢),實現方式是透過每個子節點設置的移動速度來產生。
介紹 ParallaxLayer
A parallax scrolling layer to be used with ParallaxBackground.
A ParallaxLayer must be the child of a ParallaxBackground node. Each ParallaxLayer can be set to move at different speeds relative to the camera movement or the ParallaxBackground.scroll_offset value.
This node's children will be affected by its scroll offset.
這個節點必須存在於 ParallaxBackground 之下,透過設置不同的速度實現視差。
開啟昨天的專案,現在新增一個 ParallaxBackground 節點,作為背景場景的根節點。
因為這次要實現的效果是背景持續往下滾動且無限的循環,所以我們需要建立兩個 ParallaxLayer 讓這兩個 layer 交替出現;同時,這兩個 layer 下各自分別加入 Sprite2D 讓我們放真正的背景材質。
# 架構如下
|--ParallaxBackground
|   |--ParallaxLayer2
|   |   |--Sprite2D
|   |
|   |--ParallaxLayer
|   |   |--Sprite2D
這裡先將圖片放到 Sprite2D 中,播放的話會發現我們的背景沒有完全在播放的範圍(藍線)裏面,所以現在我們調整 ParallaxBackground 的 Transform 的 offset,x 軸往右寬度的一半、y 軸往下高度的一半對齊顯示畫面。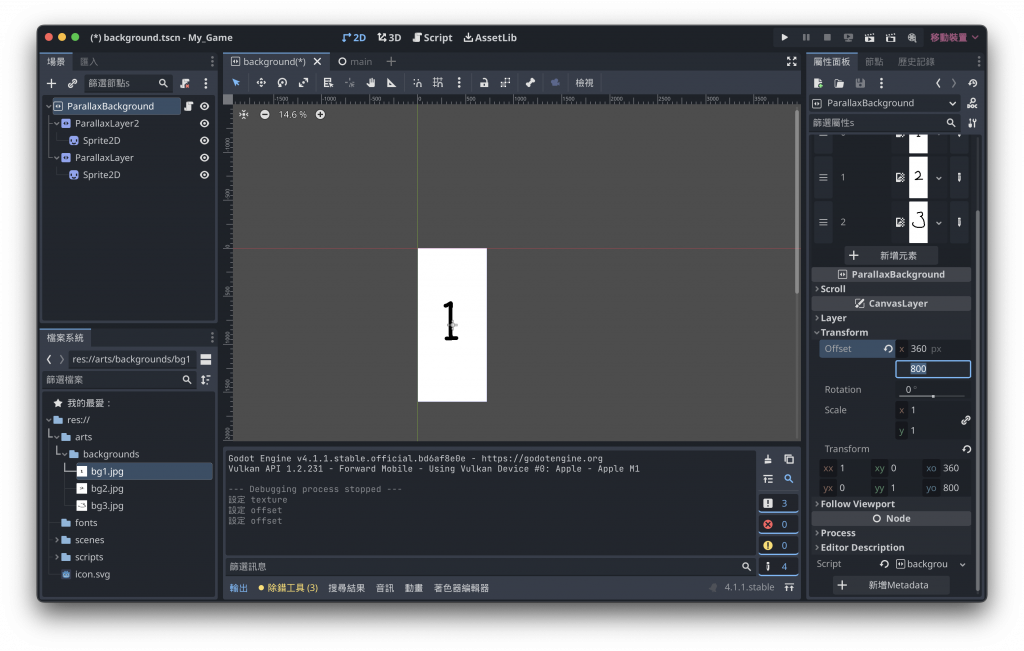
現在播放時可以正常地顯示背景圖。
開始編輯我們的程式
# 先宣告我們需要用到的兩個 layer 以及畫面高度
var background1:ParallaxLayer
var background2:ParallaxLayer
var viewpoint_height:float
# Called when the node enters the scene tree for the first time.
func _ready():
    # 取得高度
    viewpoint_height = get_viewport().size.y
    # 從場景拖曳兩個 layer 到程式碼內取得 reference
    background1 = $ParallaxLayer
    background2 = $ParallaxLayer2
    # 因為我們要做循環播放所以先將第二個背景往上方移動背景高度的距離,接在背景一上。
    background2.set_motion_offset(Vector2(0, -viewpoint_height))
示意圖,因為是用程式更動在畫面上不會看到。
2. 建構滾動方法
# 暴露一個放置所有候選背景的陣列及一個速度
@export var randomBackground:Array
@export var speed: float = 500
# 建立方法,接收 ParallaxLayer 作為輸入
func scroll_background(layer:ParallaxLayer):
    # 取得目前的位移
    var offset = layer.get_motion_offset()
    # 取得下一個目標位移
    offset.y += speed * get_process_delta_time()
    # 如果位移超過畫面高度
    if offset.y >= viewpoint_height:
    # 隨機在 Array 中取得一個元素作為背景的圖設置到 Sprite2D 上。
        layer.get_node("Sprite2D")\
        .set_texture(randomBackground[randi()%randomBackground.size()])
        # 超過時(離開畫面底部)我們往上兩倍高度的距離接回另一張圖上,無縫接軌。
        offset.y = offset.y - viewpoint_height*2
    # 確認好位置後真正設置到 layer 上
    layer.set_motion_offset(offset)
|流程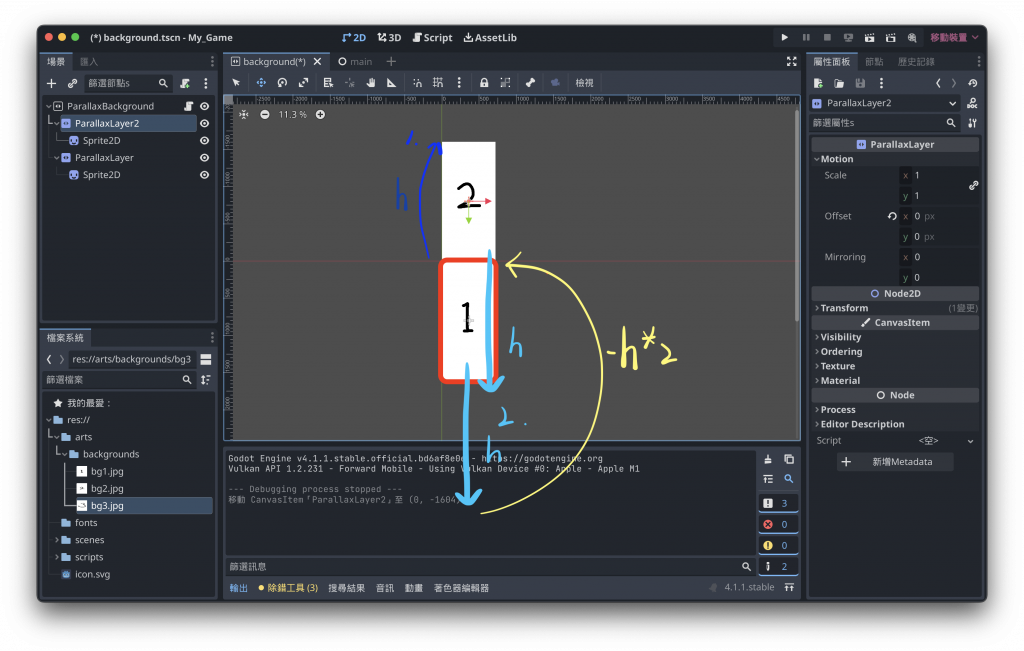
其中這邊是透過取餘數的方式讓隨機產生的整數可以限縮在陣列大小中。
例如randi() 得到是 8,8 % 3 = 2,此時便會取陣列中 index = 2 的元素作使用,即randomBackground[2]。
randi()%randomBackground.size()
將所有背景圖片放到暴露出來的陣列中
指定陣列大小符合我們準備的背景數量。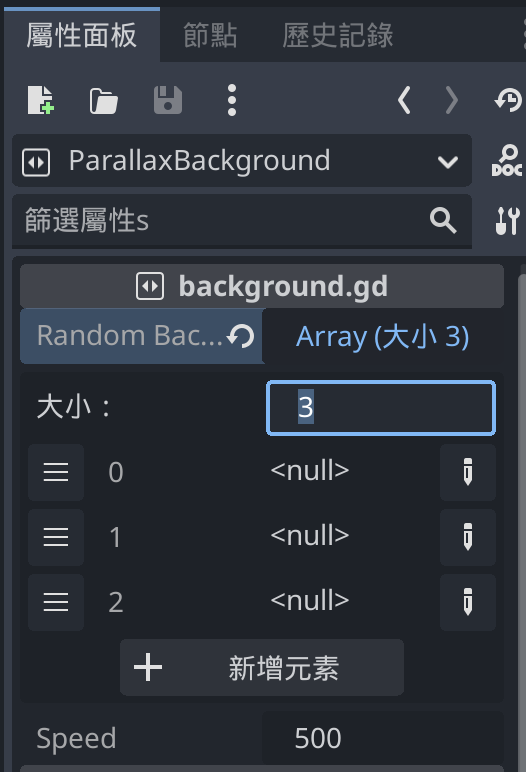
點擊右邊的筆選擇 Object 類別。
將準備的背景圖片都放入,這樣在程式碼中就可以透過陣列的 index 取得元素。
場景存到 scenes 資料夾中,完成背景場景。
程式碼在 scripts 資料夾中。
(最後我重新命名了我們的兩個 layer Node,場景和程式碼都要改方便未來查詢)
完整檔案
extends ParallaxBackground

@export var randomBackground:Array
@export var speed: float = 500

var background1:ParallaxLayer
var background2:ParallaxLayer
var viewpoint_height:float
# Called when the node enters the scene tree for the first time.
func _ready():
	viewpoint_height = get_viewport().size.y
    # 因為重新命名場景中節點的名字,所以這邊也要修改
	background1 = $DynamicBG1
	background2 = $DynamicBG2
	background2.set_motion_offset(Vector2(0, -viewpoint_height))

# Called every frame. 'delta' is the elapsed time since the previous frame.
func _process(delta):
	scroll_background(background1)
	scroll_background(background2)

func scroll_background(layer:ParallaxLayer):
	var offset = layer.get_motion_offset()

	offset.y += speed * get_process_delta_time()

	if offset.y >= viewpoint_height:
		layer.get_node("Sprite2D")\
		.set_texture(randomBackground[randi()%randomBackground.size()])
		offset.y = offset.y - viewpoint_height*2

	layer.set_motion_offset(offset)
:)