藍隊守則小提醒
沒有Alert通知的監控,是一個不完整的監控機制
雖然Wazuh Dashboard那個alert卻是也是alert(?
但不太會有人整天盯著那個dashboard
好一點的方式,是進一步把重視的Alert等級提升
當符合特定等級,然後發送到我們常看的通訊媒體上面
例如信件、Telegram ...
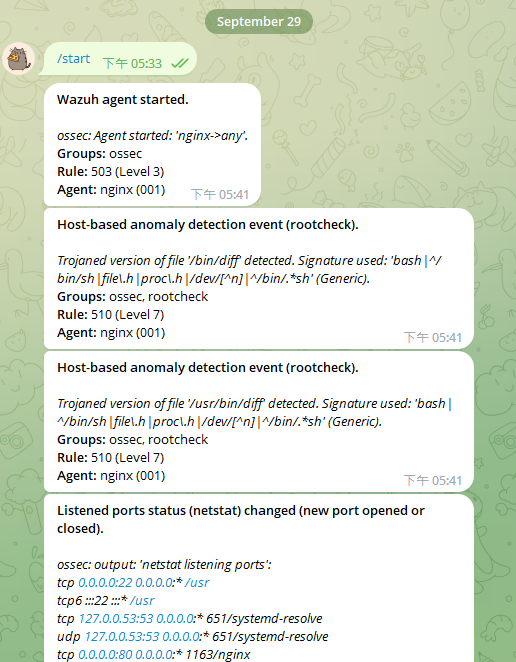
今天的內容雖然是設定整合將Wazuh的alert發送到Teltgram
不過實際上,其實不管是 Discord、Google Chat、Slack、Line 諸如此類的
都是可以參照相同模式進行,主要就是改一下 hook 的 URL
還有注意一下格式跟內容過濾就是了(不同軟體,遇到一些特殊字元可能會失敗)
這邊內容是參考以下文章
腳本就是他寫的
https://medium.com/@jesusjimsa_12801/integrating-telegram-with-wazuh-4d8db91025f
安裝所需要的環境
進入容器內
docker exec -it single-node_wazuh.manager_1 bash
在容器內安裝需要的環境
apt update
apt install python3-pip -y
pip3 install requests
取得Telegram的HOOK URL
跟BotFather機器人聊天
照順序輸入
/newbot
輸入唯一的名稱
就會得到一串token
把它記下來
6627xxxxxx:xxxxxxxxx-xxxxxxxxhAzzvf-B2a3FUBa4
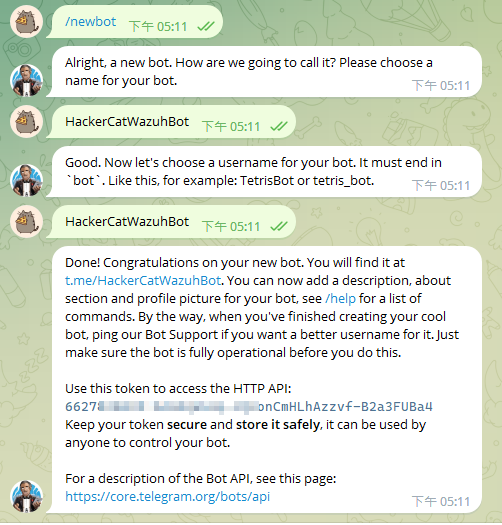
這一串就是我們專屬的token
可以訪問以下的URL
https://api.telegram.org/bot<YOUR-BOT-TOKEN>/getUpdates
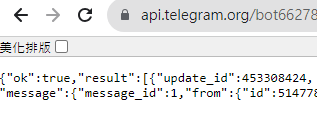
chat欄位底下有一個id
記下那個值
就是等一下會用到的chat_id
51477xxxx
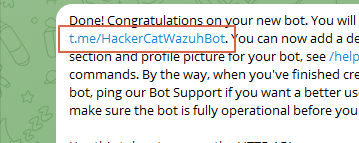
這邊注意一下
跟BotFather聊天得到Token之後
你要開啟你得到的機器人的聊天室
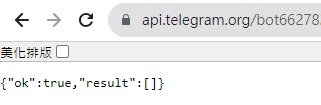
如果你沒開啟的話
你訪問以下網址的時候
https://api.telegram.org/bot<YOUR-BOT-TOKEN>/getUpdates
會得到空白的內容
撰寫腳本
腳本的路徑如下
# 容器內的路徑
/var/ossec/integrations
# 主機內對應的路徑
/var/lib/docker/volumes/single-node_wazuh_integrations/_data
因為容器內沒有vim
我們在本機上寫
(當然你也可以在容器內安裝vim)
vim /var/lib/docker/volumes/single-node_wazuh_integrations/_data/custom-telegram
腳本內容如下
記得替換CHAT_ID
#!/usr/bin/env python3
# -*- coding: utf-8 -*-

import sys
import json

try:
    import requests
except Exception:
    print("No module 'requests' found. Install: pip3 install requests")
    sys.exit(1)

CHAT_ID = "51477xxxx"

def create_message(alert_json):
    # Get alert information
    title = alert_json['rule']['description'] if 'description' in alert_json['rule'] else ''
    description = alert_json['full_log'] if 'full_log' in alert_json else ''
    description.replace("\\n", "\n")
    alert_level = alert_json['rule']['level'] if 'level' in alert_json['rule'] else ''
    groups = ', '.join(alert_json['rule']['groups']) if 'groups' in alert_json['rule'] else ''
    rule_id = alert_json['rule']['id'] if 'rule' in alert_json else ''
    agent_name = alert_json['agent']['name'] if 'name' in alert_json['agent'] else ''
    agent_id = alert_json['agent']['id'] if 'id' in alert_json['agent'] else ''

    # Format message with markdown
    msg_content = f'*{title}*\n\n'
    msg_content += f'_{description}_\n'
    msg_content += f'*Groups:* {groups}\n' if len(groups) > 0 else ''
    msg_content += f'*Rule:* {rule_id} (Level {alert_level})\n'
    msg_content += f'*Agent:* {agent_name} ({agent_id})\n' if len(agent_name) > 0 else ''

    msg_data = {}
    msg_data['chat_id'] = CHAT_ID
    msg_data['text'] = msg_content
    msg_data['parse_mode'] = 'markdown'

    # Debug information
    with open('/var/ossec/logs/integrations.log', 'a') as f:
        f.write(f'MSG: {msg_data}\n')

    return json.dumps(msg_data)

# Read configuration parameters
alert_file = open(sys.argv[1])
hook_url = sys.argv[3]

# Read the alert file
alert_json = json.loads(alert_file.read())
alert_file.close()

# Send the request
msg_data = create_message(alert_json)
headers = {'content-type': 'application/json', 'Accept-Charset': 'UTF-8'}
response = requests.post(hook_url, headers=headers, data=msg_data)

# Debug information
with open('/var/ossec/logs/integrations.log', 'a') as f:
    f.write(f'RESPONSE: {response}\n')

sys.exit(0)
配置腳本以及Wazuh的設定
把上面腳本內容寫入 custom-telegram
chmod 750 /var/ossec/integrations/custom-telegram
chown root:wazuh /var/ossec/integrations/custom-telegram
接著修改ossec.conf
指向到我們剛剛寫的腳本名稱
然後這篇配置我們的Hook URL
記得替換
然後因為測試使用
我們設定等級為3
實際上在正式使用時,建議依需求調整
<ossec_config>
    <integration>
        <name>custom-telegram</name>
        <hook_url>https://api.telegram.org/bot<YOUR-BOT-TOKEN>/sendMessage</hook_url>
        <alert_format>json</alert_format>
        <level>3</level>
    </integration>
</ossec_config>
重啟一下wazuh server
sudo docker restart single-node_wazuh.manager_1
就會生效了