接續昨天,今天要來講k8s的另一個資源型態--Deployment
我們在講的Application 其實都是指Deployment,Deployment這個資源可以幫我們做到自動佈署一個容器應用的多個備份,他會持續監控容器的數量,當低於指定的備份數量時,就會自動創建,保證我們容器運行的數量。
那來看一下怎麼撰寫吧
apiVersion: apps/v1
kind: Deployment
metadata:
  name: spring-boot-itdemo
spec:
  replicas: 1
  selector:
    matchLabels:
      app: spring-boot-itdemo
  template:
    metadata:
      labels:
        app: spring-boot-itdemo
    spec:
      containers:
        - name: spring-boot-itdemo
          image: spring-boot-itdemo:latest
          ports:
            - containerPort: 8080
          env:
            - name: SPRING_DATASOURCE_URL
              value: jdbc:postgresql://db:5432/postgres
            - name: SPRING_DATASOURCE_USERNAME
              value: postgres
            - name: SPRING_DATASOURCE_PASSWORD
              value: postgres
介紹過的就不贅述了,這裡的新面孔有
replicas:這就是我們指定的服務備分數量,根據此設定,若有少的話Deployment會自己幫忙補上
selector:告訴Deployment要補上的container是誰。
template:撰寫此Deployment的運行內容,跟之前撰寫的Pod內容幾乎相同。
建好Deployment後,可以發現,我們還有資料庫要進行溝通,講到溝通就可以想到Service,因此我們今天還要來講一下預設的Service模式--ClusterIP
簡單來說ClusterIP提供的是集群內部的服務的溝通橋樑,集群內的Pod可以透過它互相訪問,集群外部則無法。
來看一下怎麼建立ClusterIP的Service
apiVersion: v1
kind: Service
metadata:
  name: spring-boot-itdemo
spec:
  selector:
    app: spring-boot-itdemo
  ports:
    - protocol: TCP
      port: 8080
      targetPort: 8080
這樣在集群內,8080就可以透過這個Service連接到了
最後附上完整的yml檔
apiVersion: apps/v1
kind: Deployment
metadata:
  name: postgresql
spec:
  replicas: 1
  selector:
    matchLabels:
      app: postgresql
  template:
    metadata:
      labels:
        app: postgresql
    spec:
      containers:
        - name: postgresql
          image: postgres:15.2-alpine
          ports:
            - containerPort: 5432
          env:
            - name: POSTGRES_PASSWORD
              value: postgres
            - name: POSTGRES_DB
              value: postgres

---
apiVersion: apps/v1
kind: Deployment
metadata:
  name: spring-boot-itdemo
spec:
  replicas: 1
  selector:
    matchLabels:
      app: spring-boot-itdemo
  template:
    metadata:
      labels:
        app: spring-boot-itdemo
    spec:
      containers:
        - name: spring-boot-itdemo
          image: allenku0/spring-boot-itdemo
          ports:
            - containerPort: 8080
          env:
            - name: SPRING_DATASOURCE_URL
              value: jdbc:postgresql://db:5432/postgres
            - name: SPRING_DATASOURCE_USERNAME
              value: postgres
            - name: SPRING_DATASOURCE_PASSWORD
              value: postgres

---

apiVersion: v1
kind: Service
metadata:
  name: db
spec:
  selector:
    app: postgresql
  ports:
    - protocol: TCP
      port: 5432
      targetPort: 5432

---

apiVersion: v1
kind: Service
metadata:
  name: spring-boot-itdemo
spec:
  selector:
    app: spring-boot-itdemo
  ports:
    - protocol: TCP
      port: 8080
      targetPort: 8080
apiVersion: v1
kind: Service
metadata:
  name: spring-boot-itdemo-service
spec:
  selector:
    app: spring-boot-itdemo
  type: NodePort
  ports:
    - name: http
      protocol: TCP
      port: 80
      targetPort: 8080
      nodePort: 30391
以上 apply 後,即可完成佈署。看一下成果
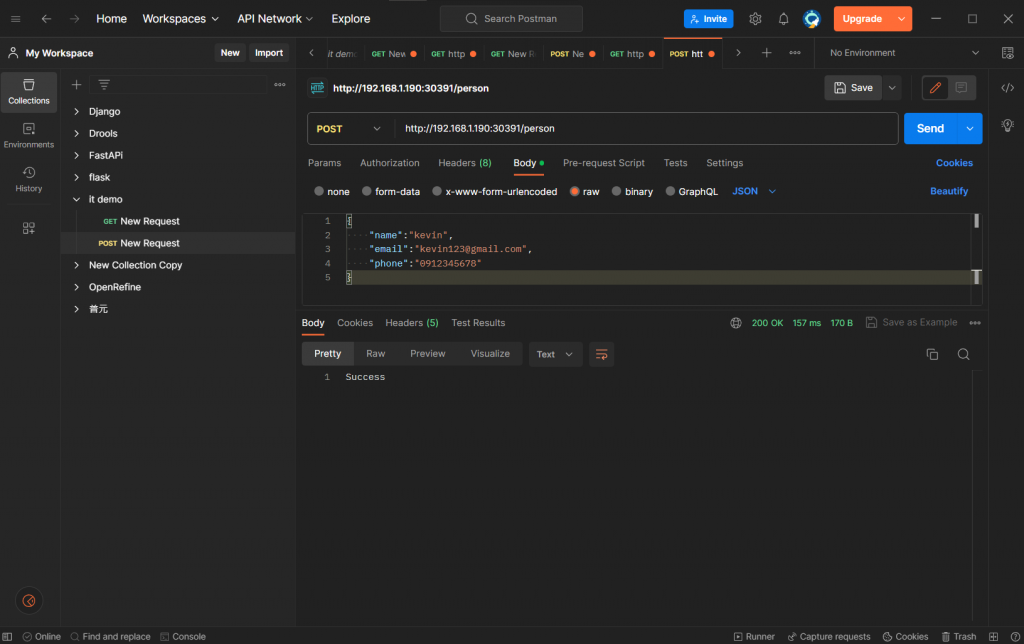

以上是我整套的從專案建置->打包Docker->佈上k8s的流程,希望能幫助到看文章的你
今天這這樣了喔,大家掰掰~


 iThome鐵人賽