今天要來介紹 Django 的登入系統,登入系統的原理是用 session 機制,這邊就不特別介紹了,提供原文連結讓大家看:
https://developer.mozilla.org/en-US/docs/Learn/Server-side/Django/Sessions
下面我們直接進行操作
Django 有提供很方便的 註冊/登入 系統模版,而我們早在執行 django-admin startproject store 這個指令的時候,就已經幫我們順便建立好了,很方便吧!
我們現在來看一下登入系統程式碼有哪些:
# store/store/setting.py

INSTALLED_APPS = [
    # …
    'django.contrib.auth',  # Core authentication framework and its default models.
    'django.contrib.contenttypes',  # Django content type system (allows permissions to be associated with models).
    # …
]
MIDDLEWARE = [
    # …
    'django.contrib.sessions.middleware.SessionMiddleware',  # Manages sessions across requests
    # …
    'django.contrib.auth.middleware.AuthenticationMiddleware',  # Associates users with requests using sessions.
    # …
]
進到 store/store/setting.py 檔案後,會發現這兩段已經存在了,就是因為當初我們用指令快速產生的。
並且不知道你們還記不記得,當初我們在第一次下 python manage.py migrate 這個指令的時候,有很多的訊息產生,忘記得話可以回到 DAY4 觀看,不過我這邊也會再寫一次~
$ python3 manage.py migrate

------
Operations to perform:
  Apply all migrations: admin, auth, contenttypes, sessions
Running migrations:
  Applying contenttypes.0001_initial... OK
  Applying auth.0001_initial... OK
  Applying admin.0001_initial... OK
  Applying admin.0002_logentry_remove_auto_add... OK
  Applying admin.0003_logentry_add_action_flag_choices... OK
  Applying contenttypes.0002_remove_content_type_name... OK
  Applying auth.0002_alter_permission_name_max_length... OK
  Applying auth.0003_alter_user_email_max_length... OK
  Applying auth.0004_alter_user_username_opts... OK
  Applying auth.0005_alter_user_last_login_null... OK
  Applying auth.0006_require_contenttypes_0002... OK
  Applying auth.0007_alter_validators_add_error_messages... OK
  Applying auth.0008_alter_user_username_max_length... OK
  Applying auth.0009_alter_user_last_name_max_length... OK
  Applying auth.0010_alter_group_name_max_length... OK
  Applying auth.0011_update_proxy_permissions... OK
  Applying auth.0012_alter_user_first_name_max_length... OK
  Applying sessions.0001_initial... OK
可以發現裡面幾乎都是 auth 開頭的訊息,這些訊息主要就是在幫你建立登入的 table 表單 和 permissions 權限 一些設定
我們前面已經有一個超級使用者的帳號,但是今天如果你讓客戶使用該網站的話,不可能每一個都是超級使用者,一定是分有層級的,所以我們現在要新增一個無法進入 admin 後台的使用者。
而我們現在先使用 Django admin 後台來新增:
輸入帳號密碼後進入後台
點擊新增 Groups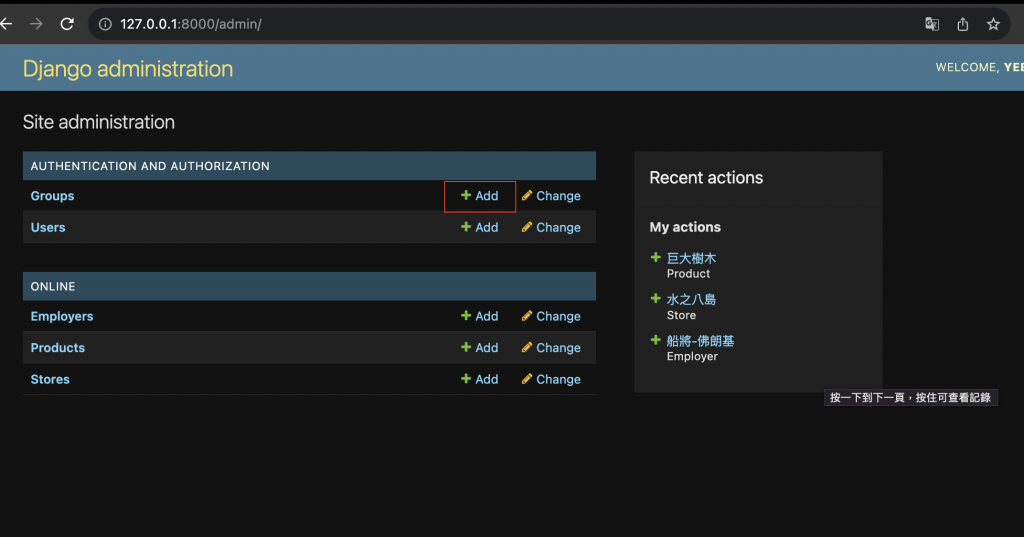
寫上名字後,不用新增權限,直接按儲存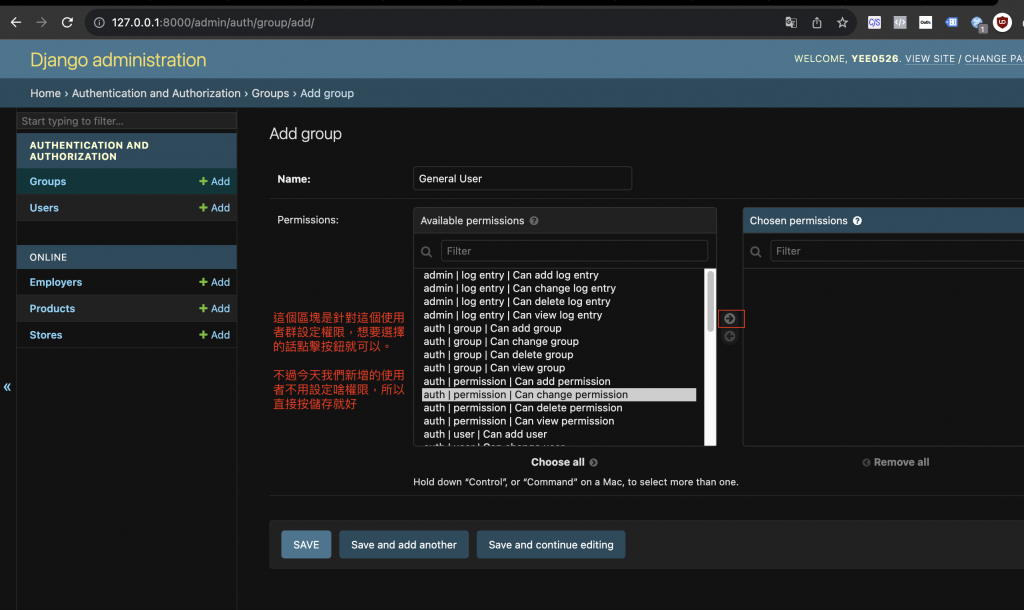
點擊新增 Users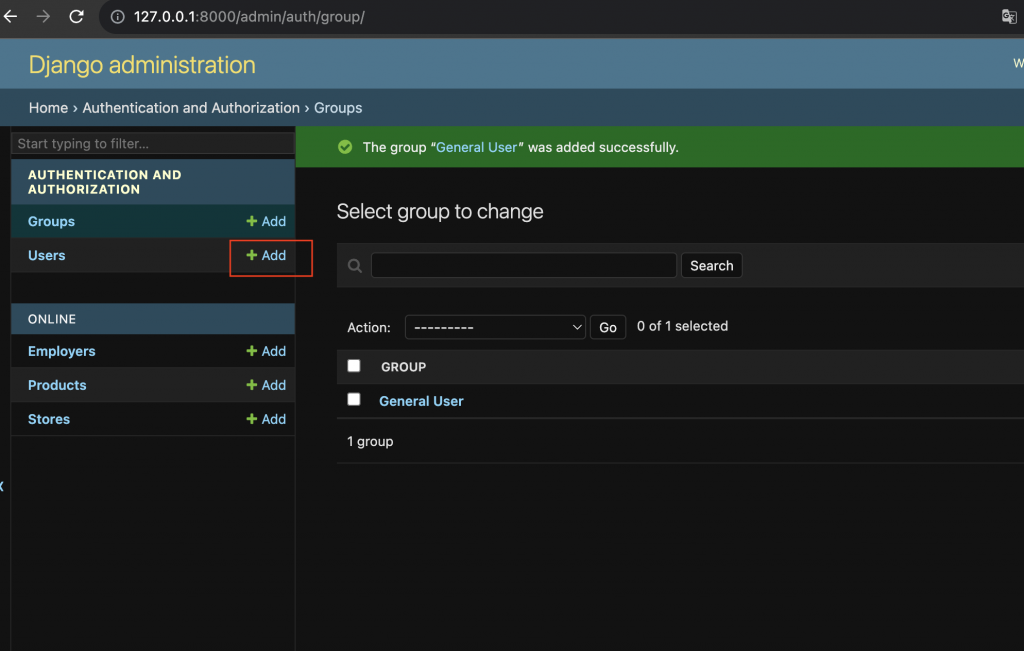
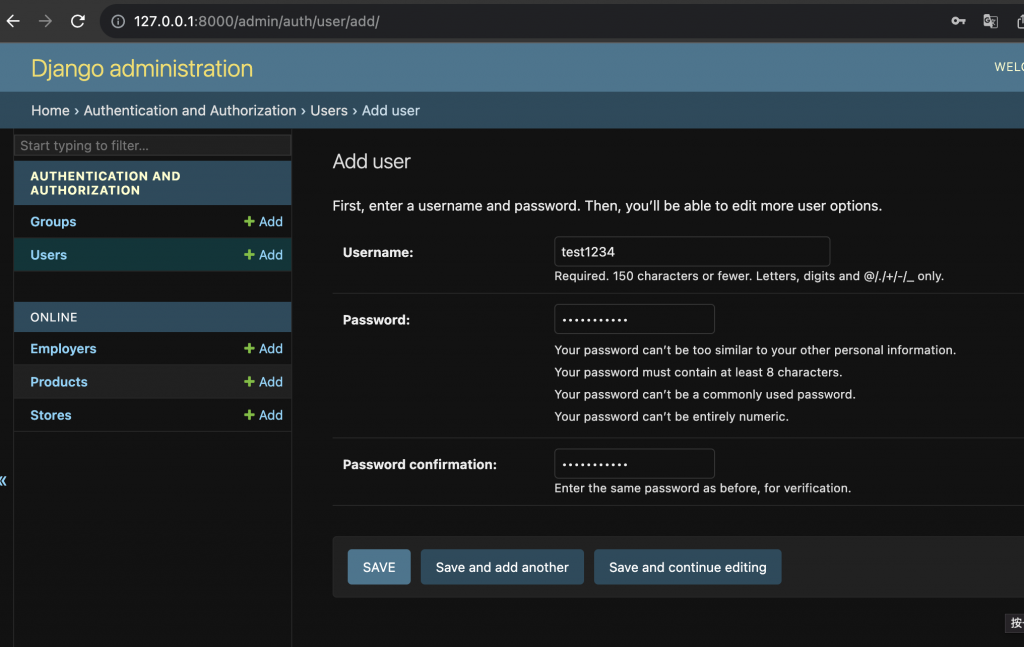
輸入帳號密碼
成功註冊後,會自動跳到個人資訊頁
補上個人資訊(姓名、信箱)、新增使用者的 Groups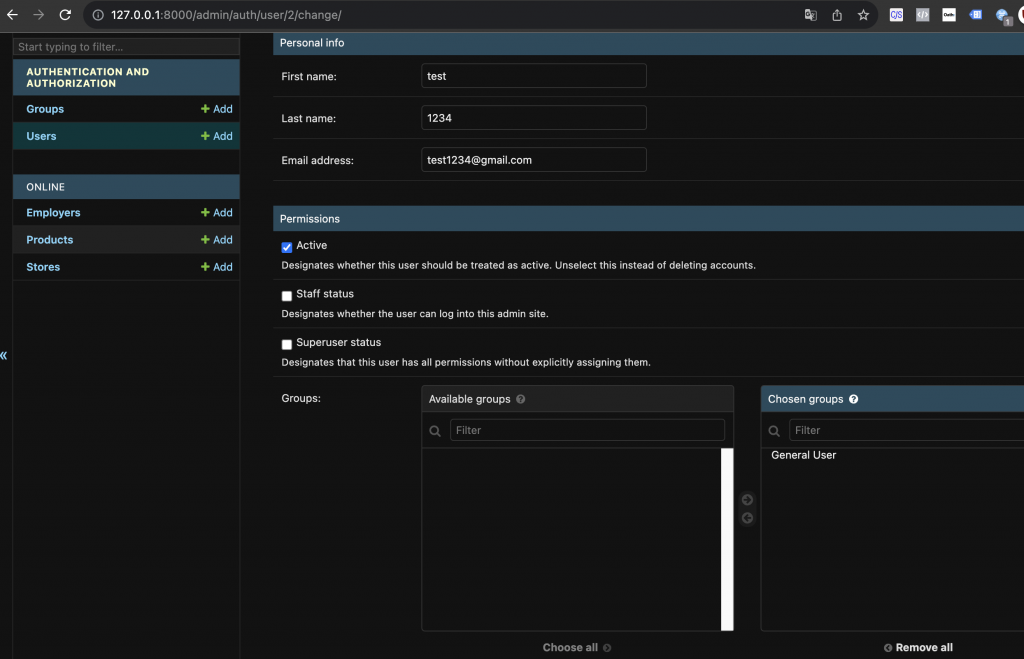
最後儲存成功看到完成新增使用者

剛剛我們已經新增一個權限沒有這麼高的使用者了,我們現在把網站的登陸系統完成,首先當然是 路徑:
# store/store/urls.py

urlpatterns += [
    path('accounts/', include('django.contrib.auth.urls')),
]
Ps. 這邊的資料夾要注意喔,不是 store/online/urls.py,是 store/store/urls.py
這邊新增好後,我們到瀏覽器輸入這個連結 http://127.0.0.1:8000/accounts/,會看到以下畫面:
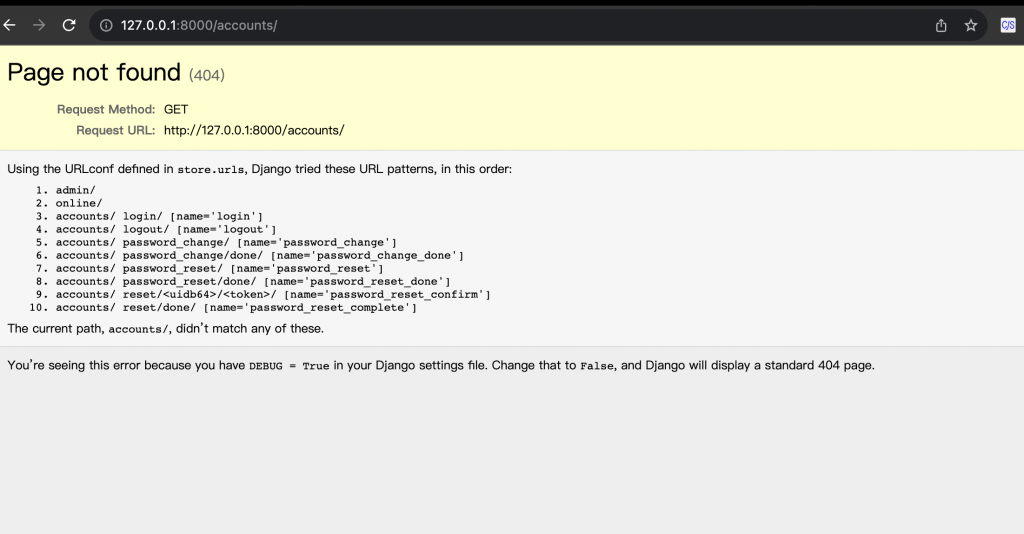
可以發現雖然是一個錯誤的資訊,像是以下:
admin/
online/
accounts/ login/ [name='login']
accounts/ logout/ [name='logout']
accounts/ password_change/ [name='password_change']
accounts/ password_change/done/ [name='password_change_done']
accounts/ password_reset/ [name='password_reset']
accounts/ password_reset/done/ [name='password_reset_done']
accounts/ reset/<uidb64>/<token>/ [name='password_reset_confirm']
accounts/ reset/done/ [name='password_reset_complete']
但是這些錯誤其實就是說,Django 已經幫你建置好這些路徑了:
http://127.0.0.1:8000/accounts/login/
http://127.0.0.1:8000/accounts/logout/
http://127.0.0.1:8000/accounts/password_change/
http://127.0.0.1:8000/accounts/password_change/done/
http://127.0.0.1:8000/accounts/password_reset/
http://127.0.0.1:8000/accounts/password_reset/done/
http://127.0.0.1:8000/accounts/reset/<uidb64>/<token>/
http://127.0.0.1:8000/accounts/reset/done/
所以我們現在連到此網址 http://localhost:8000/accounts/login ,但是他會顯示下面裡個錯誤,也就是說我們還沒建置好 templates 頁面,因此我們來補完。
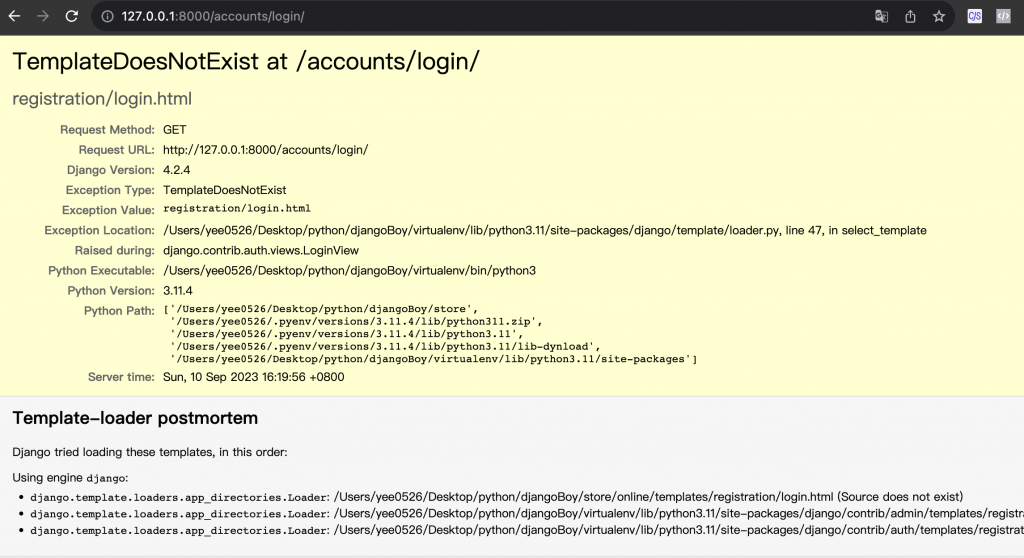
Exception Type:    TemplateDoesNotExist
Exception Value:    registration/login.html
依照上面的錯誤訊息,我們要新增一個 registration 資料夾和 login 檔案,這個 templates 資料夾,是跟 catalog 同層級喔,千萬要記得不要加在 online 資料夾 裡面的 templates 裡面: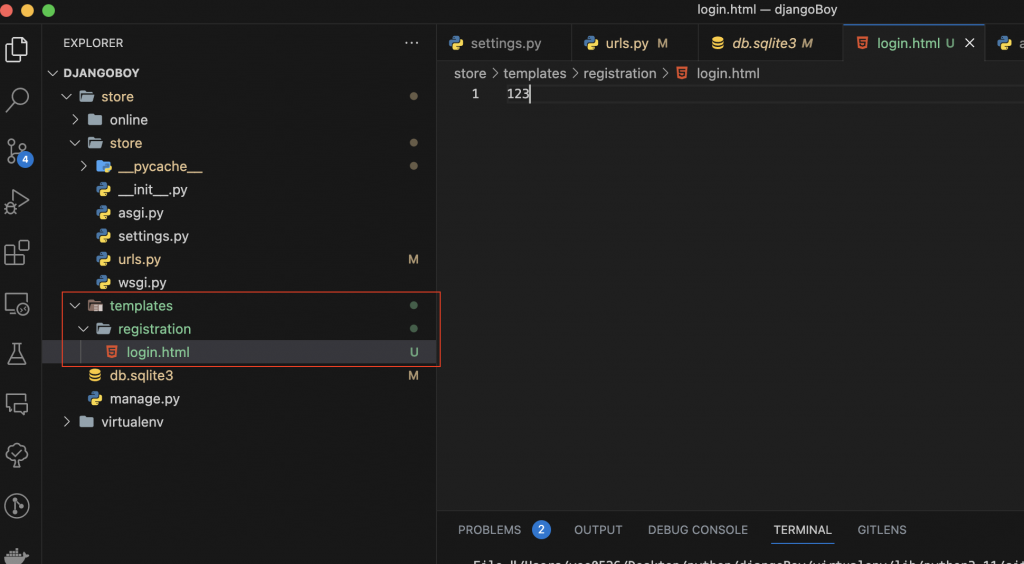
<!-- store/templates/registration/login.html -->

123
不過你這樣新增完後,會發現畫面上還是說 templates 錯誤,這是為什麼呢?原因是因為下面在 settings 資料中,有設定以下程式關係:
# store/settings.py

TEMPLATES = [
    {
        ...
        'DIRS': [],
        'APP_DIRS': True,
        ...
    }
]
預設情況下,系統會自動搜索 子類應用程式 中的 templates 資料夾,也就是 online 應用程式中的 templates 資料夾,那我們要怎麼改成讓 Django 搜索 根目錄的 templates 呢?
很間單,照下面這樣設定就可以:
# store/settings.py

TEMPLATES = [
    {
        ...
        'DIRS': ['./templates',],
        'APP_DIRS': True,
        ...
    }
]
這樣修改完後,我們再看一下瀏覽器的連結 http://127.0.0.1:8000/accounts/login/:
可以發現這樣就成功印出 123
不過登入頁面不可能只有 123 字串,我們來補上登入頁面的詳細資訊:
next變數 是什麼下面會解釋method方法 要用 post、action 要用 login
<!-- online/templates/registration/login.html -->

{% extends "sidebar.html" %}

{% block content %}

  {% if form.errors %}
    <p>使用者的名稱和密碼錯誤,請再輸入一次</p>
  {% endif %}

  {% if next %}
    {% if user.is_authenticated %}
      <p>您的帳戶無權訪問此頁面,要繼續,請使用有權訪問的帳戶登錄</p>
    {% else %}
      <p>請登錄</p>
    {% endif %}
  {% endif %}


  <form method="post" action="{% url 'login' %}">
    {% csrf_token %}
    <table>
      <tr>
        <td>{{ form.username.label_tag }}</td>
        <td>{{ form.username }}</td>
      </tr>
      <tr>
        <td>{{ form.password.label_tag }}</td>
        <td>{{ form.password }}</td>
      </tr>
    </table>
    <input type="submit" value="login">
    <input type="hidden" name="next" value="{{ next }}">
  </form>

  <!-- Assumes you setup the password_reset view in your URLconf -->
  <p><a href="{% url 'password_reset' %}">忘記密碼</a></p>

{% endblock %}
next 變數是啥
在 Django 中,next 是一個用於處理跳轉的變數。當用戶試圖訪問需要登入的頁面,但他們尚未登入時,Django 會將用戶重定向到登入頁面。
如果原始請求需要特定的頁面(即需要跳轉到某個特定頁面),Django 會將這個頁面的 URL 添加到 next 變數中。
ex. 假設你先到這個頁面http://localhost:8000/online/employers,不過這個頁面需要登入的話,Django 會先幫你重定向到 login 頁面,此時就會把http://localhost:8000/online/employers存在 next 變數中,等到登入成功後,會自動導回該頁面。
如果聽不懂沒關係,後面會有實際案例~
這樣設定完之後,我們來看一下目前登入頁面的樣子,在瀏覽器輸入 http://127.0.0.1:8000/accounts/login/:
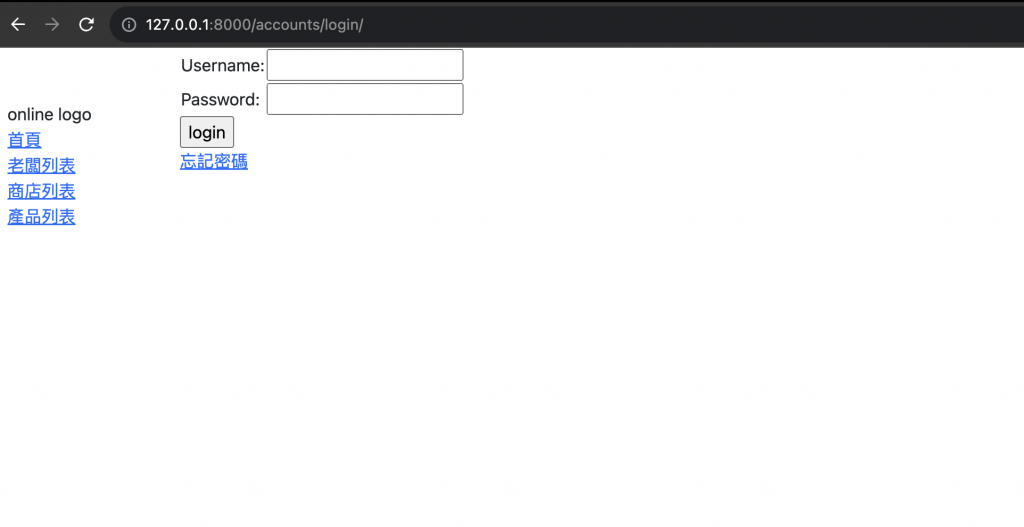
可以發現登入系統頁面已經有些樣子了,我們明天再繼續把登入系統完成~
今天學到哪些東西呢?
最後附上 Github: https://github.com/eagle0526/Django-store