昨天將使用React的Electron開發環境建置完成了,就可以開始動手撰寫Electron應用程式。第一步先修改Electron應用程式的UI,目前的UI還是React的示範頁面,要將UI修改成符合我們需求的樣式。
public/index.html做修改,增加<meta>標籤:
meta
http-equiv="Content-Security-Policy"
content="default-src 'self';
		script-src 'self' 'unsafe-inline';
		style-src 'self' 'unsafe-inline';
		img-src 'self' data:;
		font-src 'self' data:;
		base-uri 'self';"
>
``
 Content Security Policy(CSP)為**內容安全政策**,會限制網頁中對於外部的請求來源,或是限制HTML檔內的javascript或CSS運作,詳細內容可以到參考內容中閱讀。

``html
body>
..
/body>
script src="%PUBLIC_URL%/renderer.js"></script>
``
 在`<body>`標籤的後方新增之後會執行的`renderer.js`。
 `%PUBLIC_URL%`代表`public`資料夾的絕對路徑。
src/App.js,替換成下面程式碼:
unction App() {
return (
	<div className="App">
		CPU Fan Speed: <span id="cpu-fan-speed">----</span> rpm.
	</div>
);

``
 新增`cpu-fan-speed`讓`renderer.js`可以插入轉速資訊到`public/index.html`中。
preload.js,替換成下面程式碼:
onst { contextBridge, ipcRenderer } = require('electron')

ontextBridge.exposeInMainWorld('speed', {
cpufan: () => ipcRenderer.invoke('cpufan')
)
``
 這裡使用到`contextBridge`及`ipcRenderer`模組。
- `contextBridge`用來建立在**主進程與渲染進程可以互相溝通的變數或函式**。
- `ipcRenderer`用於**與主進程溝通**,使用`ipcRenderer.invoke`向主進程發送`cpufan`訊息。
main.js中增加:
onst { app, BrowserWindow, ipcMain} = require('electron')

..

pp.whenReady().then(() => {
ipcMain.handle('cpufan', () => '1200')
createWindow()
...
)
``
 使用了`ipcMain`模組,用於**與渲染進程溝通**,用`ipcMain.handle`處理渲染進程送來的`cpufan`訊息,當收到訊息就回傳值到渲染進程,這裡做為測試回傳一個固定值`1200`。
public\renderer.js:
onst func = async () => {
const response = await window.speed.cpufan()
console.log(response)
document.getElementById('cpu-fan-speed').innerHTML = response;


indow.onload = function () {
func()

``
 `func()`處理從主進程收到的訊息,首先會在主控台印出收到的訊息,接著利用`cpu-fan-speed`將訊息插入進`index.html`中。
 `window.onload`,這個函式是當頁面完全載入完成後再執行函式內的程式碼,所以我們利用它去執行`func()`。
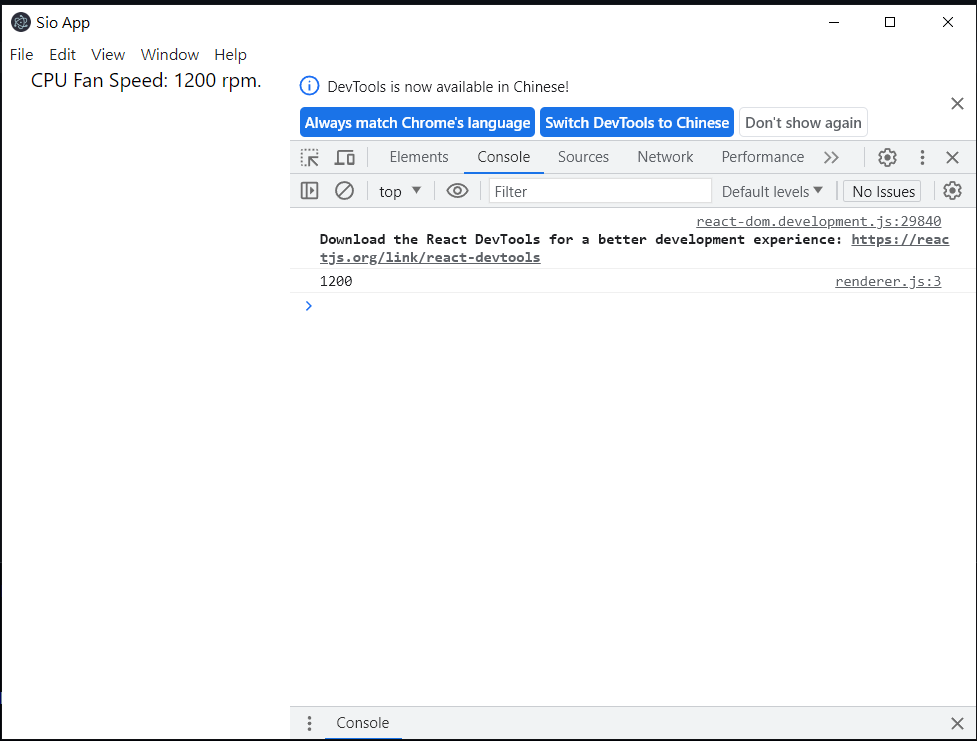
index.html都印出1200,表示主進程與渲染進程可以順利互相溝通。今天修改了Electron的UI,並且展示了如何讓主進程與渲染進程可以互相溝通,這對於我們之後呼叫動態連結函庫讀取數值並顯示在Electron應用程式的UI中非常有幫助。
Content Security Policy (CSP)
Using Preload Scripts