先import護用到的套件之後,就可以開始建立模型、定義生成器模型
class ResNetGenerator(nn.Module):

        assert(blocks >= 0)
        super(ResNetGenerator, self).__init__()

        self.input = input
        self.output = output
        ...

        model = [nn.ReflectionPad2d(3),
                 nn.Conv2d(input, n_gf, kernel_size=5, padding=0),
                 nn.InstanceNorm2d(n_gf),# n_gf=number of Generator Features
                 nn.ReLU(True)]

        downsampling = 2
        for i in range(downsampling):
            mult = 2**i
            model += [nn.Conv2d(n_gf * mult, n_gf * mult * 2, kernel_size=3,
                                stride=2, padding=1, bias=True),
                      nn.InstanceNorm2d(ngf * mult * 2),
                      nn.ReLU(True)]

        mult = 2**downsampling
        for i in range(blocks):
            model += [ResNetBlock(n_gf * mult)]
        ...

        self.model = nn.Sequential(*model)
        #定義生成器模型
downsampling 迴圈:這個迴圈用於向下採樣圖像,通過降低圖像分辨率來提取特徵。這裡使用了一系列卷積、正歸一化和 ReLU 激活函數來實現。
netG = ResNetGenerator()
netG.eval()
創建了一個 ResNetGenerator 的實例,並將其賦值給了 netG 變量
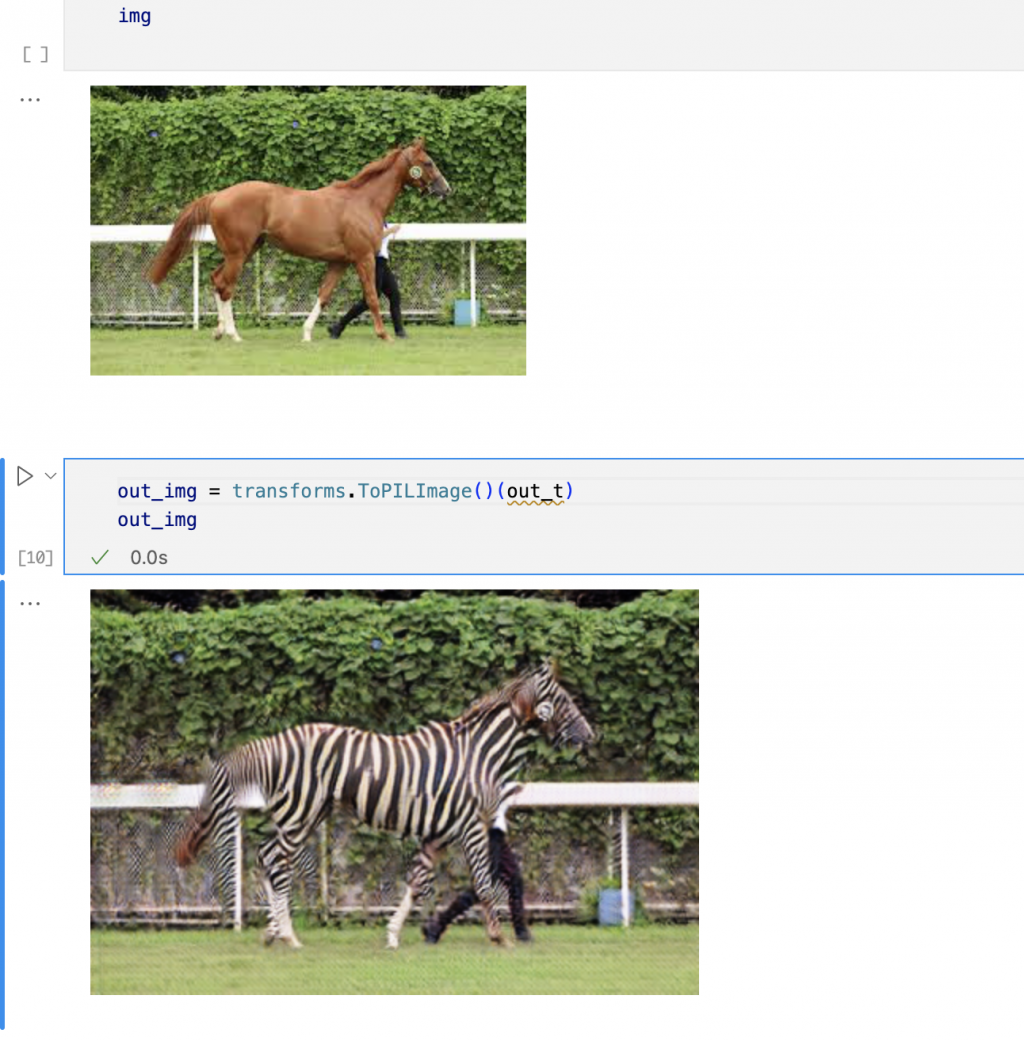
再來我們載入已經訓練好的斑馬模型參數檔案以及一張馬的照片
batch_out = netG(batch_t)
out_img = transforms.ToPILImage()(out_t)
out_img

輸出結果分析:雖然成功將馬變成斑馬,但會看到這張照片仍然會有一些小瑕疵,沒辦法將邊界分得特別清楚。
