
本文同步發佈於毛毛的踩坑人生
昨天把買賣的 API 串起來了
不過是透過 initState 的方式
今天要來個真實可以觸碰的按鈕
這樣會比較有真實感😂
多了按鈕之後
這次的引路就算完成了
剩下我會再來講講部署
一直以來
我們都是把所以有的資料擺在畫面的正中央
也只有一個價格跟漲跌變化
直接放在 Scaffold -> body -> Center -> Row
那是為了快速演示
首先來利用現有資料調整一下
不過我們有什麼資料呢
來看一下結構
RealTimeFutureTick(
  this.code,
  this.open,
  this.underlyingPrice,
  this.bidSideTotalVol,
  this.askSideTotalVol,
  this.avgPrice,
  this.close,
  this.high,
  this.low,
  this.amount,
  this.totalAmount,
  this.volume,
  this.totalVolume,
  this.tickType,
  this.chgType,
  this.priceChg,
  this.pctChg,
  this.simtrade,
);
看了一下
可以利用的有下面這些
code: 可以顯示我們正在關注的標的
close: 目前的價格
priceChg: 目前價格漲跌
volume: 這次搓合的張數、口數
totalVolume: 今日的總交易量
simtrade: 是不是試搓
先來用 [Figma](https://www.figma.com) 排排看
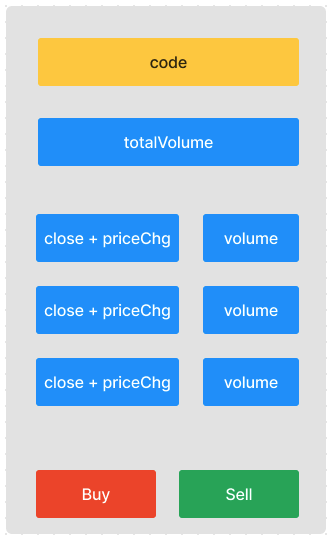
簡單排了一下
最終需要的兩顆交易按鈕
還有最新的搓合
以及前兩次搓合
最上面有這筆的股票、期貨號碼
跟當日總交易量
直接利用本來的 Scaffold -> body -> Center -> Row
插入一個 Column
變成 Scaffold -> body -> Center -> Column-> Row
一層一層往上往下
先把本來的價格複製兩次
後面再來調整資料內容
@override
Widget build(BuildContext context) {
return MaterialApp(
home: Scaffold(
appBar: AppBar(
title: const Text('期貨下單'),
actions: [
IconButton(
icon: const Icon(Icons.timer),
onPressed: sendReq,
),
],
),
body: FutureBuilder<RealTimeFutureTick?>(
future: lastTick,
builder: (context, snapshot) {
if (snapshot.hasData) {
return Center(
child: Column(
mainAxisAlignment: MainAxisAlignment.center,
children: [
Row(
mainAxisAlignment: MainAxisAlignment.spaceEvenly,
children: [
Text(
snapshot.data!.close!.toInt().toString(),
style: const TextStyle(fontSize: 50),
),
Text(
'${snapshot.data!.changeType}',
style: const TextStyle(fontSize: 30),
),
Text(
snapshot.data!.priceChg!.abs().toString(),
style: TextStyle(
fontSize: 25,
color: snapshot.data!.priceChg! > 0 ? Colors.red : Colors.green,
),
),
],
),
],
),
);
}
return const Center(
child: CircularProgressIndicator(
color: Colors.black,
),
);
},
),
),
);
}
畫面應該要長這樣
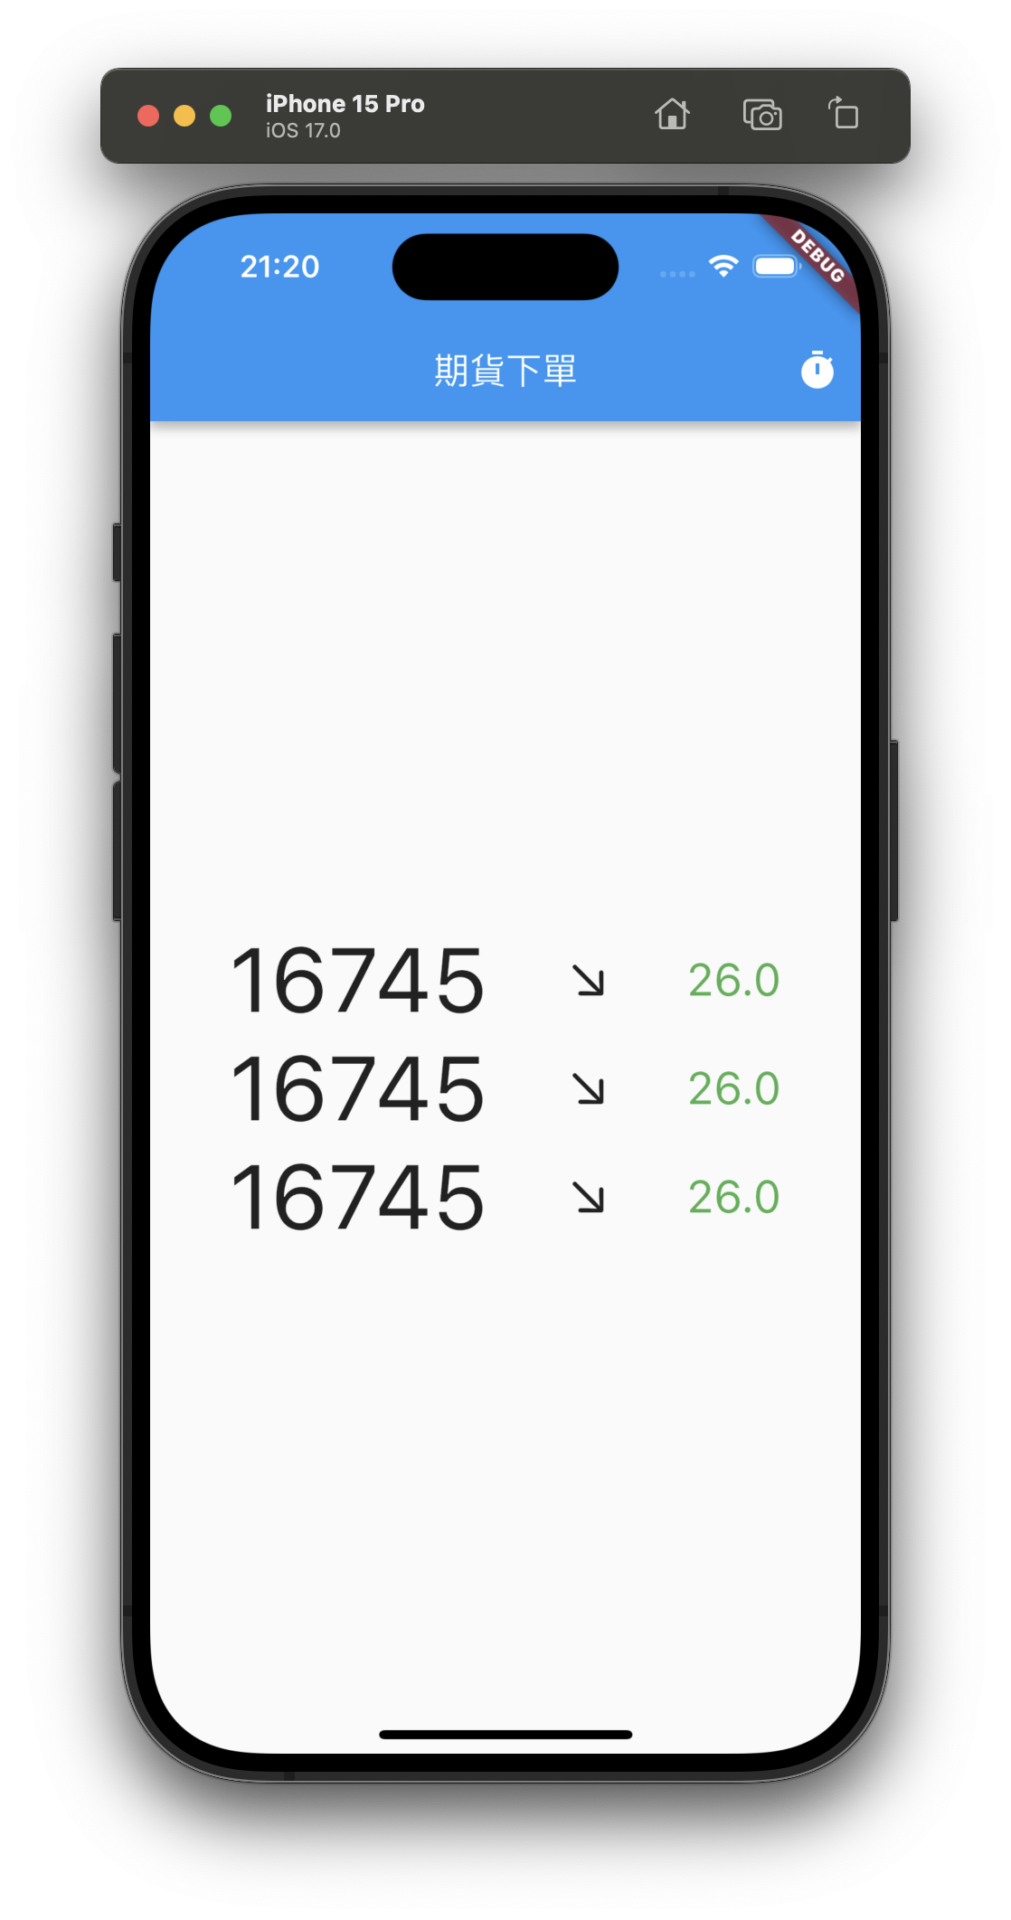
再來兩個按鈕
Row(
  mainAxisAlignment: MainAxisAlignment.spaceAround,
  children: [
    ElevatedButton(
      style: ButtonStyle(
        shape: MaterialStateProperty.all<RoundedRectangleBorder>(
          RoundedRectangleBorder(
            borderRadius: BorderRadius.circular(14),
          ),
        ),
        elevation: MaterialStateProperty.all(10),
        backgroundColor: MaterialStateProperty.all(Colors.red),
      ),
      onPressed: null,
      child: const SizedBox(
        width: 130,
        height: 70,
        child: Center(
          child: Text(
            "Buy",
            style: TextStyle(
              fontSize: 26,
              color: Colors.white,
            ),
          ),
        ),
      ),
    ),
    ElevatedButton(
      style: ButtonStyle(
        shape: MaterialStateProperty.all<RoundedRectangleBorder>(
          RoundedRectangleBorder(
            borderRadius: BorderRadius.circular(14),
          ),
        ),
        elevation: MaterialStateProperty.all(10),
        backgroundColor: MaterialStateProperty.all(Colors.green),
      ),
      onPressed: null,
      child: const SizedBox(
        width: 130,
        height: 70,
        child: Center(
          child: Text(
            "Sell",
            style: TextStyle(
              fontSize: 26,
              color: Colors.white,
            ),
          ),
        ),
      ),
    )
  ],
)
簡單用了 ElevatedButton
這會凸起來
比較有按的感覺
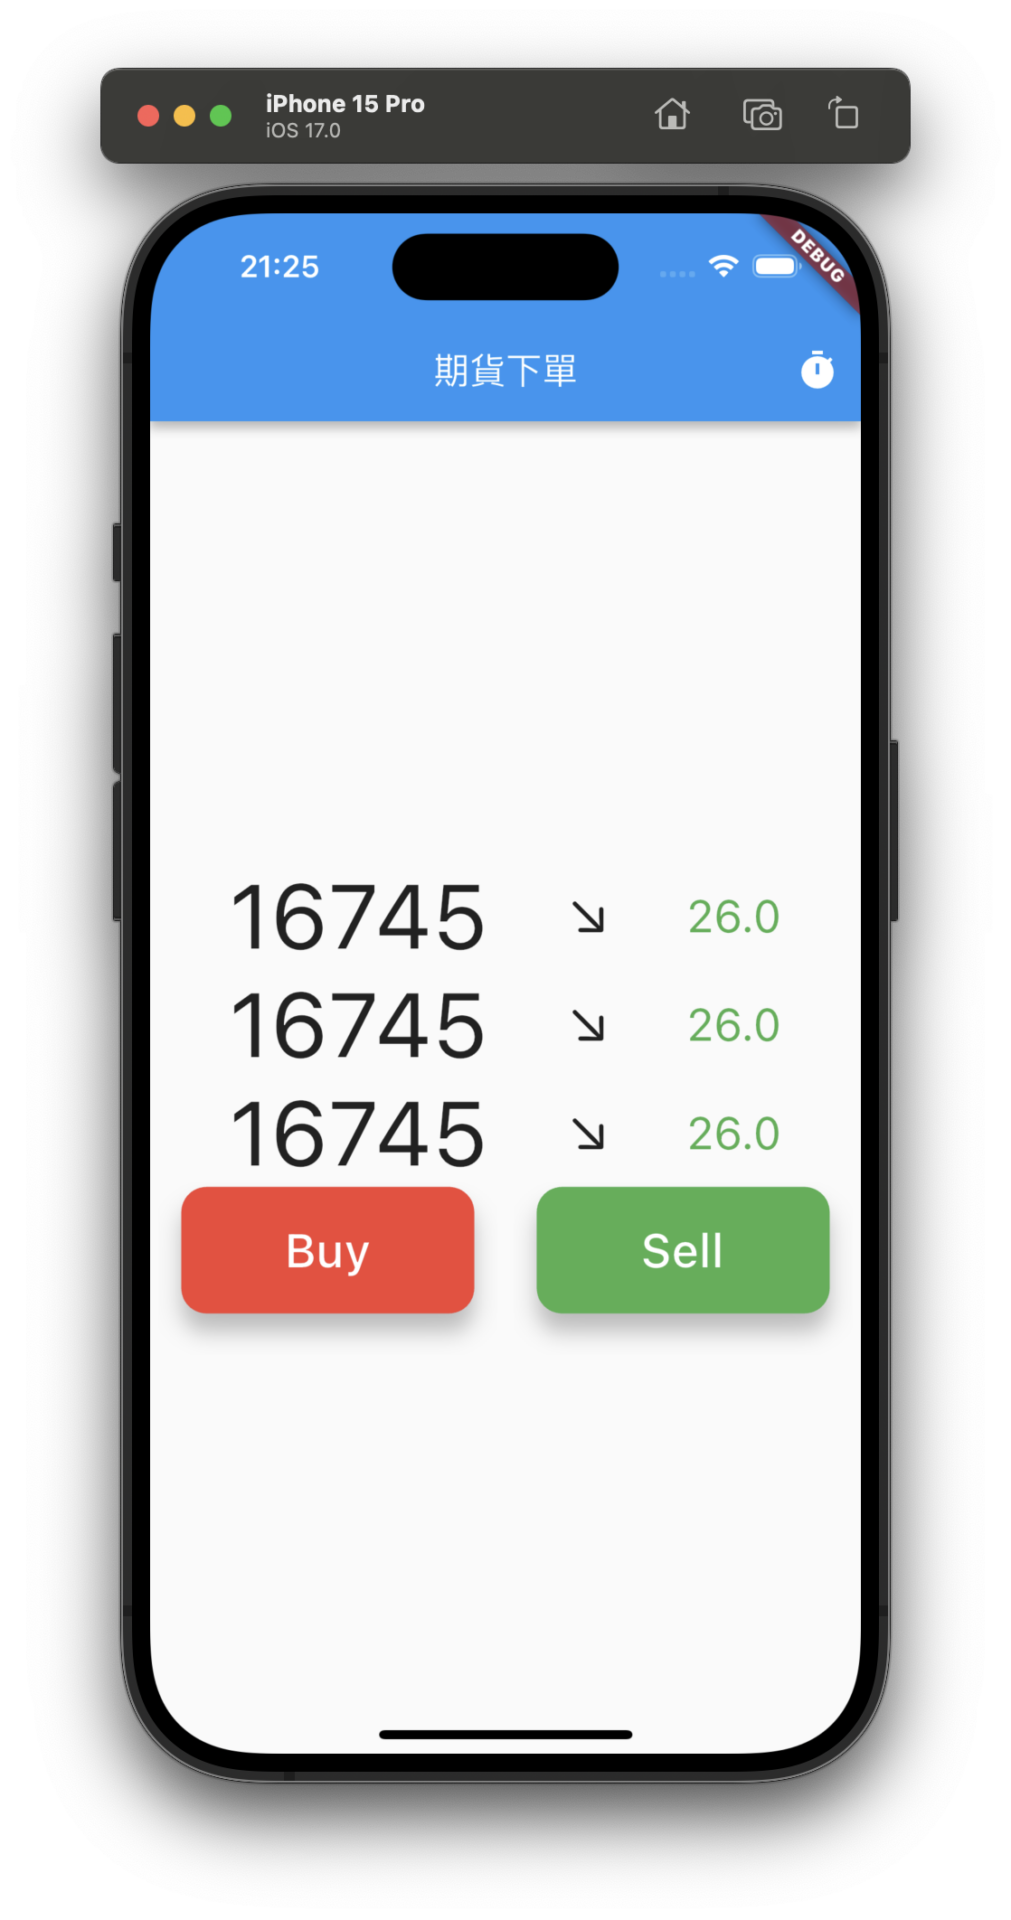
接著把最後需要的兩項擺上去
順便也把搓合的數量加上去
Row(
  mainAxisAlignment: MainAxisAlignment.center,
  children: [
    Text(
      snapshot.data!.code!,
      style: const TextStyle(fontSize: 50),
    ),
  ],
),
Row(
  mainAxisAlignment: MainAxisAlignment.center,
  children: [
    Text(
      snapshot.data!.totalVolume!.toString(),
      style: const TextStyle(fontSize: 50),
    ),
  ],
),
Text(
  snapshot.data!.close!.toInt().toString(),
  style: const TextStyle(fontSize: 50),
),
Text(
  '${snapshot.data!.changeType}',
  style: const TextStyle(fontSize: 30),
),
Text(
  snapshot.data!.priceChg!.abs().toString(),
  style: TextStyle(
    fontSize: 25,
    color: snapshot.data!.priceChg! > 0 ? Colors.red : Colors.green,
  ),
),
Text(
  snapshot.data!.volume!.abs().toString(),
  style: TextStyle(
    fontSize: 25,
    color: snapshot.data!.priceChg! > 0 ? Colors.red : Colors.green,
  ),
),
畫面應該要變成這樣
雖然很醜🤣
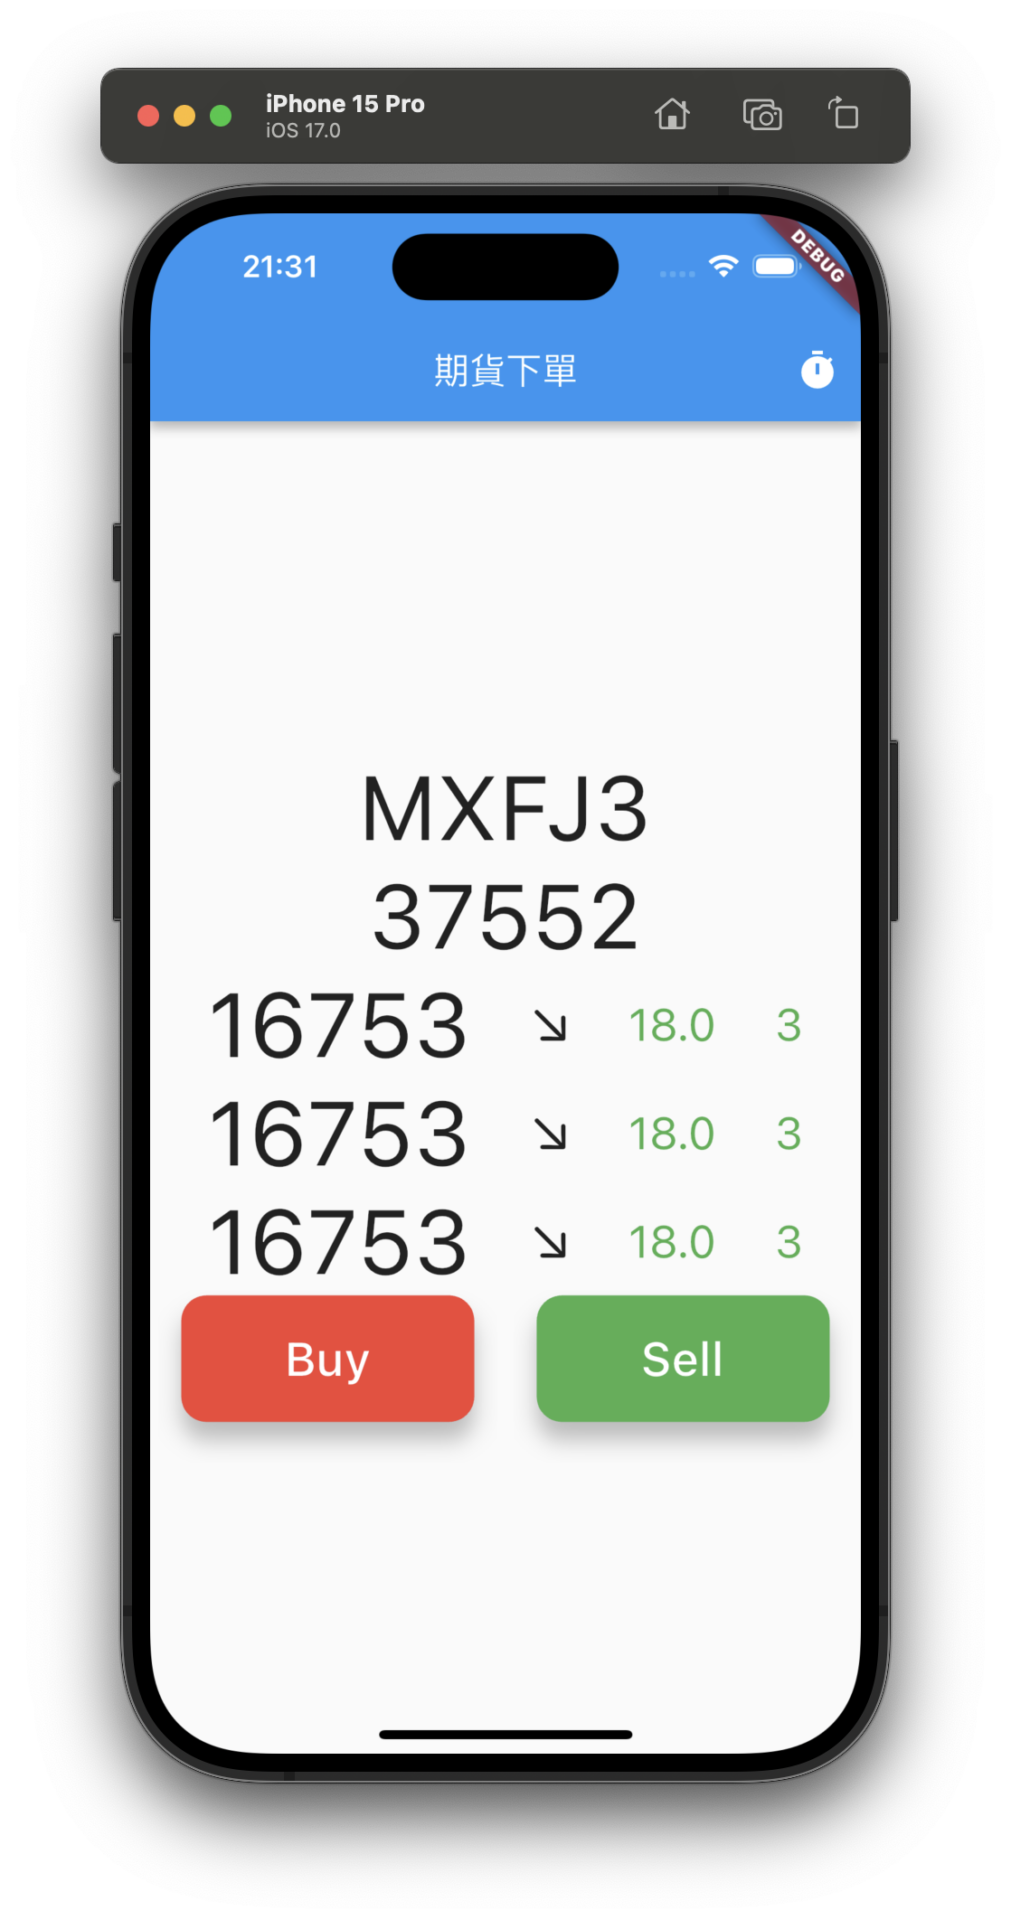
該有的資料都有了
來著手美化吧
這邊要利用到 Column, Row 的比例切割
要把這些 Widget 用 Expanded 包起來
Expanded(
child: Row(
mainAxisAlignment: MainAxisAlignment.center,
children: [
Text(
snapshot.data!.code!,
style: const TextStyle(fontSize: 50),
),
],
),
),
Expanded(
child: Row(
mainAxisAlignment: MainAxisAlignment.center,
children: [
Text(
snapshot.data!.totalVolume!.toString(),
style: const TextStyle(fontSize: 50),
),
],
),
),
Expanded(
child: Row(
mainAxisAlignment: MainAxisAlignment.spaceEvenly,
children: [
Text(
snapshot.data!.close!.toInt().toString(),
style: const TextStyle(fontSize: 50),
),
Text(
'${snapshot.data!.changeType}',
style: const TextStyle(fontSize: 30),
),
Text(
snapshot.data!.priceChg!.abs().toString(),
style: TextStyle(
fontSize: 25,
color: snapshot.data!.priceChg! > 0 ? Colors.red : Colors.green,
),
),
Text(
snapshot.data!.volume!.abs().toString(),
style: TextStyle(
fontSize: 25,
color: snapshot.data!.priceChg! > 0 ? Colors.red : Colors.green,
),
),
],
),
),
Expanded(
child: Row(
mainAxisAlignment: MainAxisAlignment.spaceAround,
children: [
ElevatedButton(
style: ButtonStyle(
shape: MaterialStateProperty.all<RoundedRectangleBorder>(
RoundedRectangleBorder(
borderRadius: BorderRadius.circular(14),
),
),
elevation: MaterialStateProperty.all(10),
backgroundColor: MaterialStateProperty.all(Colors.red),
),
onPressed: null,
child: const SizedBox(
width: 130,
height: 70,
child: Center(
child: Text(
"Buy",
style: TextStyle(
fontSize: 26,
color: Colors.white,
),
),
),
),
),
ElevatedButton(
style: ButtonStyle(
shape: MaterialStateProperty.all<RoundedRectangleBorder>(
RoundedRectangleBorder(
borderRadius: BorderRadius.circular(14),
),
),
elevation: MaterialStateProperty.all(10),
backgroundColor: MaterialStateProperty.all(Colors.green),
),
onPressed: null,
child: const SizedBox(
width: 130,
height: 70,
child: Center(
child: Text(
"Sell",
style: TextStyle(
fontSize: 26,
color: Colors.white,
),
),
),
),
)
],
),
)
什麼都沒改,就只是包起來
就變成下面這樣
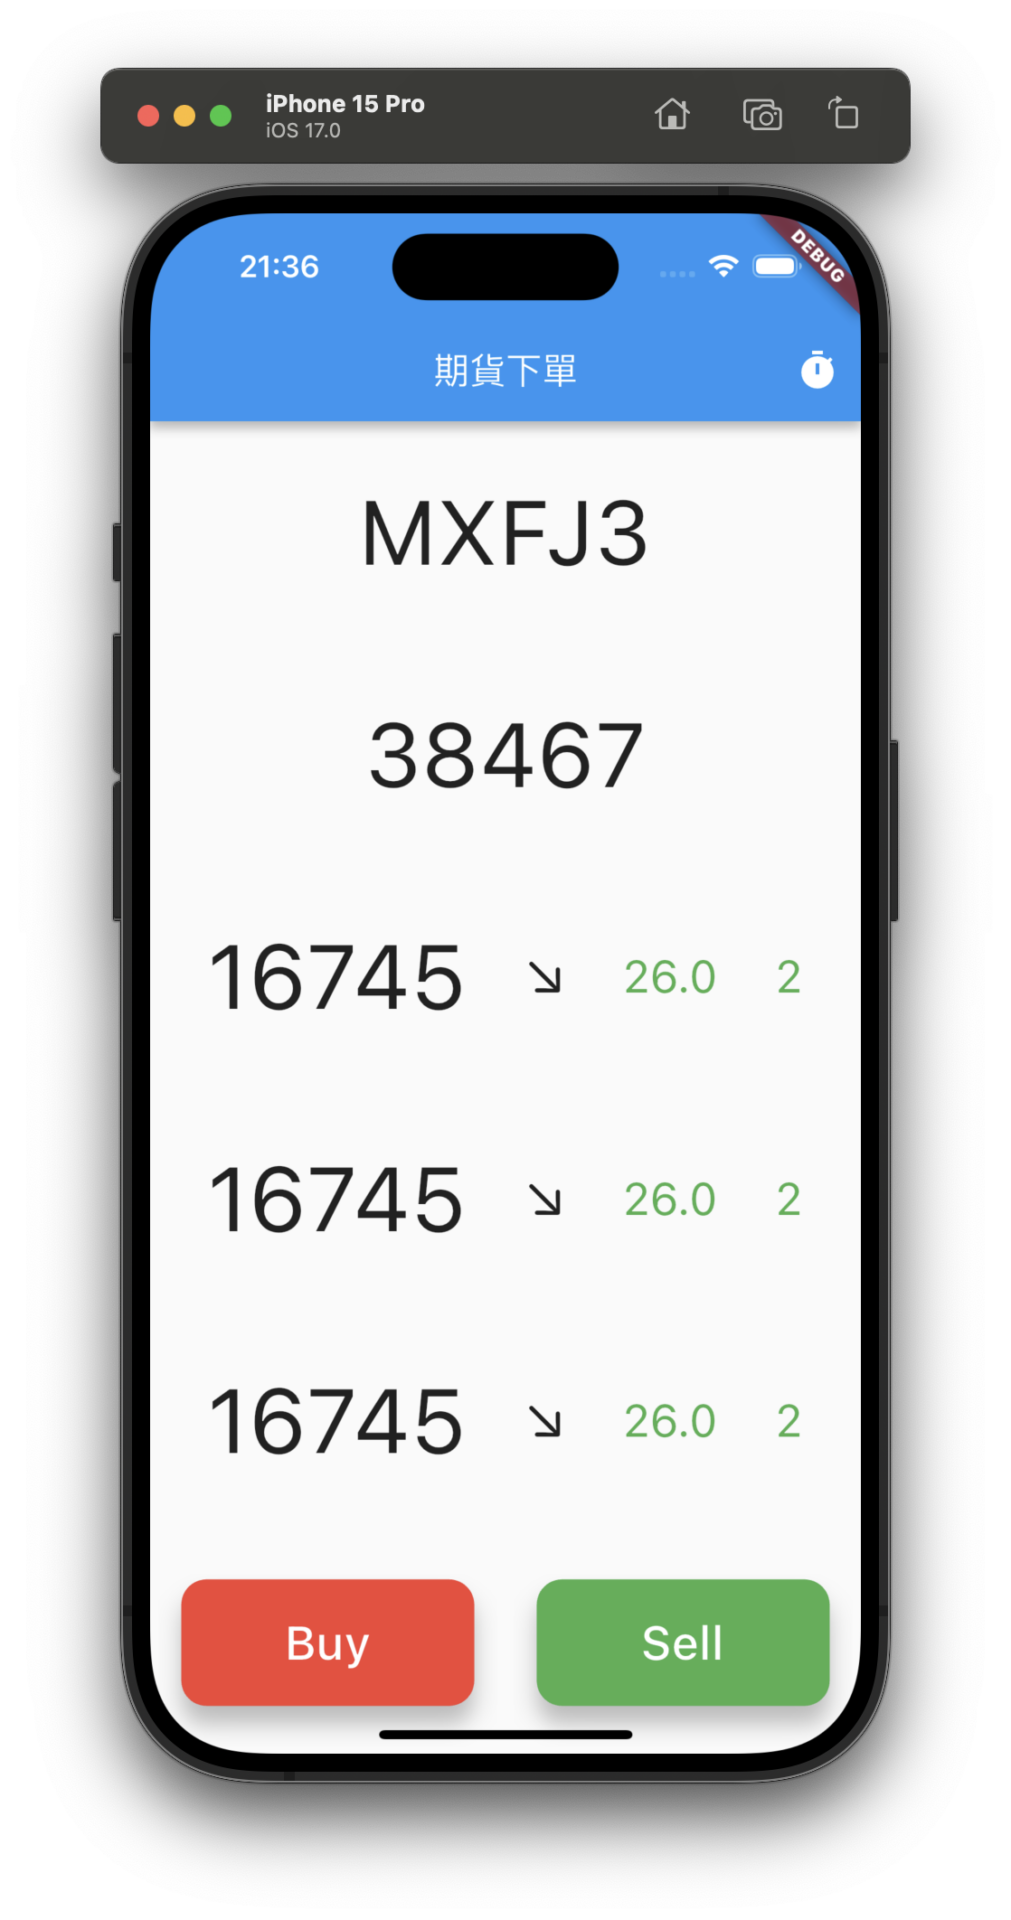
不過我希望三個搓合應該要是一組
所以在用一個 Column 把三個包起來
Expanded(
child: Column(
children: [
Row(
mainAxisAlignment: MainAxisAlignment.spaceEvenly,
children: [
Text(
snapshot.data!.close!.toInt().toString(),
style: const TextStyle(fontSize: 50),
),
Text(
'${snapshot.data!.changeType}',
style: const TextStyle(fontSize: 30),
),
Text(
snapshot.data!.priceChg!.abs().toString(),
style: TextStyle(
fontSize: 25,
color: snapshot.data!.priceChg! > 0 ? Colors.red : Colors.green,
),
),
Text(
snapshot.data!.volume!.abs().toString(),
style: TextStyle(
fontSize: 25,
color: snapshot.data!.priceChg! > 0 ? Colors.red : Colors.green,
),
),
],
),
],
),
),
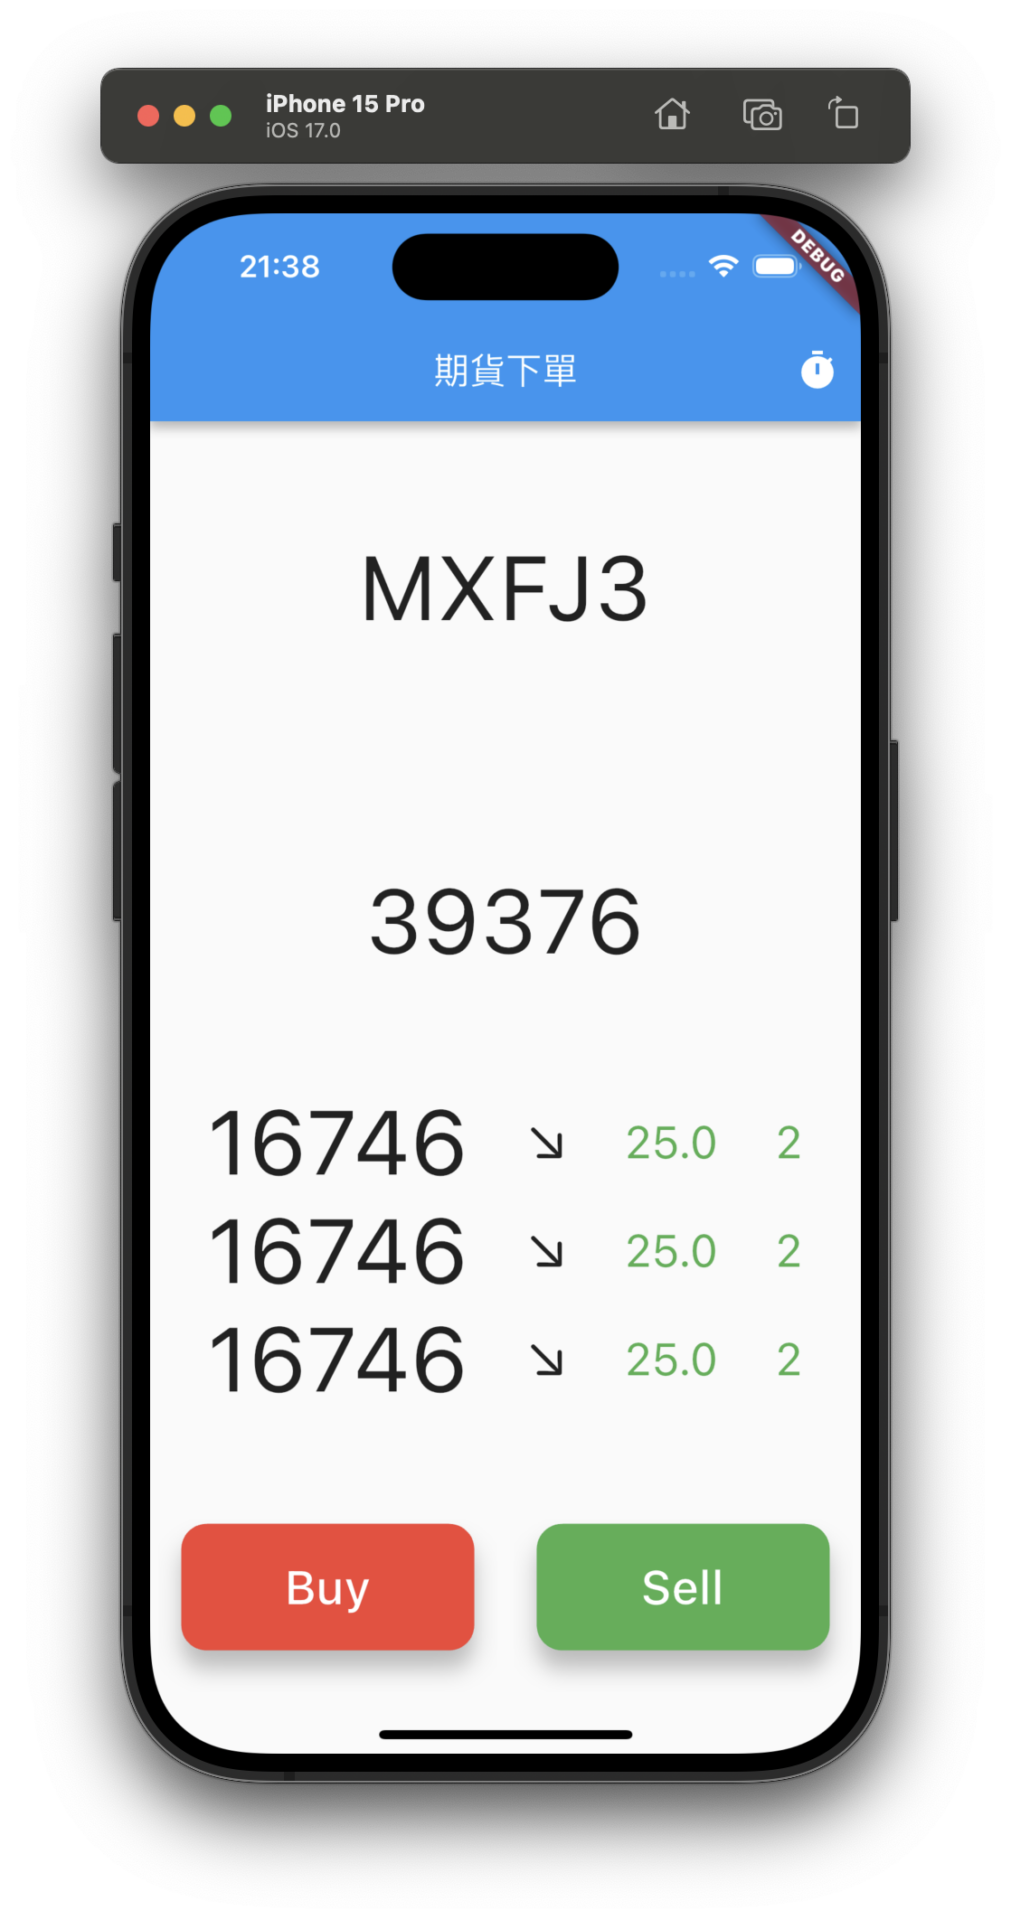
更像一回事了吧
今天把畫面弄出來了
也稍微美化一點點
明天再來針對細節拉皮
最後把呼叫 API 的方法弄上去
就是一個下單介面了
