使用Android studio導入OpenCV實作,本文會先實作如何安裝OpenCV庫,再介紹兩種格式差異與轉換,最後載入圖片轉灰階測試,以下言論純個人開發經驗分享,如有大神能建議及改善的地方非常歡迎留言!!!
實作流程:
Android studio與OpenCV格式差異與灰階介紹
Android Studio中使用OpenCV進行影像處理時,通常會先將影像資料轉換成OpenCV可處理的 Mat格式,後再進行影像處理,當OpenCV處理完影像後,也需要再將處理後的Mat再轉換回 Bitmap格式,以便在Android Studio執行後續操作。
安裝OpenCV庫
選擇裡面的Android系統喔
下載後的位置要記得,等等會用得到。
OpenCV:(https://opencv.org/releases/)
開啟Android studio專案
接著創建一個專案,名稱可以自行更改,底下我會提供程式碼,如怕麻煩的話可以跟我使用一樣的名稱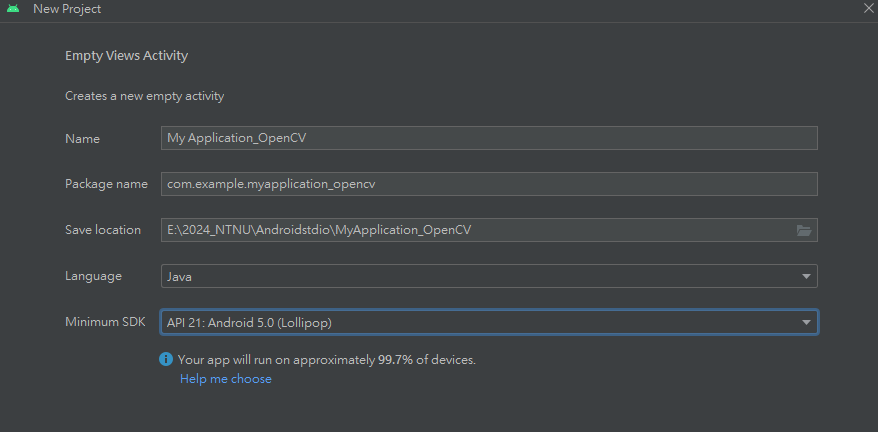
File -> New -> Import Module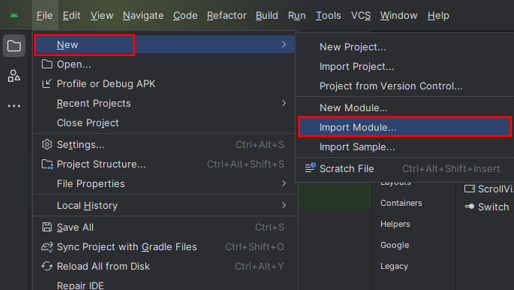
這邊很重要
是選擇剛剛下載文件裡面的sdk檔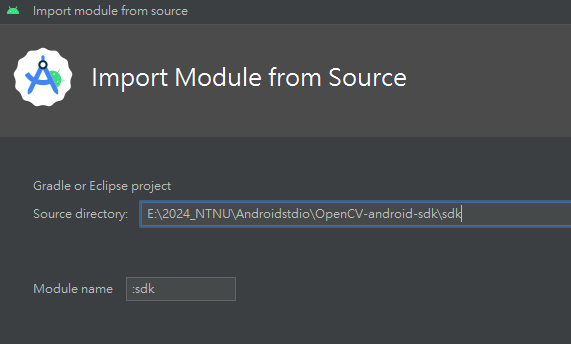
選擇好後按下Finish,會稍微跑一下~不是當機喔!
出現報錯這個很正常,然後刪除掉這行後,重新整理Try Again就會正常了apply plugin: 'kotlin-android'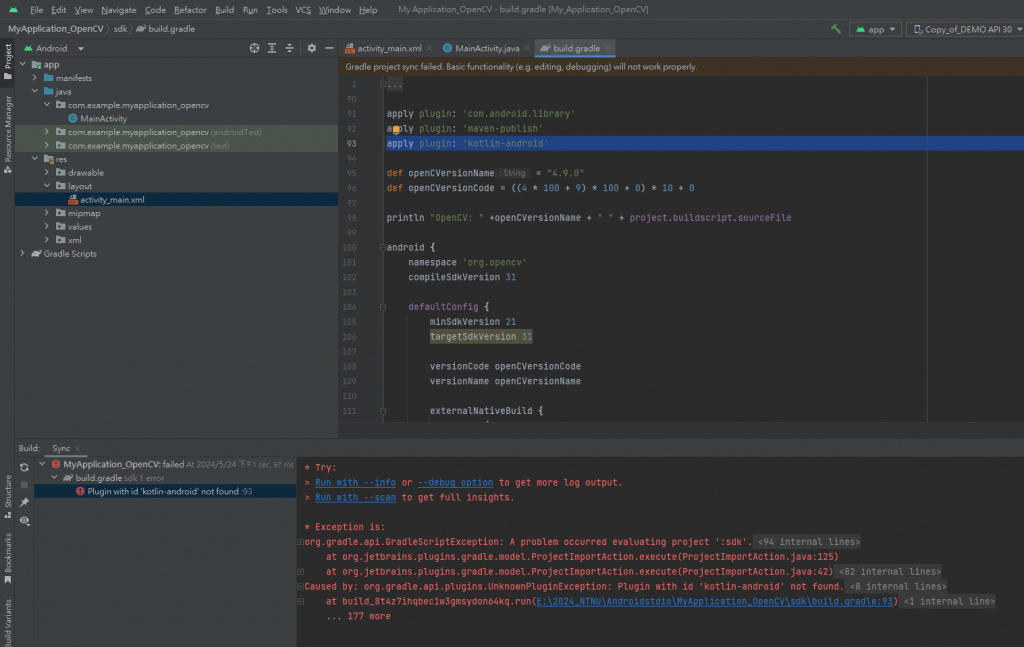
沒報錯就沒問題囉!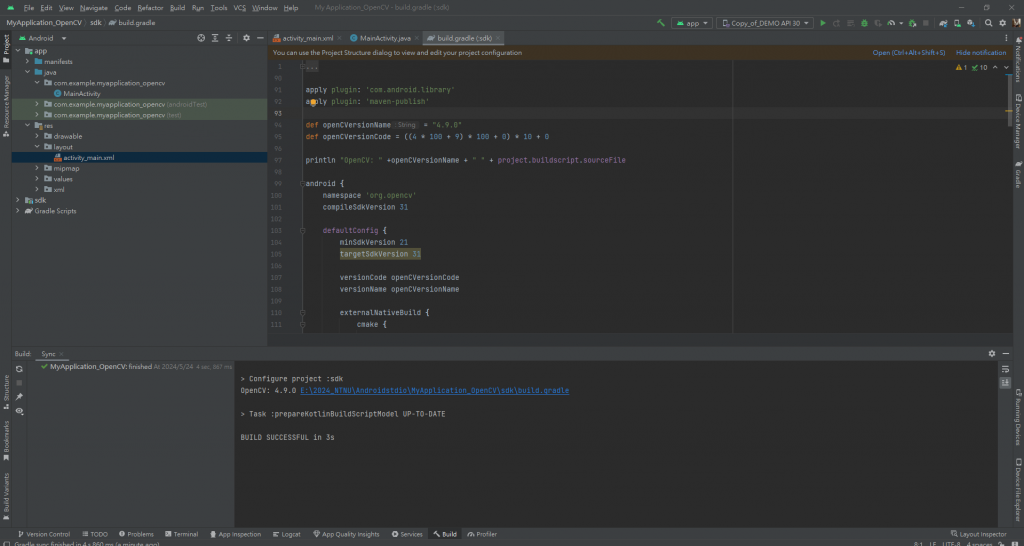
接著開啟專案結構Project Structure選擇依賴Dependencies放進去就可以囉!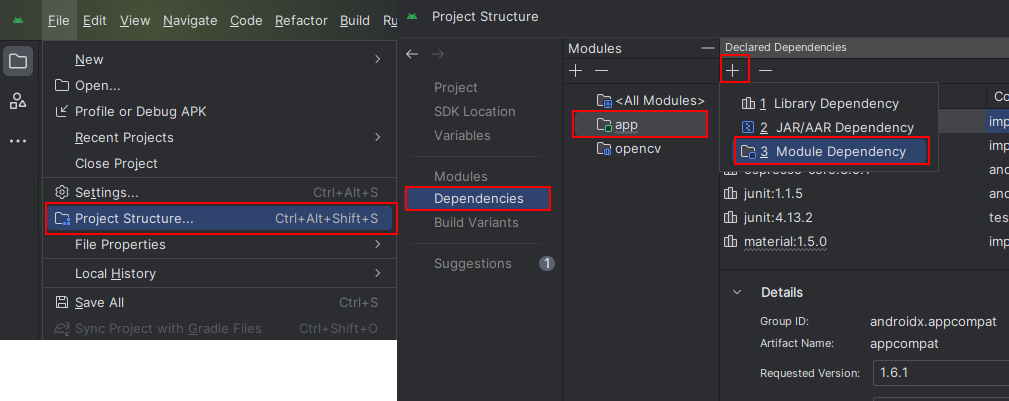
選擇你的Module,長這樣是預設的沒更改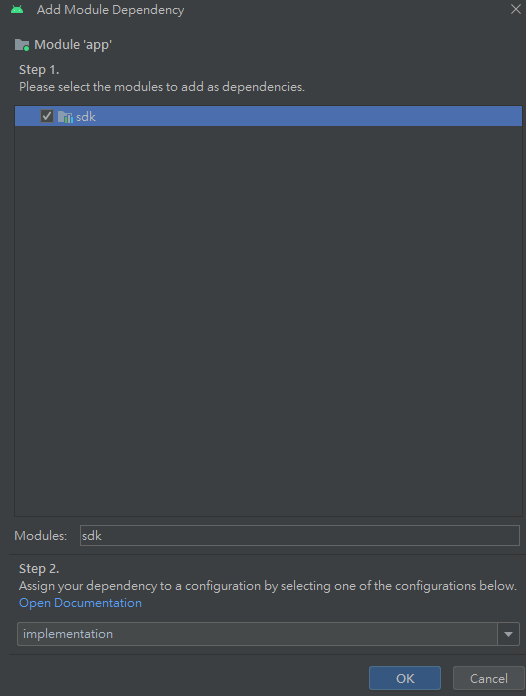
到這邊應該就能正常使用OpenCV庫了,接著我們實作一個簡單例子看看!
測試圖片是否變化
這邊提供一個圖片給各位,是我自己畫的所以直接下載下來沒問題喔!
Android Studio支援 BMP、JPG、PNG、WebP 格式,只要是這些圖片格式的都可以使用
接著把這張圖片放入drawable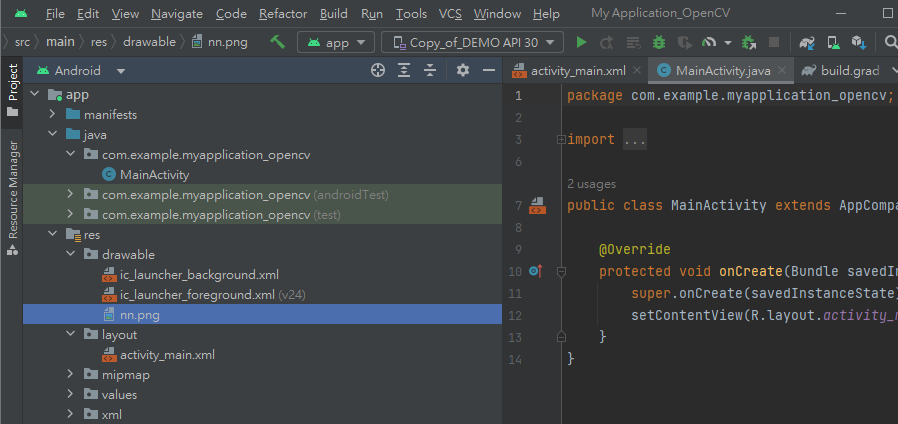
接著打開.xml來設計UI介面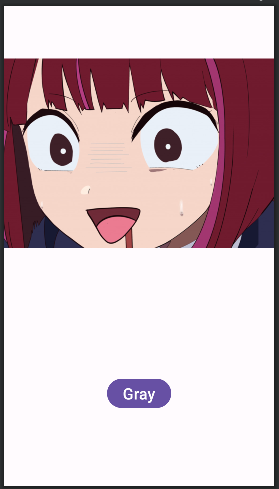
有不同只有圖片名稱nn.jpg,其他可以直接複製
<?xml version="1.0" encoding="utf-8"?>
<androidx.constraintlayout.widget.ConstraintLayout xmlns:android="http://schemas.android.com/apk/res/android"
    xmlns:app="http://schemas.android.com/apk/res-auto"
    xmlns:tools="http://schemas.android.com/tools"
    android:layout_width="match_parent"
    android:layout_height="match_parent"
    tools:context=".MainActivity">

    <ImageView
        android:id="@+id/imageView"
        android:layout_width="wrap_content"
        android:layout_height="wrap_content"
        app:layout_constraintEnd_toEndOf="parent"
        app:layout_constraintStart_toStartOf="parent"
        app:layout_constraintTop_toTopOf="parent"
        app:srcCompat="@drawable/nn" />

    <Button
        android:id="@+id/button"
        android:layout_width="wrap_content"
        android:layout_height="wrap_content"
        android:text="Gray"
        android:textAlignment="center"
        android:textSize="24sp"
        app:layout_constraintBottom_toBottomOf="parent"
        app:layout_constraintEnd_toEndOf="parent"
        app:layout_constraintStart_toStartOf="parent"
        app:layout_constraintTop_toBottomOf="@+id/imageView" />
</androidx.constraintlayout.widget.ConstraintLayout>
接著點開.java來測試影像灰度辨識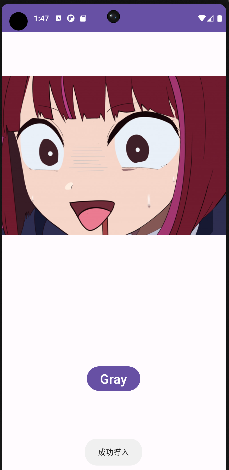
判斷是否成功導入OpenCV,會跳出提示視窗
if(OpenCVLoader.initDebug()){
            Toast.makeText(this,"成功導入",Toast.LENGTH_SHORT).show();
        }else{
            Toast.makeText(this,"導入失敗",Toast.LENGTH_SHORT).show();
        }
寫入使用到的控鍵以及Android studio與OpenCV格式
ImageView imageView;
Button button;
Bitmap bitmap;
Mat dstmat,srcmat_nn;
定義使用到的控鍵
imageView = findViewById(R.id.imageView);
button = findViewById(R.id.button);
將nn圖片變成Mat格式使OpenCV處裡影像
srcmat_nn = new Mat();
        try {
            srcmat_nn = Utils.loadResource(this,R.drawable.nn);//將圖片轉成mat
        } catch (IOException e){
            e.printStackTrace();
        }
用來存放資料型態srcmat_nn = new Mat();
使用監聽器偵測按鈕,內容我放下面解釋
button.setOnClickListener(new View.OnClickListener() {
            @Override
            public void onClick(View view) {

            }
        });
將Mat格式的srcmat_nn圖片進行灰階處裡存放至dstmat
dstmat=new Mat();
Imgproc.cvtColor(srcmat_nn, dstmat, Imgproc.COLOR_BGRA2GRAY);
創建一個與Mat相同大小的bitmap等待轉換
bitmap = Bitmap.createBitmap(dstmat.width(), dstmat.height(), Bitmap.Config.ARGB_8888);
轉成bitmat讓androidstudio顯示
Utils.matToBitmap(dstmat, bitmap);
顯示androidstudio能支援的bitmap到ui介面上
imageView.setImageBitmap(bitmap);

Android studio與OpenCV格式差異再轉換過程比較複雜一點點,先了解這兩個後.java內容會比較好理解喔~
以上言論純個人開發經驗分享,如有大神能建議及改善的地方非常歡迎留言!!!
 xiangcheng

 iThome鐵人賽