介紹AndroidStudio專案創建後如何與Firebase進行連接,Firebase數據創建與讀取權限實作測試,本實作的data是手動輸入的,如需匯入資料進入Firebase Database時,須先取得Data URL與金鑰,當資料無法匯入時可以檢查使否將規則裡面的false改成true,Firebase Realtime Database為了確保數據安全性會將讀取與寫入設為有限制的(如使用預設鎖定模式的話),以下言論純個人經驗分享,如有大神能建議及改善的地方非常歡迎留言!!!
Android Studio Download位置
(https://developer.android.com/studio?hl=zh-tw)
Android Studio 是一個基於Java和Kotlin語言的開發環境,而這兩種語言都是物件導向,本專案使用java進行。
package com.example.myapplication_firebase;
Android Studio創建專案
先建立一個專案File->New Project
選一個空白頁面開發 Empty Views Activity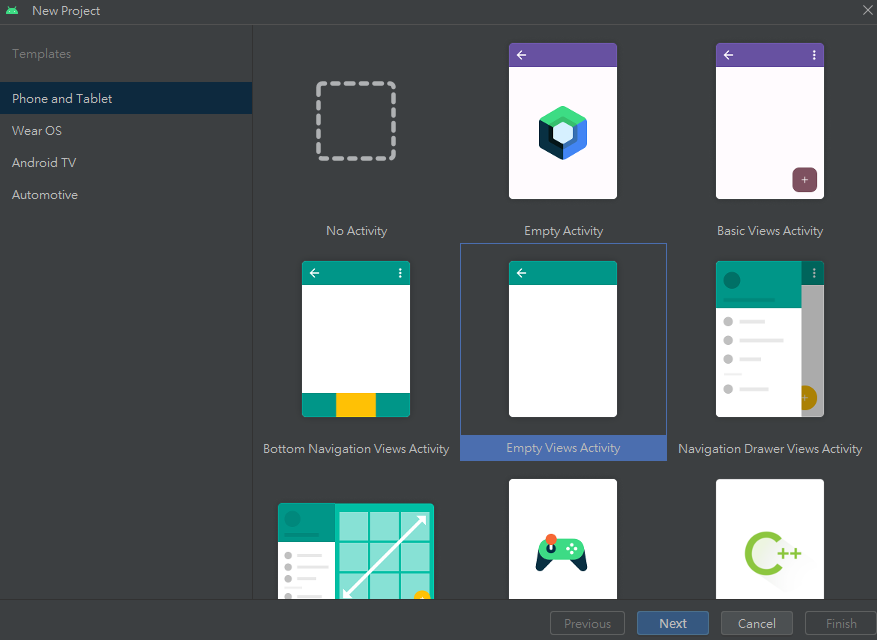
版本可以自己選擇,語言選擇JAVA,新版的也一樣。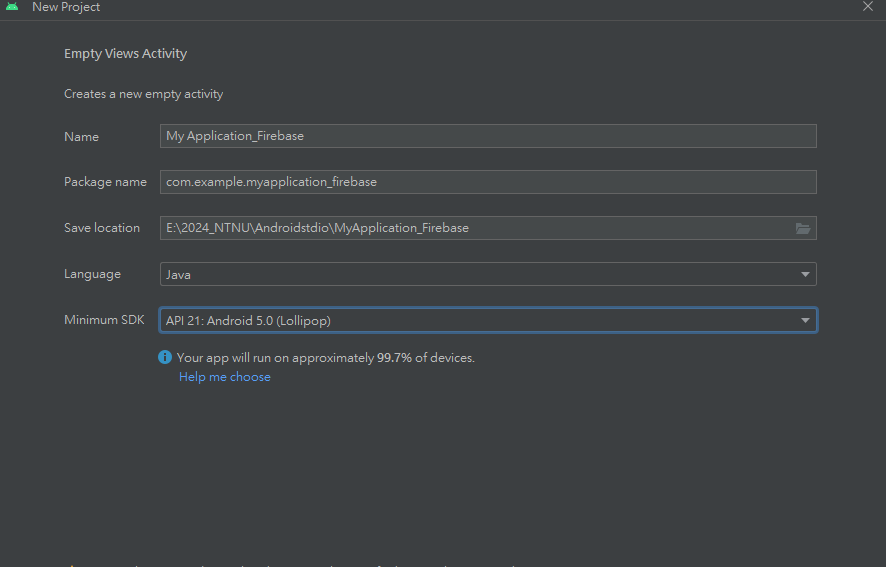
Android Studio與Firebase連接
選擇Tools內的Firebase,創建即時資料庫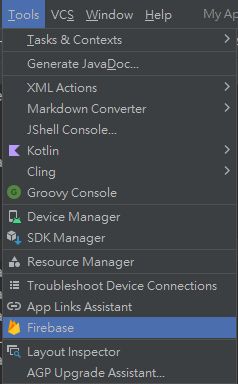
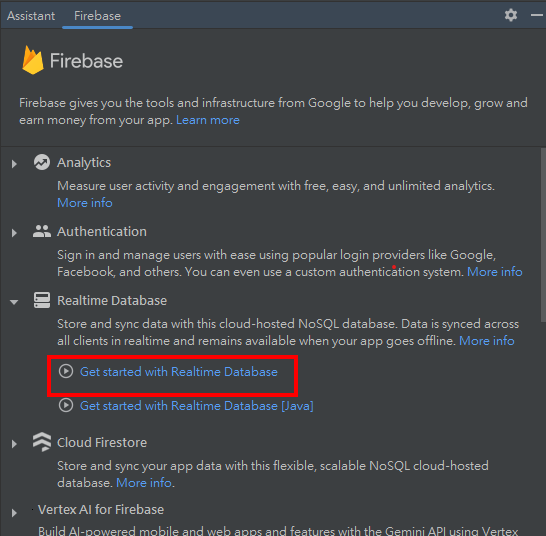
會自動到google創建一個新的firebase,也可以選擇你們創建的進行連接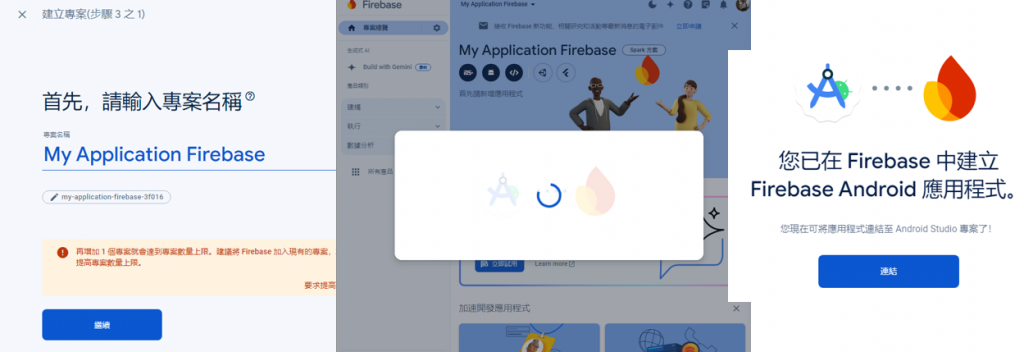
接著增加即時資料到app裡,依賴關係確認後如兩個打勾完成就連線成功囉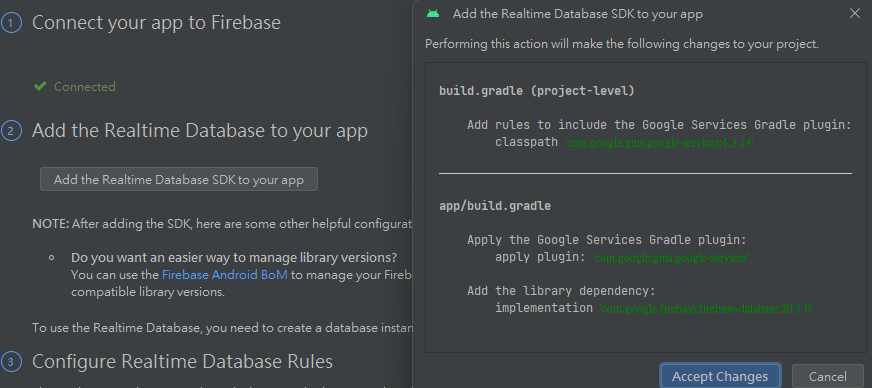
創建Firebase資料庫和資料
打開剛剛創建的Firebase選擇Realtime Database即時資料庫,跟著預設按就好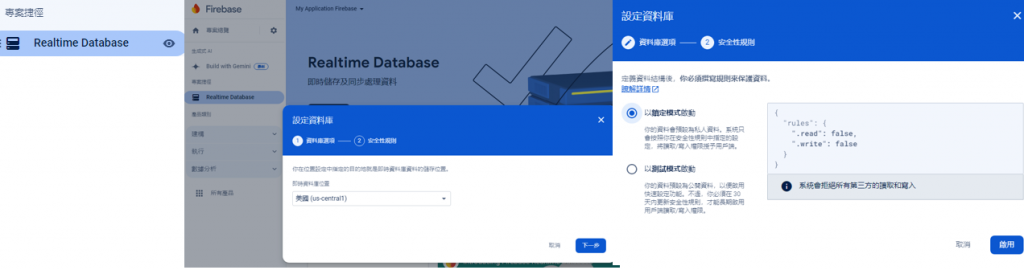
進入到Realtime Database裡,Firebase Realtime Database為了確保數據安全性會將讀取與寫入設為有限制的(預設鎖定模式),要在規則裡面的false改成true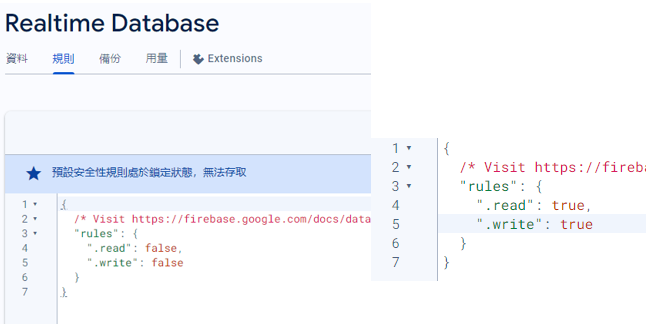
點擊網址旁邊的+號,隨機放個Key與Value進來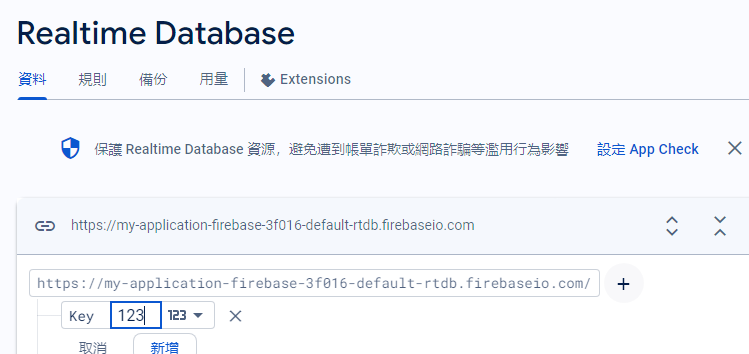
這樣資料庫與資料就設定完成了,開始來讀取看看吧
Android Studio讀取Firebase data
.xml就放入一個textview就好
<?xml version="1.0" encoding="utf-8"?>
<androidx.constraintlayout.widget.ConstraintLayout xmlns:android="http://schemas.android.com/apk/res/android"
    xmlns:app="http://schemas.android.com/apk/res-auto"
    xmlns:tools="http://schemas.android.com/tools"
    android:layout_width="match_parent"
    android:layout_height="match_parent"
    tools:context=".MainActivity">

    <TextView
        android:id="@+id/textView"
        android:layout_width="wrap_content"
        android:layout_height="wrap_content"
        android:text="獲取Firabase data"
        android:textSize="34sp"
        app:layout_constraintBottom_toBottomOf="parent"
        app:layout_constraintEnd_toEndOf="parent"
        app:layout_constraintStart_toStartOf="parent"
        app:layout_constraintTop_toTopOf="parent" />

</androidx.constraintlayout.widget.ConstraintLayout>
.java
引入了Firebase Realtime Database相關類,與Firebase數據庫進行交互傳遞
快照(結構)、錯誤偵測、數據庫引用、例子、監聽器import com.google.firebase.database.DataSnapshot;import com.google.firebase.database.DatabaseError;import com.google.firebase.database.DatabaseReference;import com.google.firebase.database.FirebaseDatabase;import com.google.firebase.database.ValueEventListener;
創建文字顯示的textViewTextView textView;
定義textView控鍵textView = findViewById(R.id.textView);
獲取FirebaseDatabase的實例,訪問Firebase Realtime DatabaseFirebaseDatabase database = FirebaseDatabase.getInstance();
找到數據庫中的"Key"節點DatabaseReference myRef = database.getReference("Key");
資料庫的監聽器,onDataChange是當數據發生變化時會調用,onCancelled是當數據庫操作被取消或失敗時會調用
myRef.addValueEventListener(new ValueEventListener() {
            @Override
            public void onDataChange(@NonNull DataSnapshot snapshot) {

            }
            @Override
            public void onCancelled(@NonNull DatabaseError error) {

            }
        });
將讀取到的數據轉成字串String value = String.valueOf(snapshot.getValue());
由textview顯示出來textView.setText(value);
完整.java程式碼
package com.example.myapplication_firebase;

import androidx.annotation.NonNull;
import androidx.appcompat.app.AppCompatActivity;

import android.os.Bundle;
import android.widget.TextView;

import com.google.firebase.database.DataSnapshot;
import com.google.firebase.database.DatabaseError;
import com.google.firebase.database.DatabaseReference;
import com.google.firebase.database.FirebaseDatabase;
import com.google.firebase.database.ValueEventListener;

public class MainActivity extends AppCompatActivity {
    TextView textView;

    @Override
    protected void onCreate(Bundle savedInstanceState) {
        super.onCreate(savedInstanceState);
        setContentView(R.layout.activity_main);

        textView = findViewById(R.id.textView);

        FirebaseDatabase database = FirebaseDatabase.getInstance();
        DatabaseReference myRef = database.getReference("Key");

        myRef.addValueEventListener(new ValueEventListener() {
            @Override
            public void onDataChange(@NonNull DataSnapshot snapshot) {
                String value = String.valueOf(snapshot.getValue());
                textView.setText(value);
            }

            @Override
            public void onCancelled(@NonNull DatabaseError error) {

            }
        });
    }
}
Firebase創建便利外,與Androidstudio結合也是很方便快速,本實作的data是手動輸入的,如需匯入資料進入Firebase Database時,須先取得Data URL與金鑰,當資料無法匯入時可以檢查使否將規則裡面的false改成true,Firebase Realtime Database為了確保數據安全性會將讀取與寫入設為有限制的(如使用預設鎖定模式的話),後續將測試使用AndroidStudio讀取網頁json格式資料,祝各位實作順利!
 xiangcheng
