Day 17: 使用 AWS EC2 部署 Docker 容器
Day 18: AWS Elastic Kubernetes Service (EKS) 入門
Day 19: 設置 AWS ALB(Application Load Balancer)進行負載均衡
Day 20: AWS Auto Scaling 自動調整實例數量
Day 21: AWS S3 與容器化應用數據存儲
Day 22: 使用 AWS RDS 管理關聯式資料庫
Day 23: 使用 AWS Inspector 進行安全性掃描與合規性檢查
Day18-23都會產生費用,不適用於免費方案,請斟酌練習喔!
Amazon EKS(Elastic Kubernetes Service)是 AWS 提供的托管 Kubernetes 服務,簡化了 Kubernetes 的部署和管理。EKS 提供高可用的控制平面,自動處理 Kubernetes 環境的維護和升級。用戶可以利用 EKS 部署、管理和擴展容器化應用程式,並集成 AWS 服務(如 IAM、VPC 和 CloudWatch)。EKS 提供企業級的安全性和可靠性,支持快速開發和運營雲原生應用。
這裡會接觸到一點AWS IAM(後面其他服務也會有關聯)
AWS IAM(Identity and Access Management)是亞馬遜網路服務提供的身份和存取管理服務。它允許用戶創建和管理 AWS 資源的使用者和權限,控制誰可以訪問 AWS 資源以及他們可以執行的操作。IAM 支持基於角色的訪問控制(RBAC),多因素身份驗證(MFA),以及細粒度的許可政策,確保安全性和合規性。用戶可以通過 IAM 管理用戶、組、角色和策略,保護雲端資源免受未經授權的訪問。
在 AWS IAM 中,將策略(Policy)建立在角色(Role)上和建立在使用者(User)上具有以下不同點:
角色(Role):
角色主要用於為 AWS 服務、應用程式或其他 AWS 資源提供臨時的權限。角色可以被 AWS 服務(如 EC2 實例)、IAM 使用者、或其他 AWS 資源(如 Lambda 函數)假設。
角色的策略通常用於跨帳戶授權、應用程式訪問、臨時訪問、以及更靈活的權限管理。
使用者(User):
使用者是指在 AWS 中具有長期身份的實體,通常代表人員或自動化系統。
使用者的策略用於直接控制該使用者的訪問權限,適合需要持續和穩定權限的情況。
角色(Role):
角色的策略可以設計為臨時權限,並且角色可以被多個實體假設,這樣可以集中管理和更靈活地分配權限。
角色可以被設計為跨帳戶訪問,或允許其他服務(如 AWS Lambda)在執行時使用角色的權限。
使用者(User):
使用者的策略直接與特定的使用者關聯,適合需要長期固定權限的情況。
使用者的權限在 IAM 系統中直接管理,通常不會像角色那樣跨帳戶或跨服務使用。
角色(Role):
使用角色可以實現最小權限原則,因為角色的權限可以按需臨時授予,並且角色可以輕鬆地進行審計和管理。
適合用於動態授權和短期使用情境。
使用者(User):
使用者的權限一般較為靜態,適合需要長期、穩定權限的場景。
更容易在具體使用者層級進行權限管理和審計。
總結
將策略建立在角色上適合動態、跨帳戶、服務間的權限管理。
將策略建立在使用者上則適合長期、穩定的個別使用者權限控制。
進階可參考官方說明頁面
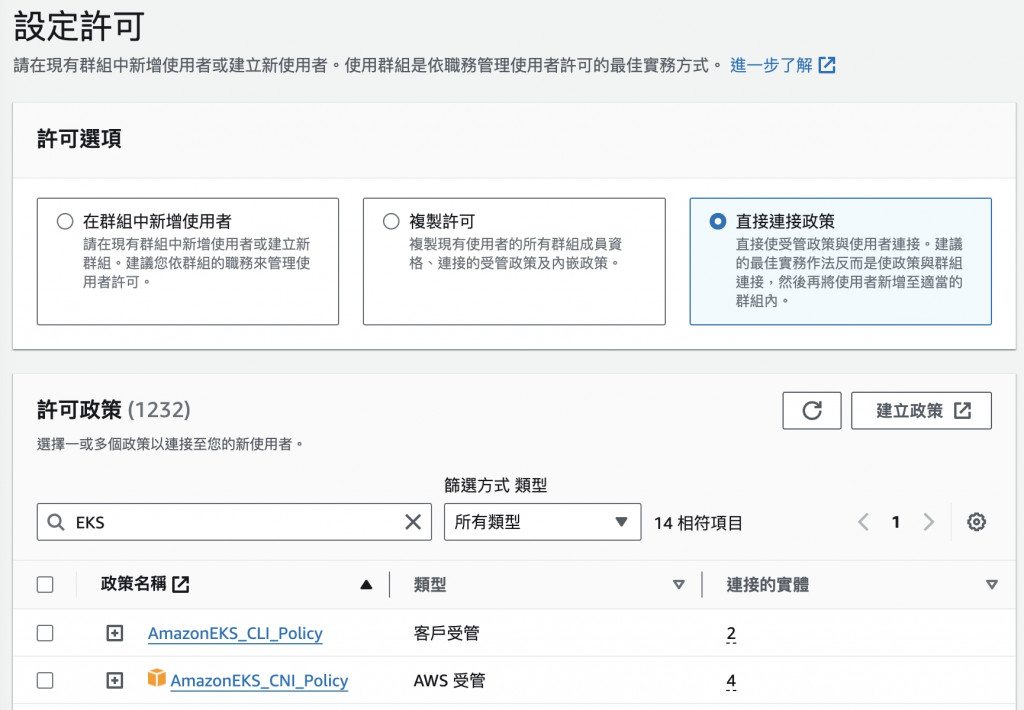
建立一個IAM使用者,選擇直接連結政策,將EKS相關的都勾上

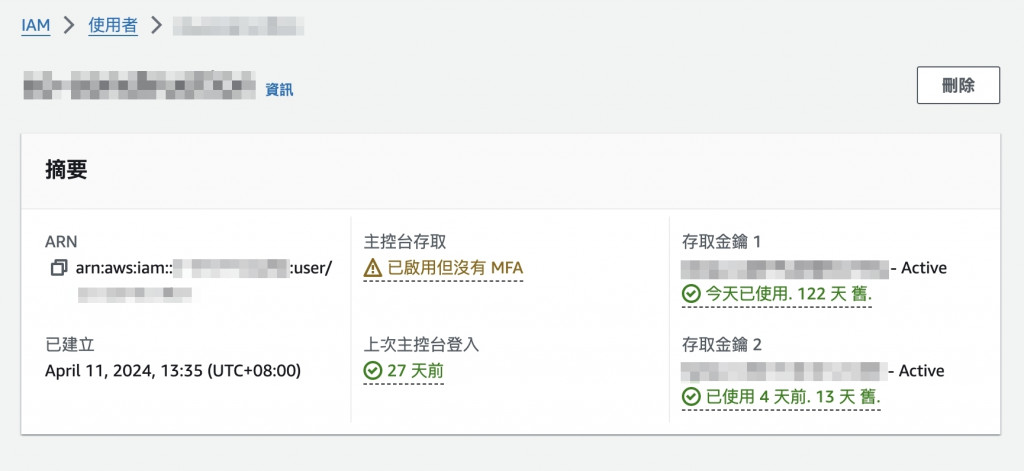
使用者可以產生金鑰(不能再次查詢,須牢記)

#獲取aws-cli工具
curl "https://awscli.amazonaws.com/awscli-exe-linux-x86_64.zip" -o "awscliv2.zip"
#解壓縮
unzip awscliv2.zip
#配置+安裝
sudo ./aws/install --bin-dir /usr/local/bin --install-dir /usr/local/aws-cli --update
aws configure
依據提示輸入
region(你的EKS所在區域,例如:ap-southeast-1)
access key(使用者產生)
secret key(使用者產生)
#安裝EKS
curl --silent --location "https://github.com/weaveworks/eksctl/releases/latest/download/eksctl_$(uname -s)_amd64.tar.gz" | tar xz -C /tmp
sudo mv /tmp/eksctl /usr/local/bin
#安裝kubectl
sudo curl -Lo /usr/local/bin/kubectl https://s3.us-west-2.amazonaws.com/amazon-eks/1.26.4/2023-05-11/bin/linux/amd64/kubectl
#加入執行權限
sudo chmod +x /usr/local/bin/kubectl
(選項一)在AWS主控台上也可操作,比較容易
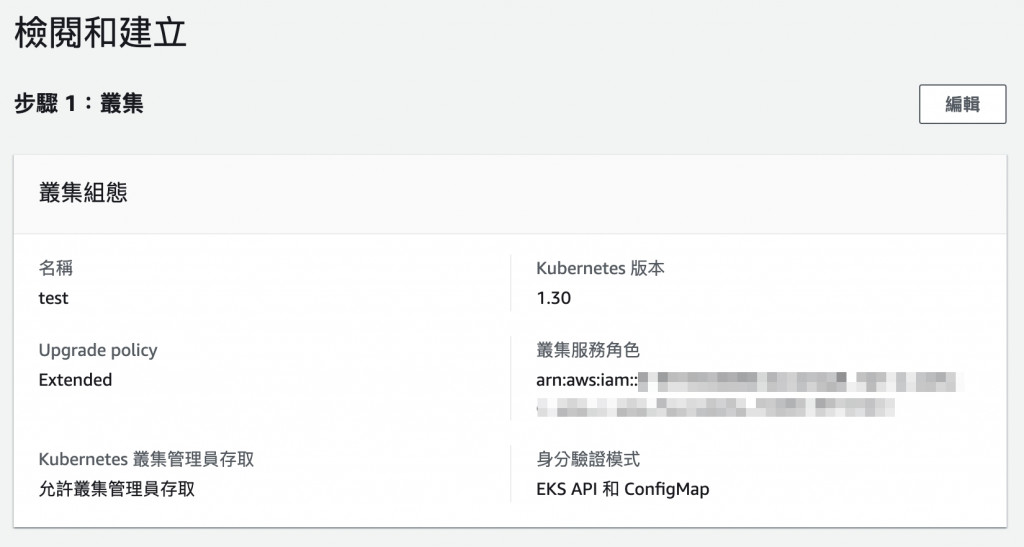
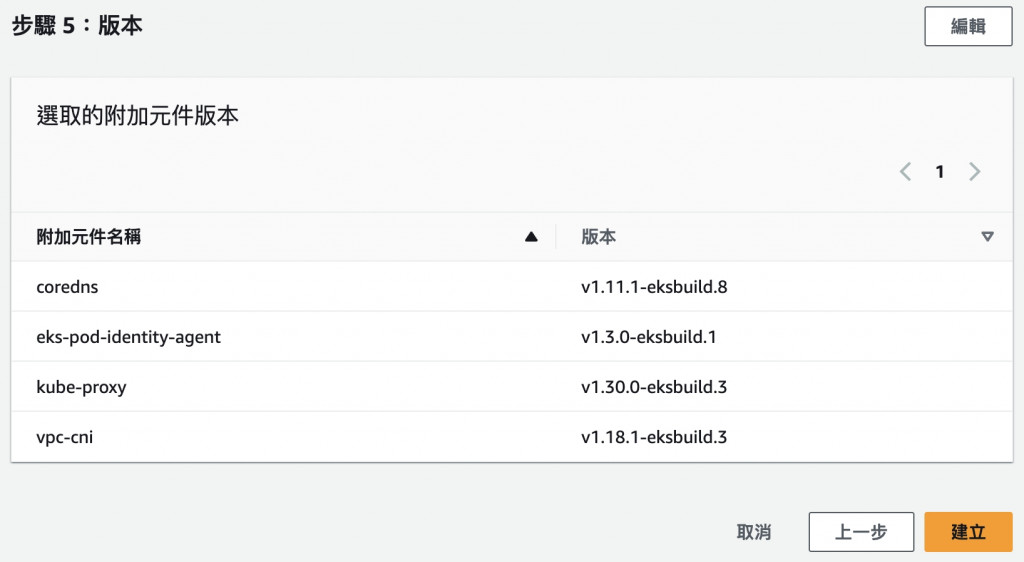
基本上就是一直下一步,選擇IAM服務帳戶、VPC、子網路、K8S組件的版本...等


(選項二)通過CLI編寫yaml腳本進行操作,比較詳細
sudo nano your-eks-cluster.yaml
apiVersion: eksctl.io/v1alpha5
kind: ClusterConfig
metadata:
  name: cluster-in-existing-vpc
  region: ap-southeast-1
  version: "1.26"
vpc:
  subnets:
    private:
      ap-southeast-1a: { id: <你的子網subnet-****> }
      ap-southeast-1b: { id: <你的子網subnet-****> }
nodeGroups:
  - name: ng-1-workers
    labels: { role: workers }
    #機型
    instanceType: t3.xlarge
    #最大及最小數量
    minSize: 2
    maxSize: 5
    #磁碟大小
    volumeSize: 30
    volumeType: gp3
    privateNetworking: true
    ssh:
      publicKey: "<你的金鑰ssh-****>"
    iam:
      withAddonPolicies:
        autoScaler: true
  - name: ng-2-builders
    labels: { role: builders }
    #機型
    instanceType: t3.xlarge
    desiredCapacity: 2
    volumeSize: 30
    privateNetworking: true
    ssh:
      publicKey: "<你的金鑰ssh-****>"
    iam:
      withAddonPolicies:
        imageBuilder: true
        ebs: true
        fsx: true
        efs: true
        awsLoadBalancerController: true
        autoScaler: true
#建立集群
eksctl create cluster -f your-eks-cluster.yaml
#刪除集群
eksctl delete cluster -f your-eks-cluster.yaml
再來建立nodeGroup的腳本
sudo nano your-eks-nodegroup-c6i.yaml
apiVersion: eksctl.io/v1alpha5
kind: ClusterConfig
metadata:
  name: your-eks-cluster-vpc
  region: ap-southeast-1

nodeGroups:
  #節點群組名稱
  - name: ng-c6i-2xlarge-workers
    labels: { role: workers }
    #機型
    instanceType: c6i.2xlarge
    minSize: 3
    maxSize: 5
    volumeSize: 200
    volumeType: gp3
    privateNetworking: true
    ssh:
      publicKey: "<你的金鑰ssh-****>"
    iam:
      withAddonPolicies:
        awsLoadBalancerController: true
        autoScaler: true
        ebs: true
        fsx: true
        efs: true
#手動建立node group
eksctl create nodegroup --config-file=your-eks-nodegroup-c6i.yaml

#刪除node group
$eksctl delete nodegroup --cluster=<clusterName> --name=<nodegroupName>
$eksctl delete nodegroup --cluster your-eks-cluster-vpc --name=ng-c6i-4xlarge-workers
查詢有哪些cluster
#eksctl get clusters --region ap-southeast-1

#查詢node群組名稱
eksctl get nodegroups --cluster your-eks-cluster
eksctl get nodegroups --cluster your-eks-cluster
