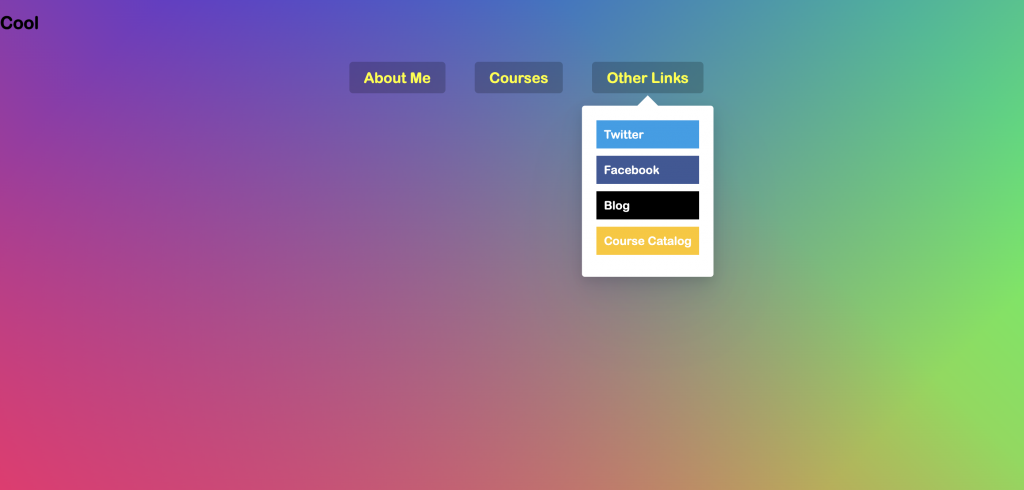
實作一個隨著滑鼠停留後會下拉的選單列效果。
可以思考一下,動畫出現的時機。
先製作出樣式
.dropdown + class
.trigger-enter 的 display 改成 block
.trigger-enter-active 的 opacity 改成 1
.dropdownBackground + calss
.open 的 opacity 改成 1
先取得元素
li
dropdownBackground
navbar
console 出來看看是否有選到使用 forEach 監聽所有 li 再做效果
func: enterHandlerfunc: leaveHandlerconsole 出來看看是否會觸發滑鼠移入的樣式效果(func: enterHandler)
增加 class .trigger-enter
this.classList.add('trigger-enter');
設定時間等待 150毫秒再新增 class 'trigger-enter-active'
setTimeout(() => this.classList.add('trigger-enter-active'), 150)
點擊效果測試
滑鼠移除的移掉樣式(func: leaveHandler)
移除 class .trigger-enter,'trigger-enter-active'
this.classList.remove('trigger-enter', 'trigger-enter-active');
點擊效果測試
滑鼠移入移出的背景樣式
滑鼠移入(func: enterHandler)
background.classList.add('open');
滑鼠移除(func: leaveHandler)
background.classList.add('open');
調整移入時的背景樣式位置,因為會發現背景在左上角,不是我們預期的地方。
先找到點擊的是哪一個
const dropdown = this.querySelector('.dropdown');
console.log(dropdown);
使用 getBoundingClientRect() 得到 nav 和點擊到的 dropdown 寬高
const dropdownCoords = dropdown.getBoundingClientRect();
const navCoords = nav.getBoundingClientRect();
console.log(dropdownCoords, navCoords);
把得到的寬高賦值到 background
const coords = {
  height: dropdownCoords.height,
  width: dropdownCoords.width,
}
background.style.setProperty('height', `${coords.height}px`);
background.style.setProperty('width', `${coords.width}px`);
再把點擊到的 dropdown 位置取出並減掉 nav 的位置,賦值到 background
const coords = {
  top: dropdownCoords.top - navCoords.top,
  left: dropdownCoords.left - navCoords.left,
}
background.style.setProperty('transform', `translate(${coords.left}px, ${coords.top}px)`);
調整下拉選單出現時機,因為會發現如果滑鼠快速移動,下拉選單會有點混亂。
使用 contains() 檢查是否有 class trigger-enter ,有再添加 trigger-enter-active class
setTimeout(() => this.classList.contains('trigger-enter') && this.classList.add('trigger-enter-active'), 150)
滑鼠事件與委派事件
mouseenter ,mouseleave :無法使用委派事件,因為只會觸發一次
const ul = document.querySelector('.cool');
ul.addEventListener('mouseenter', inHandler);
ul.addEventListener('mouseleave', outHandler);

function inHandler() {
  console.log('in');
}
function outHandler() {
  console.log('out');
}
mouseover,
mouseout : 可以使用委派事件,觸發多次
const ul = document.querySelector('.cool');
ul.addEventListener('mouseover', inHandler);
ul.addEventListener('mouseout', outHandler);

function inHandler() {
  console.log('in');
}
function outHandler() {
  console.log('out');
}
先用 composedPath() 找到事件的路徑
function inHandler(e) {
  console.log('in', e.composedPath());
}
function outHandler(e) {
  console.log('out', e.composedPath());
}
增加判斷,在點擊到 a 連結在觸發事件
function inHandler(e) {
  const path = e.composedPath()
  if (path[0].nodeName == 'A') console.log('in');
}
function outHandler(e) {
  const path = e.composedPath()
  if (path[0].nodeName == 'A') console.log('out');
}
使用委派事件就可以用在動態選單了,但是要多寫很多判斷,所以要小心建議有工具(JQ)比較好。
