今天要來看React的父子組件間的傳遞囉,前面說到React是單向數據流今天就能看看了

下面開始個別說明
示意圖
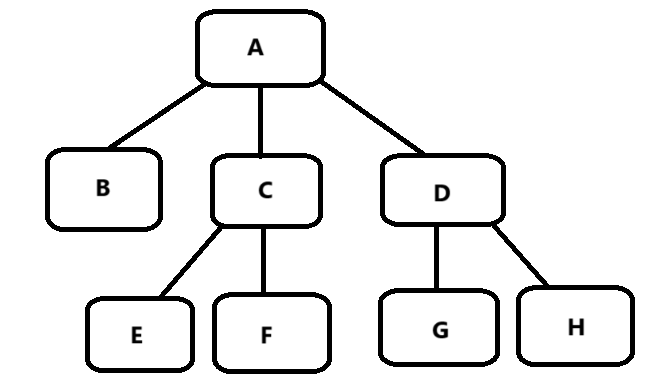
首先我們先來看父子的架構長甚麼樣
function Son() {
    return <div>你乖兒子</div>
  }
function ParentComponent()
  {
      return(
      <>
          <div>
              <label>父子通信(你爹)</label>
              <Son />
          </div>
      </>
      )
  }
export default ParentComponent
當A組件透過<組件名/>導引出的組件變是子,而A則為父
而正常來說兩邊函數是不會互相溝通的,如果函數要溝通一般的函數很直觀function(參數)基本都這樣
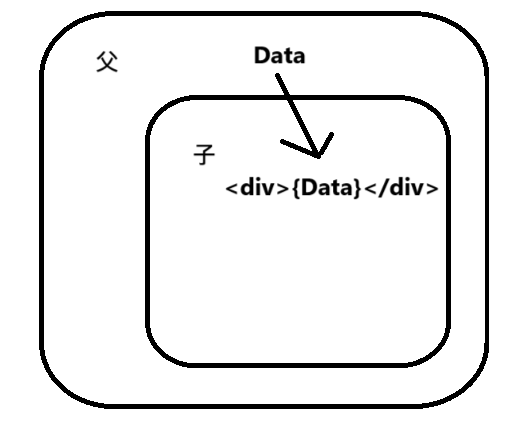
但這邊正常應該都不會想到<組件/>怎麼在這裡帶參數吧,下面進行父傳子的操作
父子的溝通大概如下
父
<a組件 參數a={} 參數b={} ... />
子接收
function a組件(props){
    console.log(props.a)
    console.log(props.b)
    ...
}
範例
import React, { useState } from 'react'
function Son(props) {
    return(
    <>
        <label>以下是你乖兒子</label>
        <div>{props.Soncontext},老爹給你的訊息:{props.number}</div>
    </>
    )
}
function ParentComponent()
  {
    const message='老爹的信'
    const [sonvalue, setSonvalue] = useState('')
    return(
    <>
      <div>
          <label>父子通信</label>
          <input type="text" onChange={(e) => setSonvalue(e.target.value)} />
            <br />
          <Son Soncontext={message} number={sonvalue} />
      </div>
    </>
  )
  }
export default ParentComponent
這樣就可以傳遞了,而父傳子能傳遞的東西有甚麼?
他能傳遞的類型很多,例如:數字、字串、布林、字串、字典、函式、jsx都行
    name={string}
    number={123}
    tf={true}
    list={[123,456]}
    dict={[one:1]}
    letter={()=>consolo.log(123)}
    jsx={<span>test</span>}
但是,子組件是不能修改父組件的值ex:props.number = 0
將上面的Son替換
function Son(props) {
    return(
    <>
        <label>以下是你乖兒子</label>
        <div>{props.Soncontext},老爹給你的訊息:{props.number}</div>
        {props.children}
        {props.children[0]}
    </>
    )
}
父呼叫子的地方替換
<Son Soncontext={message} number={sonvalue}>
<label>來旅遊的</label>
<label>來旅遊的2</label>
</Son>
props.children能夠一次將包裹住的元素渲染出來,也可透過[n]一一渲染出來
一樣先上code在解說
import React, { useState } from 'react'
function Son(props) {
    const [sonMsg, setSonMsg] = useState('');
    return (
        <div>
            <button onClick={() => props.onGetSonMsg(sonMsg)}>
                傳送子組件訊息
            </button>
            <input type='text' onChange={(e)=>setSonMsg(e.target.value)}/>
        </div>
    );
}

function ParentComponent() {
    const [msg, setMsg] = useState('');
    const getMsg = (msg) => {
        console.log(msg);
        setMsg(msg);
    };
    return (
        <div>
            <label>父子通信 - 子傳父</label>
            <br />
            <label>等待子消息:{msg}</label>
            <Son onGetSonMsg={getMsg} />
        </div>
    );
}
export default ParentComponent;
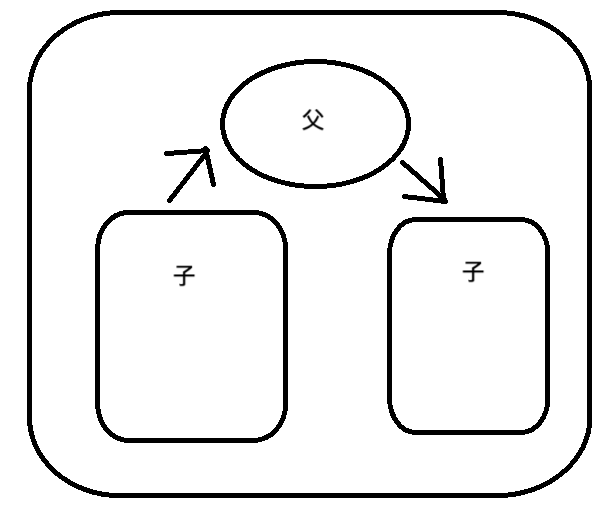
我們在父組件中,透過 <Son onGetSonMsg={getMsg} /> 的方式,將一個回調函數 getMsg 傳遞給子組件,這樣子組件在執行某個動作時(例如點擊按鈕),可以通過這個回調函數將資料傳回父組件。
接下來,子組件通過 props.onGetSonMsg(sonMsg) 來調用這個回調函數,也就是從父組件傳遞下來的 getMsg 函數。sonMsg 作為參數傳遞給父組件的 getMsg,這樣父組件就可以接收到子組件發送的數據,並在父組件中進行相應的處理(例如更新狀態)。
由於React的單向數據流,所以方式十之八九就是如下啦
範例
import React, { useState } from 'react'

function A({ onGetName }) {
    const name = 'A msg'
    return (
        <div>
            this is A
            <button onClick={() => onGetName(name)}>send</button>
        </div>
    )
}

function B({name}) {
    return (
        <div>
            this is B,get:{name}
        </div>
    )
}
function ParentComponent() {
    const getname = (name) => {
        console.log(name)
        setName(name)
    }
    const [name, setName] = useState('')
    return (
        <>
            <div>
                <header>
                    <a href="/">Home</a>
                    <label>子傳父</label>
                </header>
                <A onGetName={getname}></A>
                <B name={name}></B>
            </div>
        </>
    )
}

export default ParentComponent;
就是用回調函數的方式,先將子傳給父,父做處理再用useState去重新渲染B,就是用上面得父傳子+子傳父的結合
{name}這就是解構語法這樣就不用前面再加個props甚麼的,但缺點就是數量一多就很麻煩,所以斟酌使用
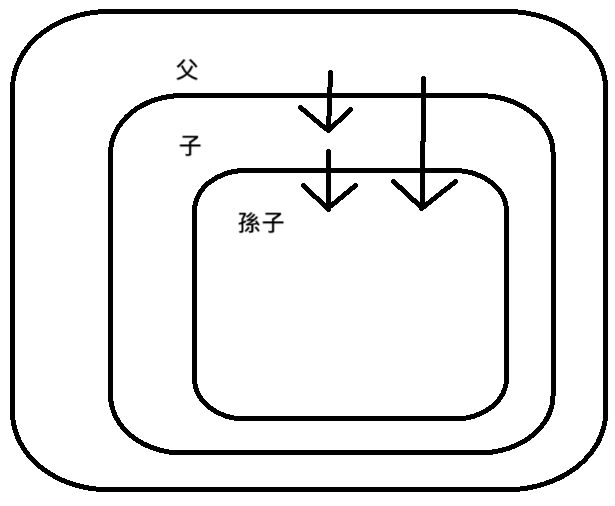
你可能會想該不會父傳子做兩次吧,那也是可以,但也可以直接丟給你孫子唷(使用Context API)。
步驟:
1.使用creatContext創建一個上下文對象的Ctx
2.在頂層組件(父)中通過Ctx.Provoid組件提供數據
3.在底層組件(孫子)中通過useContext函數鉤子函數獲取消費數據
註:可一次申請多個Ctx
import { createContext, useContext } from "react"
const MsgCtx = createContext()
function A() {
    return (
        <div>
            this is A
            <B />
        </div>
    )
}

function B() {
    const msg = useContext(MsgCtx)
    return (
        <div>
            this is B,{msg}
        </div>
    )
}
function ParentComponent() {
    const msg = 'send material'
    return (
        <>
            <div>
                <header>
                    <a href="/">這裡是父</a>
                </header>
                <MsgCtx.Provider value={msg}>
                    這邊還是父
                    <A />
                </MsgCtx.Provider>
            </div>
        </>
    )
}

export default ParentComponent;
使用 createContext() 函數來創建一個上下文對象 MsgCtx。這個上下文會提供一個共享的數據源,所有在 MsgCtx.Provider 包裹範圍內的組件都可以訪問這個共享數據。
在 ParentComponent(父) 中,我們創建了一個變量 msg,其值為 'send material',並且使用 MsgCtx.Provider 將這個變量作為上下文提供給子組件和孫子組件。
MsgCtx.Provider:Provider 是 Context API 中用來傳遞數據的組件,這裡的 value={msg} 表示將 msg 的數據傳遞給 Provider 包裹範圍內的組件。
子組件 A 被 Provider 包裹,雖然 A 本身沒有使用 useContext,但它的子組件 B 能夠通過 useContext 存取 msg。
在 B 組件中,我們使用 useContext(MsgCtx) 來獲取 MsgCtx.Provider 提供的數據。
今天就到這囉,這就是React的單向數據流所造成的通信架構,這大概就是我最長的文章了,休息啦
