接著,我們來實作將商品加入購物車的功能,在HomePage.vue加入Add To Cart的按鈕,在Category: {{ product.category }}下,添加按鈕。
<p class="text-gray-500 text-xs mt-1">
						Category: {{ product.category }}
					</p>

<button
						class="bg-blue-500 hover:bg-blue-700 text-white font-bold py-2 px-4 rounded"
						@click="cartHandler(product.id)"
					>
						Add To Cart
					</button>
按下按鈕後,傳送商品id給cartHandler
const cartHandler = (id) => {
	console.log(id);
};
按下Add To Cart,就會傳送Product的id。
使用axios將商品加入購物車
const cartHandler = (id) => {
	addToCart(id);
};

const addToCart = async (id) => {
	try {
		const data = {
			productId: id,
			quantity: 1,
		};

		const response = await axios.put(
			"http://localhost:8080/api/cart/add",
			data,
			{
				headers: {
					Authorization: `Bearer ${authStore.token}`,
				},
			}
		);
		console.log(response.data);
	} catch (error) {
		console.log(error);
	}
};
按下Add To Cart後,網頁上會出現一個兩秒後消失的訊息。
修改HomePage.vue,設定訊息顯示以及按下會消失。
<div
				v-if="showBubble"
				class="fixed top-8 left-1/2 transform -translate-x-1/2 bg-green-500 text-white px-4 py-2 rounded-lg shadow-lg transition-opacity duration-500 ease-in-out"
				@click="closeBubble"
			>
				Added to Cart!
			</div>

<div class="flex justify-center">
				<vue-awesome-paginate
				/>
				//...
			</div>
在script部分,設定按下Add To Cart按鈕後,讓bubble顯示,點擊訊息或兩秒後自動消失。
const showBubble = ref(false);

const addToCart = async (id) => {
	try {
		//...

		const response = await axios.put(
			//...
		);
		showBubble.value = true;
		setTimeout(() => {
			showBubble.value = false;
		}, 2000);

		console.log(response.data);
	} catch (error) {
		console.log(error);
	}
};

const closeBubble = () => {
	showBubble.value = false;
};
新增CartPage.vue,使用的都是先前學過的Vue技巧,將後端取得的資料顯示在網頁上。
<template>
	<div
		class="flex items-center justify-between border-b border-gray-200 py-4 font-bold"
	>
		<div class="flex items-center">
			<div class="w-16 h-16"></div>
			<div class="flex-1 text-gray-700">商品</div>
		</div>
		<div class="flex items-center space-x-4">
			<span class="w-28 text-gray-700">單價</span>
			<span class="w-20 text-gray-700">數量</span>
			<span class="w-16 text-gray-700">總計</span>
			<span class="w-16 text-gray-700">操作</span>
		</div>
	</div>

	<div
		v-for="item in items"
		:key="item.id"
		class="flex items-center justify-between border-b border-gray-200 py-4"
	>
		<div class="flex items-center">
			<img
				:src="item.product.image"
				:alt="item.product.name"
				class="w-16 h-16 object-cover rounded-lg shadow-sm mr-4"
			/>
			<div class="flex-1">
				<h2 class="text-lg font-bold text-gray-900">{{ item.product.name }}</h2>
			</div>
		</div>
		<div class="flex items-center space-x-4">
			<span class="w-16 text-gray-700">{{ item.product.price }}</span>
			<div class="flex items-center space-x-2">
				<button
					class="bg-blue-500 hover:bg-blue-600 text-white px-2 py-1 rounded"
				>
					-
				</button>
				<input
					type="text"
					v-model="item.quantity"
					class="border border-gray-300 p-2 w-16 text-center"
				/>
				<button
					class="bg-blue-500 hover:bg-blue-600 text-white px-2 py-1 rounded"
				>
					+
				</button>
			</div>
			<span class="w-16 text-gray-700">{{
				item.product.price * item.quantity
			}}</span>
			<button class="w-16 bg-red-500 hover:bg-red-600 text-white px-2 py-1 rounded">
				刪除
			</button>
		</div>
	</div>

	<div class="text-right mr-4 text-lg">
		總金額 ({{totalQuantity}} 個商品):$ {{totalPrice}}
	</div>
</template>

<script setup>
import { useAuthStore } from "@/stores/auth";
import axios from "axios";
import { computed, onMounted, ref } from "vue";
const authStore = useAuthStore();
const isAuthenticated = computed(() => authStore.isAuthenticated);
const items = ref([]);

const totalPrice = ref(0);
const totalQuantity = ref(0);

const getCartItems = async () => {
	try {
		const response = await axios.get("http://localhost:8080/api/cart/", {
			headers: {
				Authorization: `Bearer ${authStore.token}`,
			},
		});
		items.value = response.data.cartItems;
		totalPrice.value = response.data.totalPrice;
		totalQuantity.value = response.data.totalQuantity;
		console.log(response.data);
	} catch (error) {
		console.log(error);
	}
};

onMounted(() => {
	if (isAuthenticated.value) {
		getCartItems();
	}
});
</script>
router/index.js添加路由
routes: [
    //
    ,
    {
      path: '/cart',
      name: 'cart',
      component: CartPage
    }
  ]
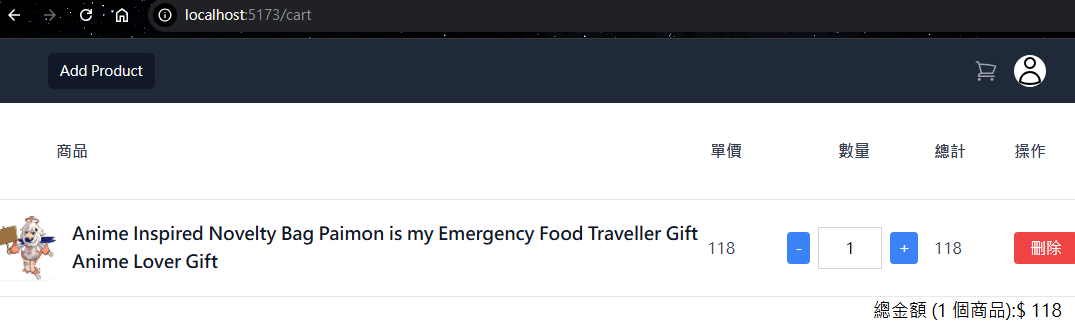
我們在首頁按下其中一個商品的Add To Cart,點擊購物車符號,前往購物車網頁,就能看到剛才選擇的商品。
<div class="flex items-center space-x-2">
				<button
					class="bg-blue-500 hover:bg-blue-600 text-white px-2 py-1 rounded"
					@click="updateQuantity(item.id, item.product.id, item.quantity - 1)"
				>
					-
				</button>
				<input
					type="text"
					v-model="item.quantity"
					class="border border-gray-300 p-2 w-16 text-center"
					@change="updateQuantity(item.id, item.product.id, item.quantity)"
				/>
				<button
					class="bg-blue-500 hover:bg-blue-600 text-white px-2 py-1 rounded"
					@click="updateQuantity(item.id, item.product.id, item.quantity + 1)"
				>
					+
				</button>
</div>
			<span class="w-16 text-gray-700">{{
				item.product.price * item.quantity
			}}</span>
			<button
				class="w-16 bg-red-500 hover:bg-red-600 text-white px-2 py-1 rounded"
				@click="updateQuantity(item.id, item.product.id, 0)"
			>
				刪除
			</button>
修改數量後,要重新計算總金額與總數量並顯示在網頁上
const updateQuantity = async (itemId, productId, quantity) => {
	try {
		if (quantity <= 0) {
			const response = await axios.delete(
				`http://localhost:8080/api/cartItem/${itemId}`,
				{
					headers: {
						Authorization: `Bearer ${authStore.token}`,
					},
				}
			);
			console.log(response.data);
		}
		else {
			const data = {
				productId: productId,
				quantity: quantity,
			};
			const response = await axios.put(
				`http://localhost:8080/api/cartItem/${itemId}`,
				data,
				{
					headers: {
						Authorization: `Bearer ${authStore.token}`,
					},
				}
			);
			console.log(response.data);
		}
		getCartItems();
	} catch (error) {
		console.log(error);
	}
};
在購物車頁面
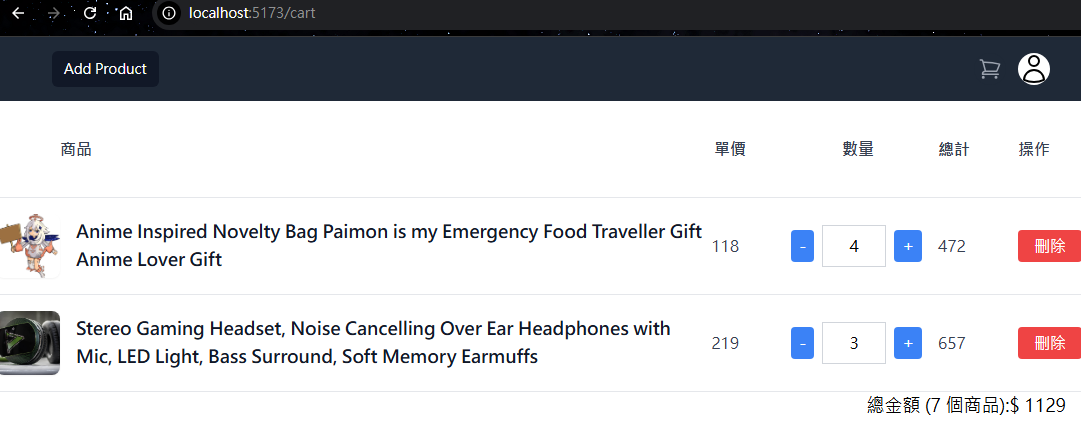
按+竟然導致商品順序改變

getCartItems的部分做些修改,避免更改數量後,造成顯示順序的變化。
不能理解我在說什麼的人,可以不改這部分。
在購物車有多個商品後,一直按+,就能明白為什麼要改了。
const getCartItems = async () => {
	try {
		//...
		items.value = response.data.cartItems.sort((a, b) => a.id - b.id);
		//...
	} catch (error) {
		//...
	}
};
我們修改CartPage.vue,添加Checkout按鈕,按下後前往結帳頁面。
<div class="text-right mr-4 text-lg">
		總金額 ({{ totalQuantity }} 個商品):$ {{ totalPrice }}
		<br />
		<button
			class="bg-orange-500 hover:bg-orange-600 text-white px-2 py-1 rounded"
			@click="checkoutHandler()"
		>
			Checkout
		</button>
	</div>
建立支付Session,並轉移到Stripe支付頁面
const checkoutHandler = async () => {

	const response = await axios.get(
				"http://localhost:8080/api/order/create_session",
				{
					headers: {
						Authorization: `Bearer ${authStore.token}`,
					},
				}
			);
	window.location.href = "" + response.data.url;
};
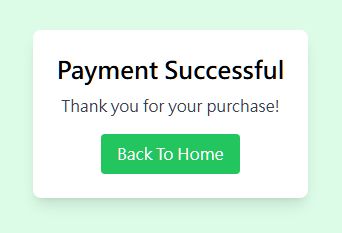
CheckoutSuccess.vue,支付成功後來到的頁面。
<template>
	<div class="flex items-center justify-center min-h-screen bg-green-100">
		<div class="bg-white p-6 rounded-lg shadow-lg text-center">
			<h2 class="text-2xl font-bold mb-2">Payment Successful</h2>
			<p class="text-gray-700">Thank you for your purchase!</p>
			<button
				class="mt-4 px-4 py-2 bg-green-500 text-white rounded hover:bg-green-600"
                @click="router.push('/')"
			>
				Back To Home
			</button>
		</div>
	</div>
</template>

<script setup>
import { useRouter } from "vue-router";
const router = useRouter();

</script>
router/index.js
,
    {
      path: '/checkout/success',
      name: 'checkout-success',
      component: CheckoutSuccess
    }
在購物車有商品時,按下Checkout,前往Stripe頁面。
填入的資料和Spring Boot部分一樣,卡號4242424242424242,其餘部分隨意。
支付成功後,會來到http://localhost:5173/checkout/success,看到支付成功的訊息。
在MainNavbar.vue,增加Order。
const navigation = [
	{ name: "Home", href: "/", current: false },
	{ name: "Add Product", href: "/add", current: false },
	{ name: "Order", href: "/order", current: false },
];
在router/index.js,添加order路由。
,
    {
      path: '/order',
      name: 'order',
      component: UserOrder
    }
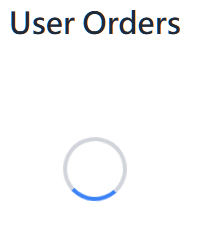
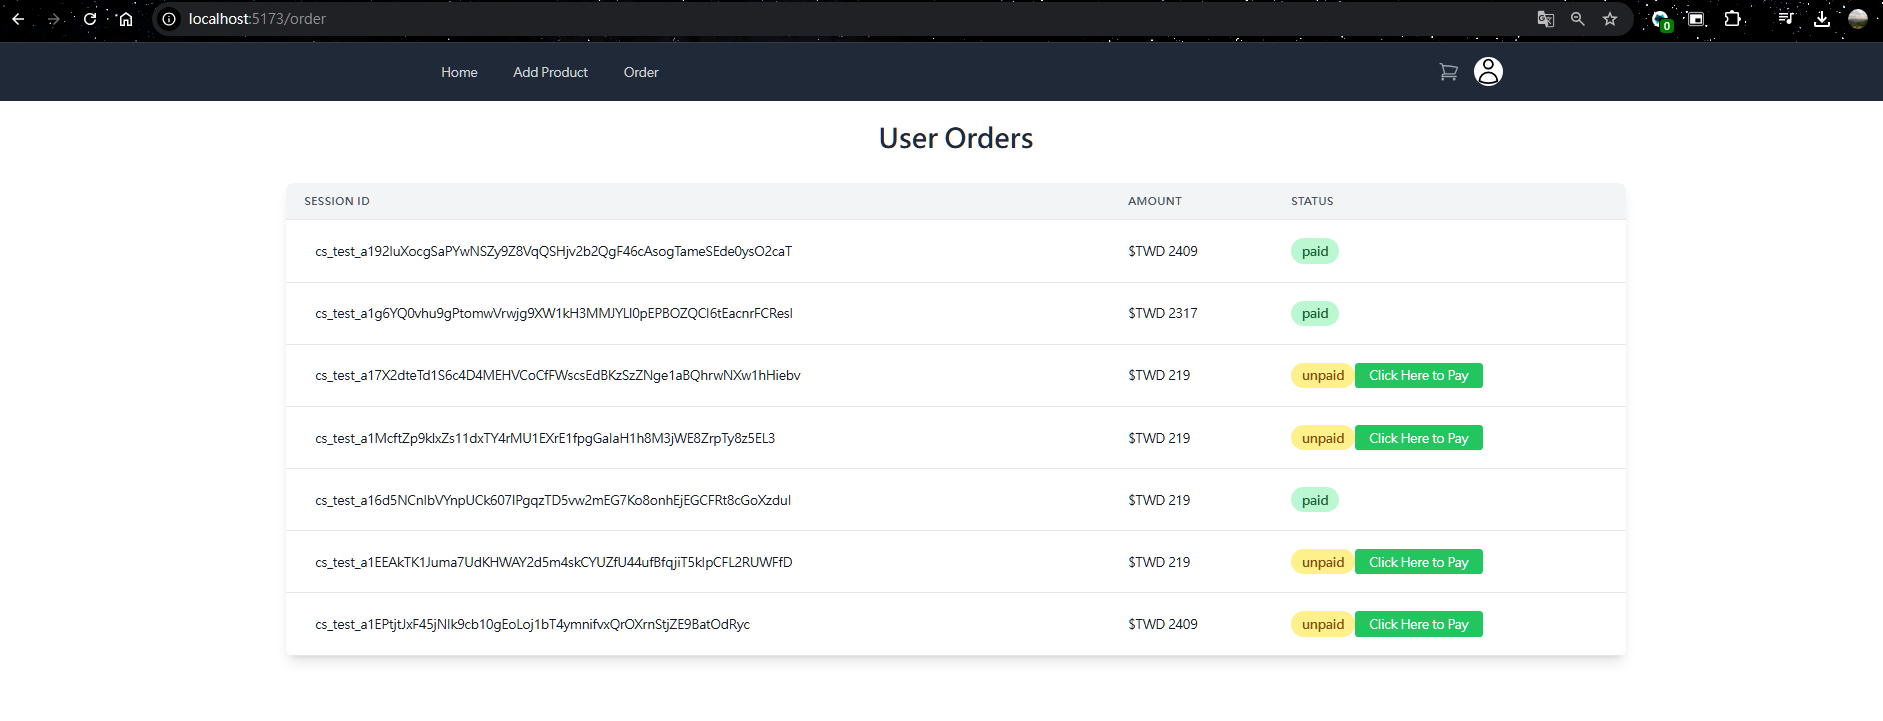
新增UserOrder.vue,顯示Session ID、總價格、付款狀態。
另外,等待資料載入時,會轉圈圈。
<template>
	<div class="container mx-auto p-6">
		<h1 class="text-3xl font-extrabold text-gray-800 mb-8 text-center">
			User Orders
		</h1>

		<div v-if="loading" class="flex justify-center items-center h-48">
			<div
				class="w-16 h-16 border-4 border-gray-300 border-t-4 border-t-blue-500 rounded-full animate-spin"
			></div>
		</div>

		<div v-else class="bg-white shadow-lg rounded-lg overflow-hidden">
			<table class="min-w-full leading-normal">
				<thead>
					<tr>
						<th
							class="px-5 py-3 border-b-2 border-gray-200 bg-gray-100 text-left text-xs font-semibold text-gray-600 uppercase tracking-wider"
						>
							Session ID
						</th>
						<th
							class="px-5 py-3 border-b-2 border-gray-200 bg-gray-100 text-left text-xs font-semibold text-gray-600 uppercase tracking-wider"
						>
							Amount
						</th>
						<th
							class="px-5 py-3 border-b-2 border-gray-200 bg-gray-100 text-left text-xs font-semibold text-gray-600 uppercase tracking-wider"
						>
							Status
						</th>
					</tr>
				</thead>
				<tbody>
					<tr
						v-for="order in orders"
						:key="order.id"
						class="border-b border-gray-200 bg-white hover:bg-gray-50 transition duration-150"
					>
						<td class="px-5 py-5 text-sm">
							<div class="flex items-center">
								<div class="ml-3">
									<p class="text-gray-900 whitespace-no-wrap">
										{{ order.sessionId }}
									</p>
								</div>
							</div>
						</td>
						<td class="px-5 py-5 text-sm">
							<p class="text-gray-900 whitespace-no-wrap">
								$TWD {{ order.amount }}
							</p>
						</td>
						<td class="px-5 py-5 text-sm">
							<span
								:class="{
									'inline-block px-3 py-1 font-semibold text-green-800 bg-green-200 rounded-full':
										order.status === 'paid',
									'inline-block px-3 py-1 font-semibold text-yellow-800 bg-yellow-200 rounded-full':
										order.status === 'unpaid',
								}"
							>
								{{ order.status }}
							</span>
							<button
								v-if="order.status === 'unpaid'"
								@click="goToPaymentSession(order.url)"
								class="bg-green-500 hover:bg-green-600 text-white px-4 py-1 rounded"
							>
								Click Here to Pay
							</button>
						</td>
					</tr>
				</tbody>
			</table>
		</div>
	</div>
</template>

<script setup>
import axios from "axios";
import { useAuthStore } from "@/stores/auth";
import { onMounted, ref } from "vue";

const authStore = useAuthStore();
const orders = ref([]);
const loading = ref(true);

const getOrders = async () => {
	try {
		const response = await axios.get(
			`http://localhost:8080/api/order/find_order`,
			{
				headers: {
					Authorization: `Bearer ${authStore.token}`,
				},
			}
		);
		orders.value = response.data;
		console.log(response.data);
	} catch (error) {
		console.log(error);
	} finally {
		loading.value = false;
	}
};

const goToPaymentSession = (url) => {
	window.location.href = url;
};

onMounted(() => {
	getOrders();
});
</script>
如果已經沒付款,旁邊會顯示前往付款頁面的按鈕。
我們的前端專案完成了!
需要自己使用npm i或bun i,安裝npm套件。
https://mega.nz/file/1U80DDBT#PhxrB8v07E3reQ3GGz_q4JT68RtLcO57C6EvgogXmyA
在根目錄新增ssl資料夾,存放私鑰和憑證。
產生私鑰
openssl genrsa -out private.key 2048
產生自簽憑證
openssl req -new -x509 -key private.key -out certificate.crt -days 365 -config openssl.conf
解釋的部分可以前往Day22觀看詳細的內容
修改vite.config.js,啟用HTTPS,並導入私鑰和憑證。
import { fileURLToPath, URL } from 'node:url'

import { defineConfig } from 'vite'
import vue from '@vitejs/plugin-vue'
import fs from 'fs';
import path from 'path';

// https://vitejs.dev/config/
export default defineConfig({
  plugins: [
    vue(),
  ],
  resolve: {
    alias: {
      '@': fileURLToPath(new URL('./src', import.meta.url))
    }
  },
  base: './',
  server: {
    https: {
      key: fs.readFileSync(path.resolve('./ssl/private.key')),
      cert: fs.readFileSync(path.resolve('./ssl/certificate.crt'))
    }
  }
})
Spring Boot專案要在CORS的部分做修改
將http→https
config.setAllowedOrigins(Arrays.asList(
                                "https://localhost:5173"
                        ));
如果後端是HTTP,前端是HTTPS,會因為HSTS,而觸發了preflight request,導致向後端傳送OPTIONS的request,需要允許OPTIONS類別通過。
config.setAllowedMethods(Arrays.asList("GET", "POST", "PUT", "DELETE", "OPTIONS"));
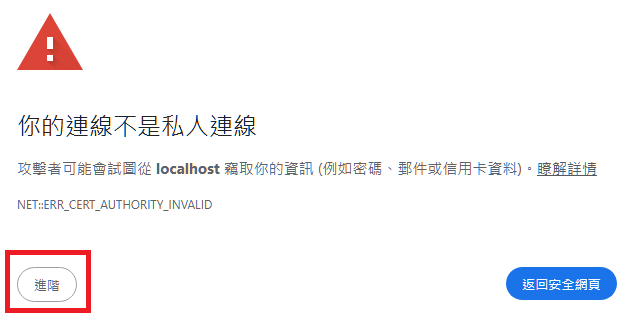
我們前往https://localhost:5173/
由於我們採用自簽憑證,會發現瀏覽器提示這是一個不安全的網站,實際上我們的網站並不危險。
按下進階
選擇繼續前往
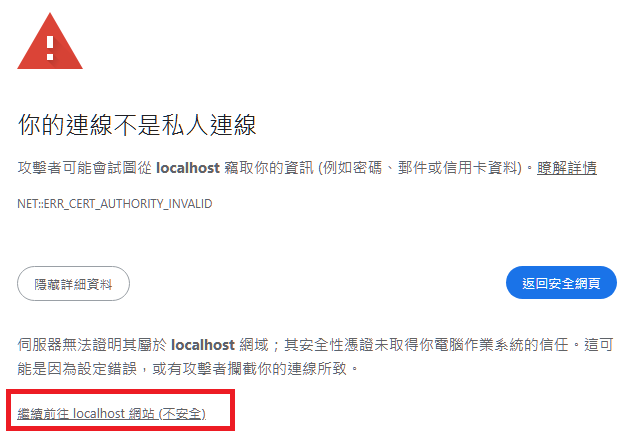
確認前端可以從後端取得資料