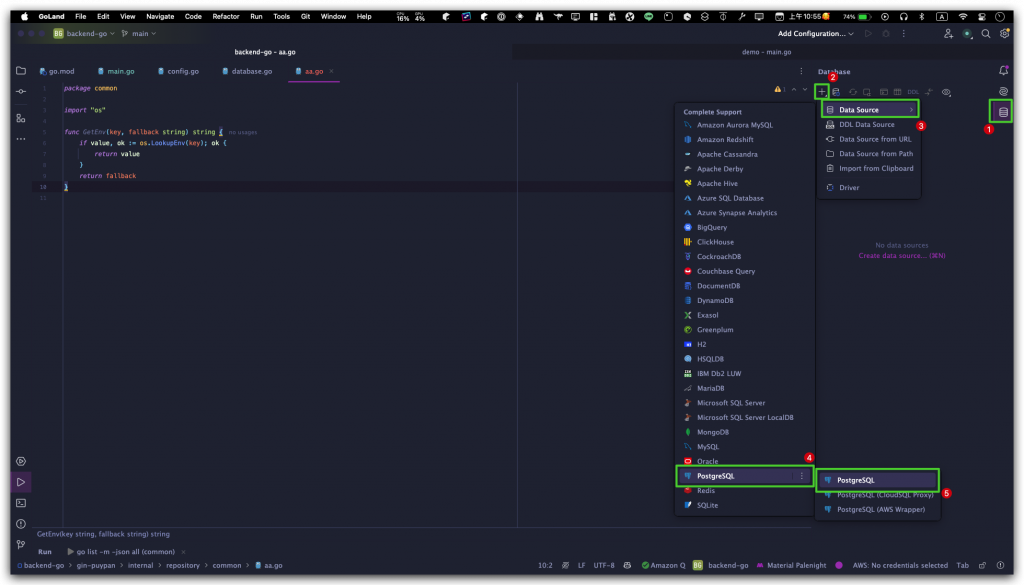
上面我們介紹了基本概念,那接下來我們就來試著在 Goland 中去做連接資料庫的動作吧!
一樣我們先在終端機輸入下面指令:
go get -u gorm.io/gorm
go get -u gorm.io/driver/postgres
module demo

go 1.23.0

require (
	github.com/jackc/pgpassfile v1.0.0 // indirect
	github.com/jackc/pgservicefile v0.0.0-20240606120523-5a60cdf6a761 // indirect
	github.com/jackc/pgx/v5 v5.7.1 // indirect
	github.com/jackc/puddle/v2 v2.2.2 // indirect
	github.com/jinzhu/inflection v1.0.0 // indirect
	github.com/jinzhu/now v1.1.5 // indirect
	golang.org/x/crypto v0.27.0 // indirect
	golang.org/x/sync v0.8.0 // indirect
	golang.org/x/text v0.18.0 // indirect
	gorm.io/driver/postgres v1.5.9 // indirect
	gorm.io/gorm v1.25.12 // indirect
)
這裡我們要先下載
driver files才能正常與我們 PostgreSQL 做互動
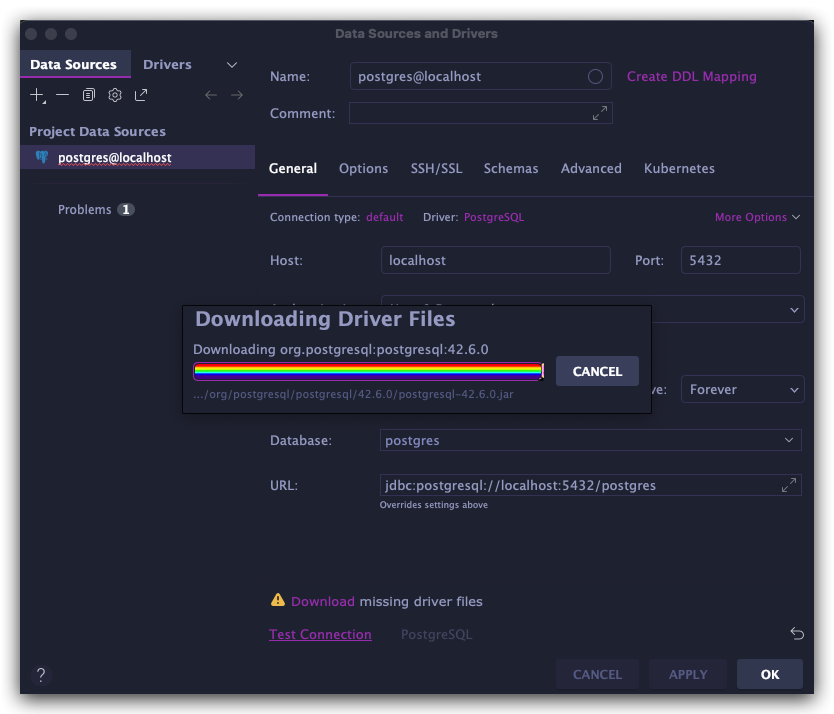
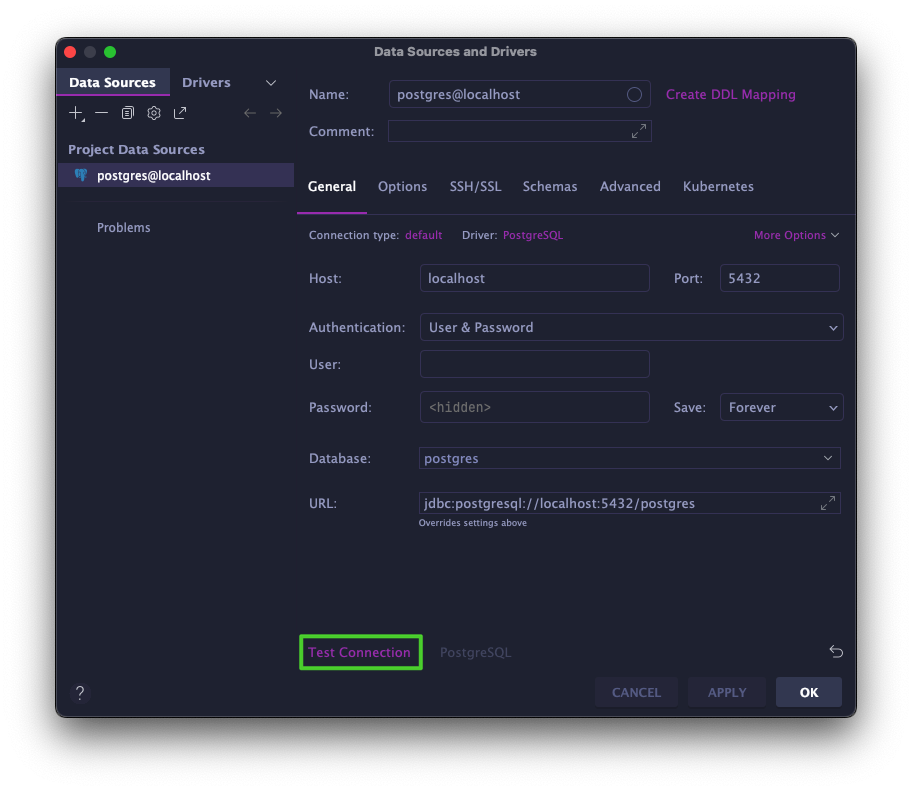
如果成功的話,我們就直接點擊 ->
APPLY->OK
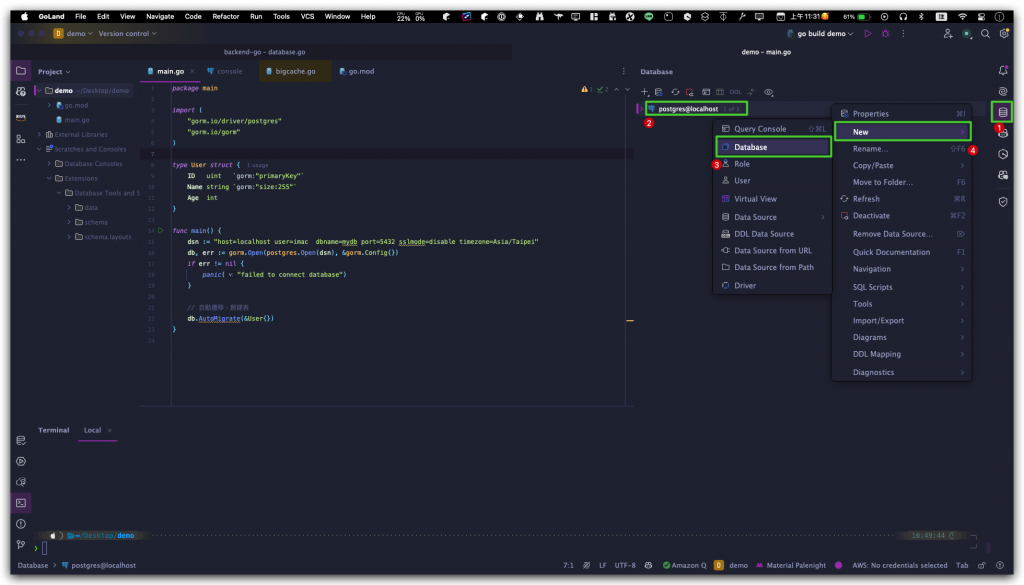
第二步驟要記得用右鍵觸發
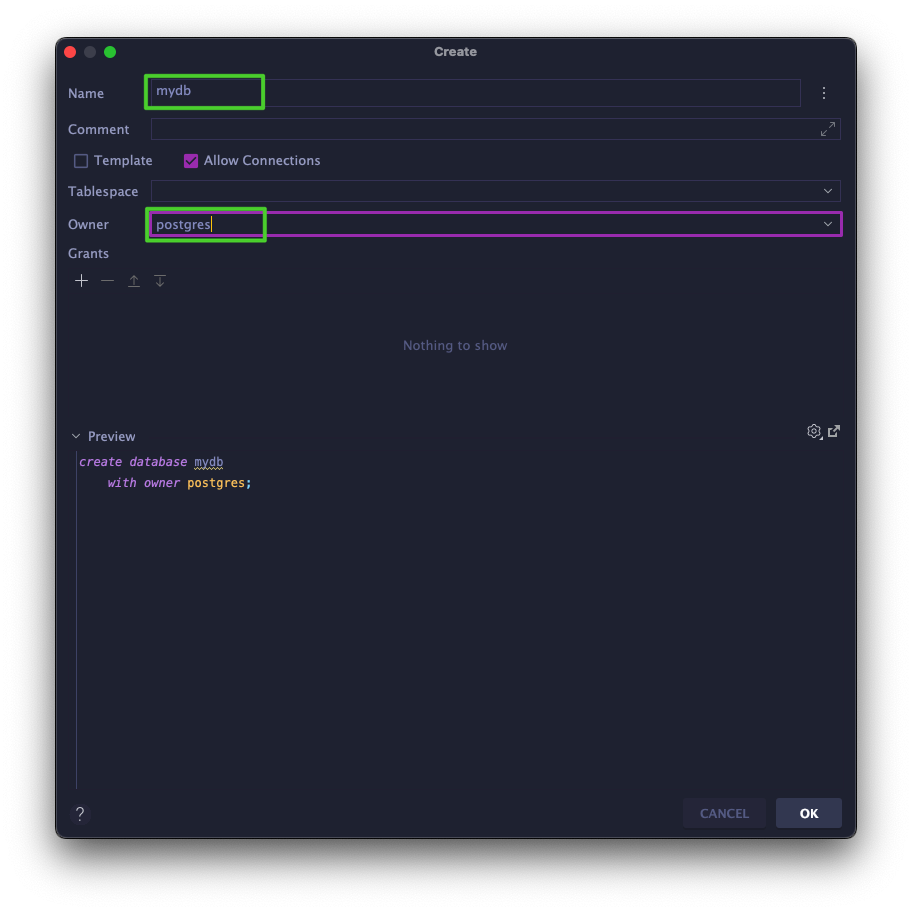
- 那資料庫的名字我們就設定
mydb- 擁有者就用預設的
postgres
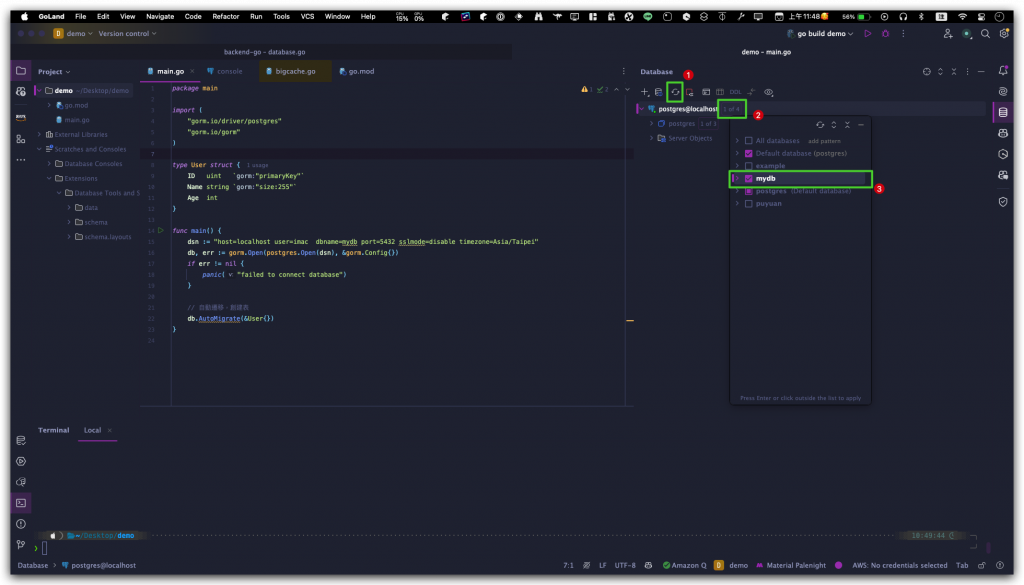
package main

import (
	"gorm.io/driver/postgres"
	"gorm.io/gorm"
)

type User struct {
	ID   uint   `gorm:"primaryKey"`
	Name string `gorm:"size:255"`
	Age  int
}

func main() {
	dsn := "host=localhost user=imac  dbname=mydb port=5432 sslmode=disable timezone=Asia/Taipei"
	db, err := gorm.Open(postgres.Open(dsn), &gorm.Config{})
	if err != nil {
		panic("failed to connect database")
	}

	// 自動遷移,創建表
	db.AutoMigrate(&User{})
}
這裡定義了一個
User結構體,代表了資料庫中的一個表。每個欄位對應於資料表中的一個欄位:
- ID:資料表中的主鍵(primary key)。
gorm:"primaryKey"表示這個欄位是主鍵。- Name:一個
string類型的欄位,最多長度為 255。- Age:一個
int類型的欄位,用來儲存年齡。如果不確定後面標籤要帶什麼可以參考這兩個頁面來做判斷📎參考連結
dsn 是資料庫連線字串,用來告訴 Gorm 如何連接 PostgreSQL 資料庫。各個部分的解釋如下:
- host=localhost:指定資料庫主機位於本地。
- user=imac:連接資料庫的用戶名稱是
postgres。- dbname=mydb:要連接的資料庫名稱是
mydb。- port=5432:PostgreSQL 預設使用的端口號是
5432。- sslmode=disable:禁用 SSL 連接,適合開發環境。
- timezone=Asia/Taipei:設置資料庫的時區為台北時間。
使用 Gorm 來連接 PostgreSQL 資料庫:
gorm.Open:開啟一個 Gorm 資料庫連接,並使用postgres.Open(dsn)來指定 PostgreSQL 驅動和連接字串。- 如果連接失敗,
err會非空,panic("failed to connect database")會觸發程式中止,並顯示錯誤訊息。
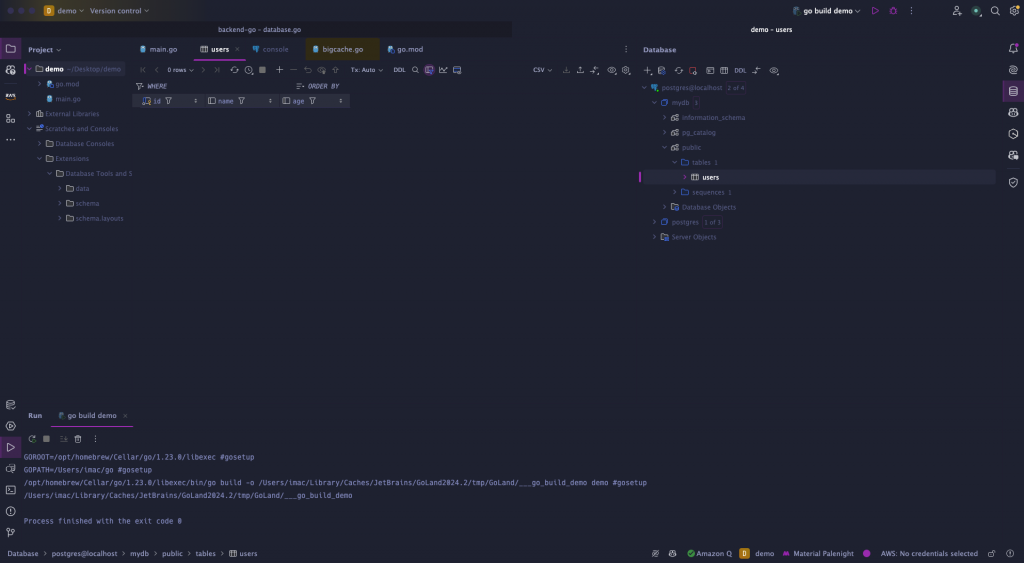
然後我們就直接運行程式,確保我們的資料表能正常建立後,我們在回到右側的區域來做查看。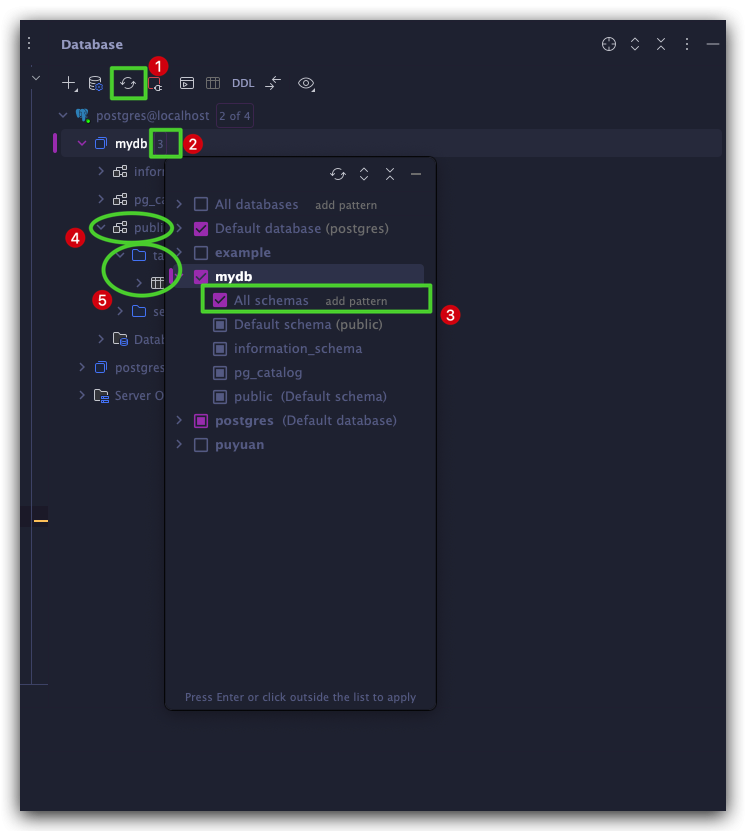
最終成品圖
那我們今天學會了如何在 GoLand 和資料庫做互動,這也是我喜歡用 GoLand 的原因之一,那今天就到這邊,我們明天見!
如果你想學習使用不同資料庫的話,歡迎查看更進階的教學內容