iT邦幫忙

2024 iThome 鐵人賽

DAY 5
0

新增手機裝置

  • 點擊右側的Device Manager
    https://ithelp.ithome.com.tw/upload/images/20240913/20168454IemdEDkfc2.png

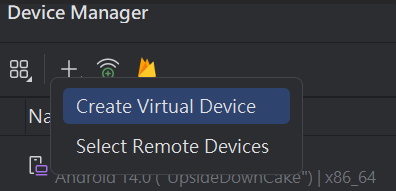
  • 點擊Create device
    https://ithelp.ithome.com.tw/upload/images/20240913/20168454I5TxXvCqma.png

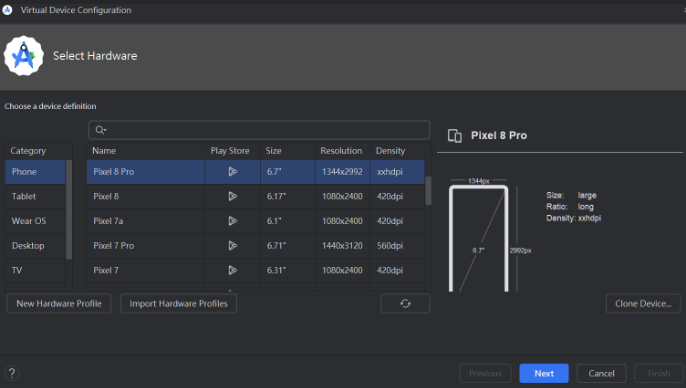
  • 選擇手機型號,我選擇Pixel 8 Pro
    https://ithelp.ithome.com.tw/upload/images/20240913/20168454Ghhy029C9R.png

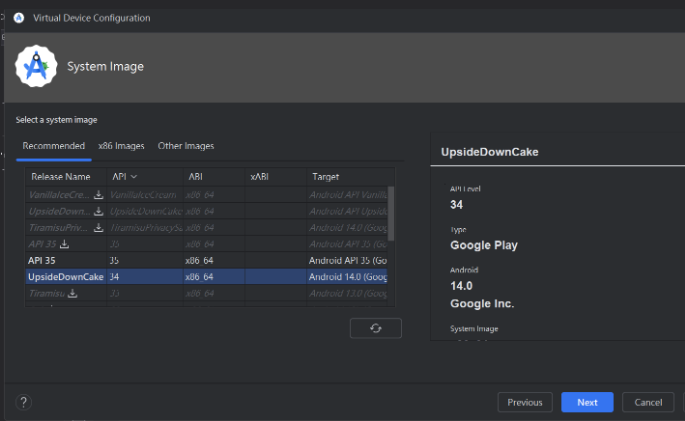
  • 選擇版本
    https://ithelp.ithome.com.tw/upload/images/20240913/20168454XVvv9Ldolw.png

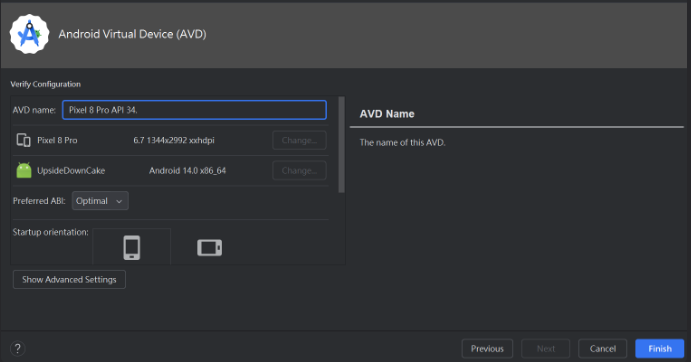
  • 按下Finish,就成功架設出屬於自己的收機裝置
    https://ithelp.ithome.com.tw/upload/images/20240913/20168454CceZrBZDeh.png
    https://ithelp.ithome.com.tw/upload/images/20240913/201684543tnvROvZ3d.png

第一次讓它執行時,需要等待一段下載時間
https://ithelp.ithome.com.tw/upload/images/20240913/20168454viTPquC1YP.png
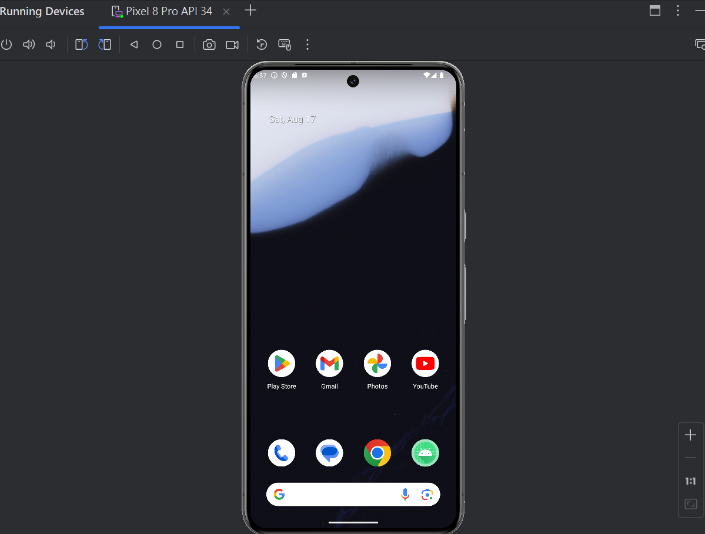
持行完後便會出像手機模擬畫面

手機上排功能為

https://ithelp.ithome.com.tw/upload/images/20240913/20168454zyxj48ZCjW.png:點選為開啟或關閉螢幕,點擊並按住可開啟或關閉裝置
https://ithelp.ithome.com.tw/upload/images/20240913/20168454ElohuMQmc3.png:可顯示一個滑桿控制並調高或調低音量
https://ithelp.ithome.com.tw/upload/images/20240913/20168454eP8L4eSwB3.png:將設備逆/順時針旋轉90 度
https://ithelp.ithome.com.tw/upload/images/20240913/20168454ZxgX1D8jOc.png:返回上一個螢幕(左)、返回主畫面(中)、開啟最近用過的應用程式的縮圖清單(右)
https://ithelp.ithome.com.tw/upload/images/20240913/20168454x1uqm1aA7y.png:手機螢幕截圖(左)、手機螢幕錄影(右)
https://ithelp.ithome.com.tw/upload/images/20240913/2016845490Sy1JOZjy.png:快照可看儲存映像時裝置的完整狀態(左)、硬體輸入(中)、其他功能和設定(右)

題外話

如果想看某隻手機它下載後檔案放在哪,可以點到Device Manager
比如我想看Pixel 8 Pro API 34

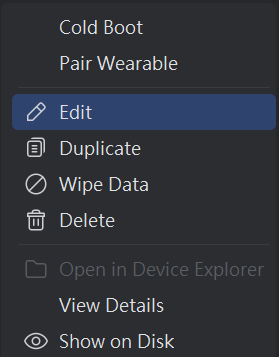
  • 點擊那三個點
    https://ithelp.ithome.com.tw/upload/images/20240913/20168454FQGx1evqBk.png

  • 按下Show on Disk 後,就會跳出此手機在磁碟上關聯的AVD INI 和IMG 文件檔在哪囉~
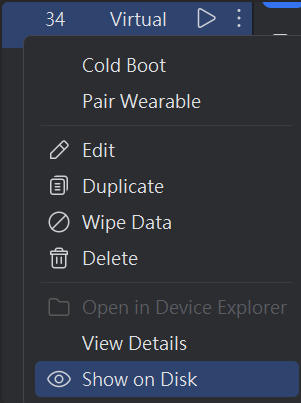
    https://ithelp.ithome.com.tw/upload/images/20240913/201684546SmikfsRLb.png

如果只是單純修改AVD只要點選
https://ithelp.ithome.com.tw/upload/images/20240913/20168454zPrY0RjfeM.png
進去後就能進行更改


想必了解完以上跟之前幾篇這些之後,大家在使用上就不會甚麼都不懂了吧?(;′⌒')
那接下來就是進行實操環節~ 元件篇


上一篇
快捷鍵篇 Day4
下一篇
元件篇-TextView Day6
系列文
Android 元件總動員 - 運用與實踐元件指南30
圖片
  直播研討會
圖片
{{ item.channelVendor }} {{ item.webinarstarted }} |
{{ formatDate(item.duration) }}
直播中

尚未有邦友留言

立即登入留言