今天我們來介紹如何使用GT.fmt_image()來顯示圖片。
首先我們假設當前資料夾結構如下:
├── logos
│   ├── type1
│   │   ├── python.png
│   │   ├── ruby.png
│   │   └── rust.png
│   └── type2
│       ├── logo1.png
│       ├── logo2.png
│       └── logo3.png
└── main.ipynb
type1資料夾與type2資料夾包含三張一樣的圖片,即python.png對應logo1.png、ruby.png對應logo2.png及rust.png對應logo3.png。
接著我們生成dfDataFrame來作為今天說明的範例。
import os
from pathlib import Path

import polars as pl
from great_tables import GT


with_png = pl.col("str").str.to_lowercase().add(".png")

df = pl.DataFrame(
    {
        "str": ["Python", "Ruby", "Rust"],
        "int": [1, 2, 3],
    }
).select(
    pl.lit(str(Path("./logos/type1").resolve()))
    .add(pl.lit(os.sep))
    .add(with_png)
    .alias("local_path"),
    with_png.alias("path_http"),
    with_png.alias("path_file"),
    pl.col("int").cast(pl.Utf8).alias("path_file_pattern"),
)
shape: (3, 4)
┌────────────────────────────┬────────────┬────────────┬───────────────────┐
│ local_path                 ┆ path_http  ┆ path_file  ┆ path_file_pattern │
│ ---                        ┆ ---        ┆ ---        ┆ ---               │
│ str                        ┆ str        ┆ str        ┆ str               │
╞════════════════════════════╪════════════╪════════════╪═══════════════════╡
│ C:\Users\jerry\Desktop\it… ┆ python.png ┆ python.png ┆ 1                 │
│ C:\Users\jerry\Desktop\it… ┆ ruby.png   ┆ ruby.png   ┆ 2                 │
│ C:\Users\jerry\Desktop\it… ┆ rust.png   ┆ rust.png   ┆ 3                 │
└────────────────────────────┴────────────┴────────────┴───────────────────┘
其中包含了四個欄位:
type1資料夾中三張圖片的本地路徑。str型別。GT.fmt_image()GT.fmt_image(self, columns=None, rows=None, height=None, width=None, sep=' ', path=None, file_pattern='{}', encode=True)
GT.fmt_image()可以將對應的圖片檔案顯示於欄位中,共有下面四種方式:
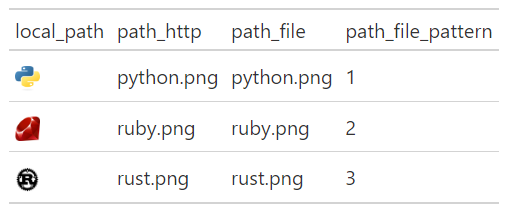
這個方法提供圖片檔案的本地路徑來作為GT.fmt_image()的columns參數。例如這裡我們指定columns參數為「"local_path"」欄:
GT(df).fmt_image("local_path", width="20px", height="20px")
這個方法最常出現的錯誤是所提供的路徑不存在,尤其是在Windows系統上,必須特別小心如磁碟代號或分隔符號等設定。建議大家可以使用python內建的pathlib module來處理這類的問題。
這個方法提供圖片檔案名來作為GT.fmt_image()的columns參數,以及指定一個網址作為path參數。例如這裡我們指定columns參數為「"path_http"」欄,並指定path為GitHub上的一個資料夾連結:
(
    GT(df).fmt_image(
        "path_http",
        width="20px",
        height="20px",
        path="https://raw.githubusercontent.com/jrycw/ithome2024-gt/master/src/14_day14/logos/type1",
    )
)

可以將path參數視為尚未完整的網址,其會在與columns中各欄的檔案名各自組合後,成為完整的網址,讓gt呈現於表格中。
這個方法提供圖片檔案名來作為GT.fmt_image()的columns參數,以及指定一個本地資料夾作為path參數。例如:
(
    GT(df).fmt_image(
        "path_file", width="20px", height="20px", path="./logos/type1"
    )
)

path為本地的資料夾名,其會在與columns中各欄的檔案名各自組合後,成為完整的本地路徑,讓gt呈現於表格中。
這個方法提供檔名規律來作為GT.fmt_image()的columns參數,以及指定一個本地資料夾作為path參數並指定一個規律描述字串作為file_pattern參數。例如我們想格式化type2資料夾的三張圖片,可以這麼寫:
(
    GT(df).fmt_image(
        "path_file_pattern",
        width="20px",
        height="20px",
        path="./logos/type2",
        file_pattern="logo{}.png",
    )
)

其中:
columns為檔名規律,即「"path_file_pattern"」欄的1~3(str型別)。path為本地資料夾名,即./logos/type2。file_pattern使用字串來描述檔案規律,即path內每個圖片檔名都是「"logo"」加上一個數字再加上「".png"」而成。其中數字就是規律所在,在字串中以{}表示。這裡我們展示同時使用GT.fmt_image()的四種方法來顯示圖片:
(
    GT(df)
    .fmt_image("local_path", width="20px", height="20px")
    .fmt_image(
        "path_http",
        width="20px",
        height="20px",
        path="https://raw.githubusercontent.com/jrycw/ithome2024-gt/master/src/14_day14/logos/type1",
    )
    .fmt_image("path_file", width="20px", height="20px", path="./logos/type1")
    .fmt_image(
        "path_file_pattern",
        width="20px",
        height="20px",
        path="./logos/type2",
        file_pattern="logo{}.png",
    )
)
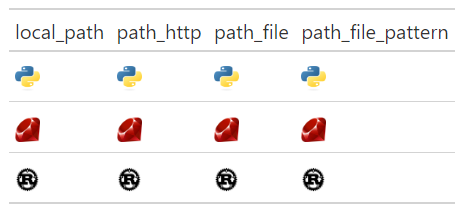
使用者可以依照當下最方便的方式呼叫GT.fmt_image(),在表格中顯示圖片。
註1:此功能是由PR#444改進而來,故需使用0.11.1之後版本才可正常執行。
註2:關於顯示圖片,小弟於官方部落格寫了一篇英文版的說明,有興趣的朋友可以參考Rendering images anywhere in Great Tables(2024/12/26修訂)。