今天,我們要來增加一個新功能:將喜歡的詞組儲存至清單,讓我們的界面看起來像這樣:
我們今日所需要建立的函式以及儲存陣列將會如同var current跟void getNext()一樣,都放置於MyAppState之中。
程式碼如下:
class MyAppState extends ChangeNotifier {
  var current = WordPair.random();
  void getNext() {
    current = WordPair.random();
    notifyListeners();
  }

  // lines below are added
  var favorites = <WordPair>[];
  void toggleFavorite() {
    if (favorites.contains(current)) {
      favorites.remove(current);
    } else {
      favorites.add(current);
    }

    notifyListeners();
  }
}
在上方程式中,我們建立一個變數favorites來存我們的List<E>[],在dart中的list有點類似c語言中的vector,有著編號順序index。
list可分為兩個類型:有大小限制的Fixed-length List,以及可變更長度的Growable List。dart預設為Growable List。我們在此使用Growable List來存取我們的詞組。關於List的詳細說明文件請點此連結
在我們的函式最下方,記得呼叫notifyListeners(),通知我們的client(也就是應用程式運作的平台)有個物件object產生了變動。
下一步便是增加按鈕,我們希望按鈕跟next按鈕在同一橫軸,如上方範例圖。為此,我們將游標放於ElevatedButton上方,也就是我們Next按鈕的程式碼,點選右鍵>Refactor>Wrap with Row。這時我們看到程式中,next按鈕變成向左對齊,這是因為我們的界面其實是由下圖一般的Grid所排版設計的,Column預設向上對齊、往下增加內容,Row預設向左對齊、往右增加內容。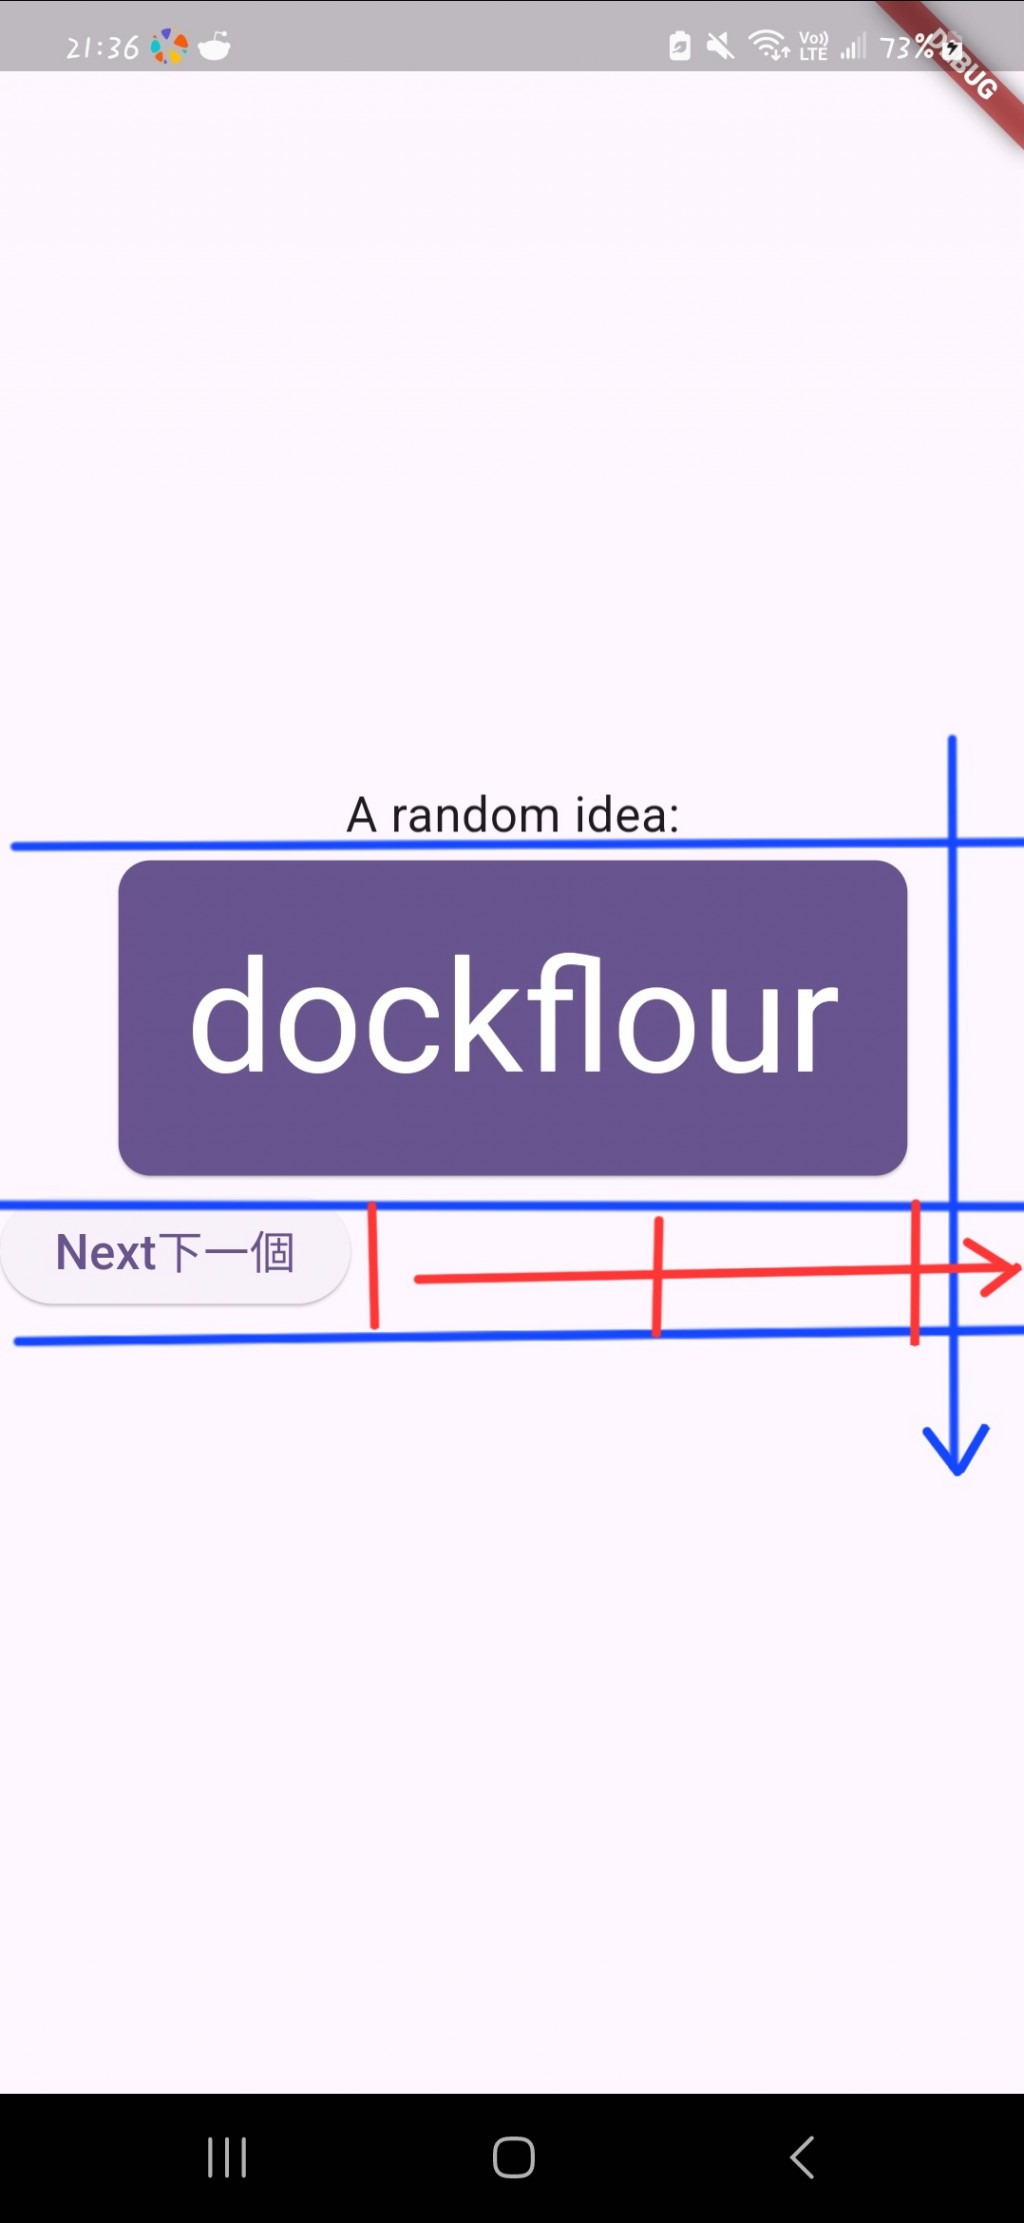
想讓Row置中的方式與Column相同,只需要在括號下一行加上mainAxisAlignment: MainAxisAlignment.center就可以了。
按鈕的建立與next相同,只須依樣畫葫蘆便能做出相同的按鈕。在此筆者依照著Codelab的作法,使用ElevatedButton的icon功能,增加圖示以便於閱讀。
class MyHomePage extends StatelessWidget {
  @override
  Widget build(BuildContext context) {
    var appState = context.watch<MyAppState>();
    var currentPair = appState.current;

    // icon of like changes whether if the wordpair is liked or not
    IconData favoriteIcon;
    if (appState.favorites.contains(currentPair)) {
      favoriteIcon = Icons.favorite;
    } else {
      favoriteIcon = Icons.favorite_border;
    }

    return Scaffold(
      body: Center(
        child: Column(
          mainAxisAlignment: MainAxisAlignment.center,
          children: [
            Text('A random idea:'),
            BigCard(currentPair: currentPair),
            Row(
              mainAxisAlignment: MainAxisAlignment.center,
              children: [
                // like button
                ElevatedButton.icon(
                  onPressed: () {
                    appState.toggleFavorite();
                    print('Favorite Toggled');
                  },
                  icon: Icon(favoriteIcon),
                  label: Text('Like'),
                ),

                // add horizontal distance between two buttons
                SizedBox(width: 15),

                ElevatedButton(
                  onPressed: () {
                    appState.getNext();
                    print('button pressed!');
                  },
                  child: Text('Next'),
                ),
              ],
            )
          ],
        ),
      ),
    );
  }
}
現在我們的介面看起來像下圖,已經開始成形了是吧!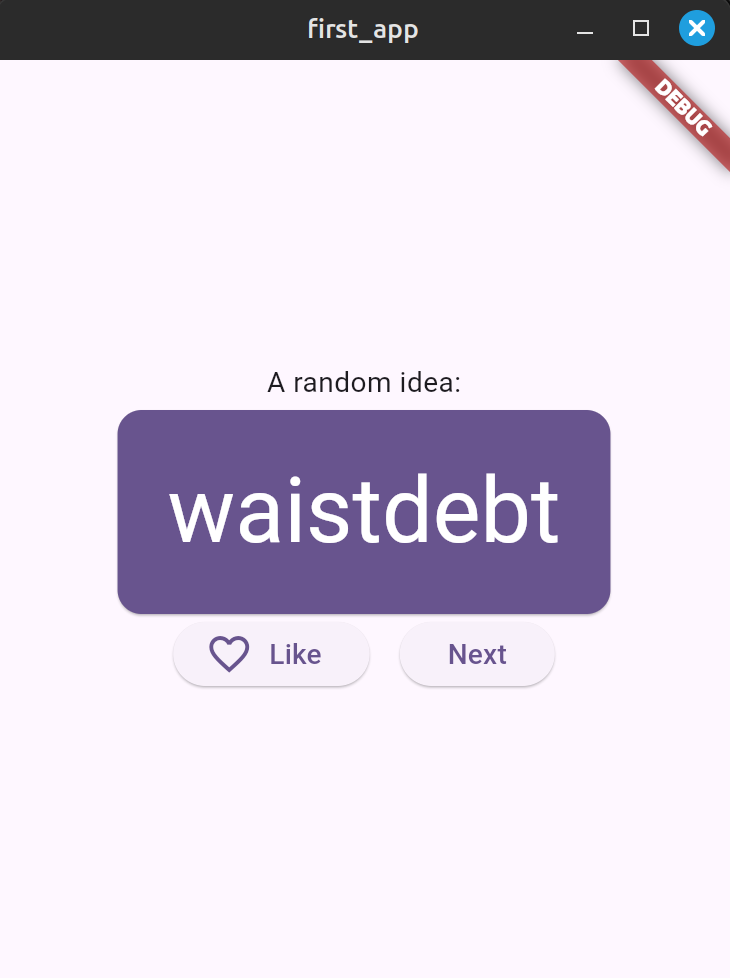
此時應用程式中,我們還無法看到儲存的詞組,因此我們想讓應用程式擁有兩個頁面:
目標是將介面做成下圖,稍微想想看,要如何達成呢?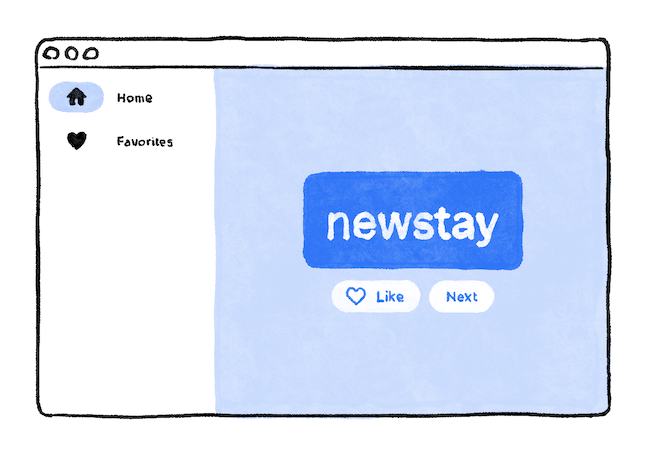
答案是:Widgets!
將MyHomePage分成主頁面HomePage與生成頁面GenerationPage,其中,主頁面使用到之前用過得Scaffolds, Rows等方式去排版。以下為更改MyHomePage後的結果:\
class HomePage extends StatelessWidget {
  @override
  Widget build(BuildContext context) {
    return Scaffold(
      body: Row(
        children: [
          SafeArea(
            child: NavigationRail(
              extended: false,
              destinations: [
                NavigationRailDestination(
                  icon: Icon(Icons.home),
                  label: Text('Home'),
                ),
                NavigationRailDestination(
                  icon: Icon(Icons.favorite),
                  label: Text('Likes'),
                )
              ],
              selectedIndex: 0,
              onDestinationSelected: (value) {
                print('Page [$value] selected');
              },
            ),
          ),
          Expanded(
            child: Container(
              color: Theme.of(context).colorScheme.primaryContainer,
              child: GenerationPage(),
            ),
          ),
        ],
      ),
    );
  }
}

class GenerationPage extends StatelessWidget {
  @override
  Widget build(BuildContext context) {
    var appState = context.watch<MyAppState>();
    var currentPair = appState.current;

    IconData favoriteIcon;
    if (appState.favorites.contains(currentPair)) {
      favoriteIcon = Icons.favorite;
    } else {
      favoriteIcon = Icons.favorite_border;
    }

    return Center(
      child: Column(
        mainAxisAlignment: MainAxisAlignment.center,
        children: [
          Text('A random idea:'),
          BigCard(currentPair: currentPair),
          Row(
            mainAxisAlignment: MainAxisAlignment.center,
            children: [
              ElevatedButton.icon(
                onPressed: () {
                  appState.toggleFavorite();
                  print('Favorite Toggled');
                },
                icon: Icon(favoriteIcon),
                label: Text('Like'),
              ),
              SizedBox(width: 15),
              ElevatedButton(
                onPressed: () {
                  appState.getNext();
                  print('button pressed!');
                },
                child: Text('Next'),
              ),
            ],
          )
        ],
      ),
    );
  }
}
在HomePage中,有沒有注意到我們的頁面選單被包裹在一個名為SafeArea的東西之內?這個SafeArea是用於保護它內部的東西,不論我們平台的介面大小,裡面的內容都不會被遮住,一定能夠完整顯示。若程式因畫面太小而有內容無法顯示,則會出現以下畫面: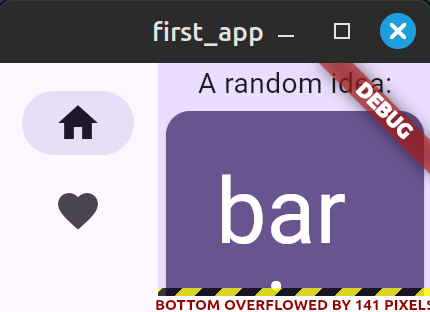
哦!有一點需要特別注意,現在的程式是將介面上的東西都包含在HomePage這個Widget之中,那麼最上面的class MyApp中也要記得將ChangeNotifierProvider中的home設為HomePage,否則會顯示出奇怪的畫面。
想讓程式的頁面選單顯示選項名稱,最基本的方法,就是將NavigationRail的extended設為true,結果如下圖,恩......不太好看是不是?空白似乎有點太多了,這時我們就要給它的寬度加一些限制。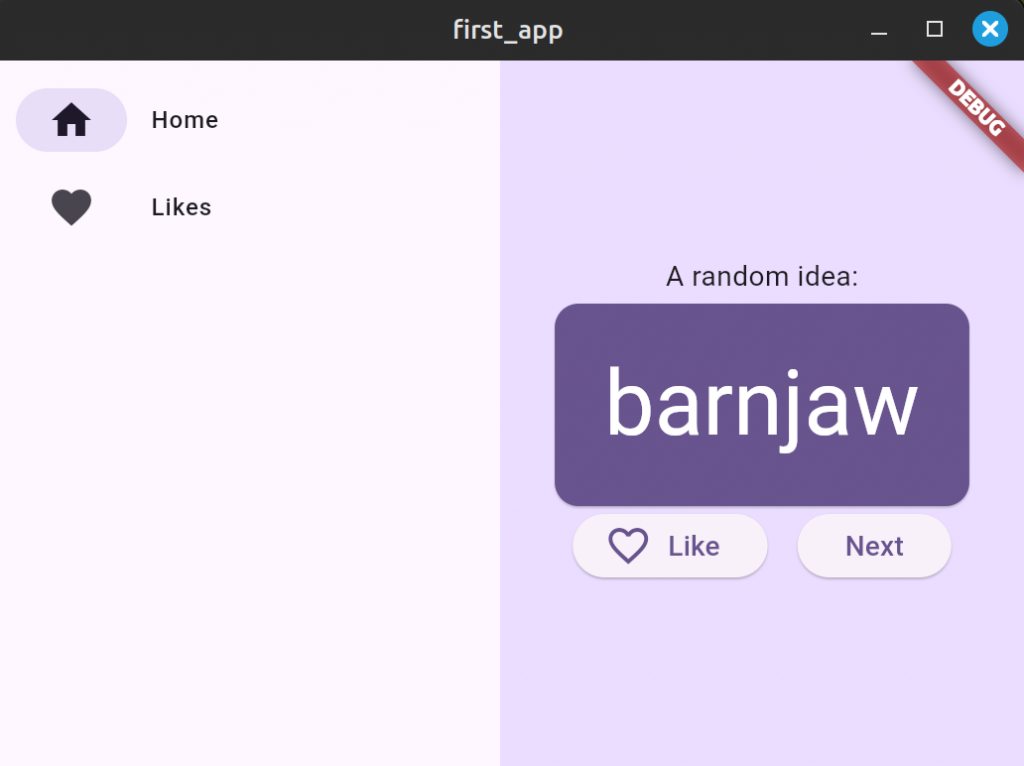
對著上方的Scaffold點右鍵>Refactor>Wrap with Builder>將return Builder更改為return LayoutBuilder、下一行的builder括弧由(context)更改為(context, constraints)。現在,我們就可以在剛剛的extended增加寬度限制了!
    return LayoutBuilder(builder: (context, constraints) {
      return Scaffold(
        body: Row(
          children: [
            SafeArea(
              child: NavigationRail(
                extended: constraints.maxWidth >= 600,
                destinations: [...],
                selectedIndex: selectedPageIndex,
                onDestinationSelected: (value) {...});
                },
              ),
            ),
            Expanded(...),
          ],
        ),
      );
    });
現在我們的頁面選單可以根據介面大小調整是否要顯示選項文字了。
當我們變更頁面時,我們的debug console長的像這樣:
flutter: Page [1] selected
flutter: Page [0] selected
兩個頁面的數值是0和1,為了方便未來的開發,此時我們想將那編號改為文字,那麼我們便需要一個變數儲存現在所在的狀態(也就是所在頁面),而我們該如何製作呢?首先,我們需要將我們的HomePage由StatelessWidget變更為StatefulWidget,顧名思義,它有著不同的狀態可變換。我們只需要對HomePage點右鍵>Refactor>Convert to StatefulWidget便能完成第一步。
接下來,我們將在剛剛生成的_HomePageState中建立一個變數selectedPageIDX,儲存現在選擇的頁面的編號。
class _HomePageState extends State<HomePage> {
  var selectedPageIndex = 0; // initial page

  @override
  Widget build(BuildContext context) {
    return Scaffold(
      body: Row(
        children: [
          SafeArea(
            child: NavigationRail(
              extended: false,
              destinations: [
                NavigationRailDestination(...),
                NavigationRailDestination(...)
              ],

              // change the following lines
              selectedIndex: selectedPageIndex,
              onDestinationSelected: (value) {
                setState(() {
                  selectedPageIndex = value;
                });
              },
            ),
          ),
          Expanded(...),
        ],
      ),
    );
  }
}
下一步,在build內、return Scaffold之上加上這段switch,並更改下面Expanded裡面的顯示頁面(由GenerationPage()改為page)用於變更頁面。
class _HomePageState extends State<HomePage> {
  var selectedPageIndex = 0; // added

  @override
  Widget build(BuildContext context) {
    Widget page;
      switch (selectedPageIndex) {
        case 0:
          page = GenerationPage();
          print('Page [GenerationPage] selected');
        case 1:
          page = Placeholder();
          print('Page [FavoritesPage] selected');
        default:
          throw UnimplementedError('no widget for $selectedPageIndex');
    }

    return Scaffold(
      body: Row(
        children: [
          SafeArea(...),
          Expanded(
            child: Container(
              color: Theme.of(context).colorScheme.primaryContainer,
              child: page,  // viewing current selected page
          ),
        ],
      ),
    ),
  }
}
在dart中,switch並不會如c語言,有著fall through,若一個case符合條件,則程式不會再去檢查下方的其他case與執行他們的內容,故官方文件建議直接將break省略。
因為我們還未建立一個顯示儲存詞組的頁面,因此先暫時用Placeholder(),一個空白的widget代替。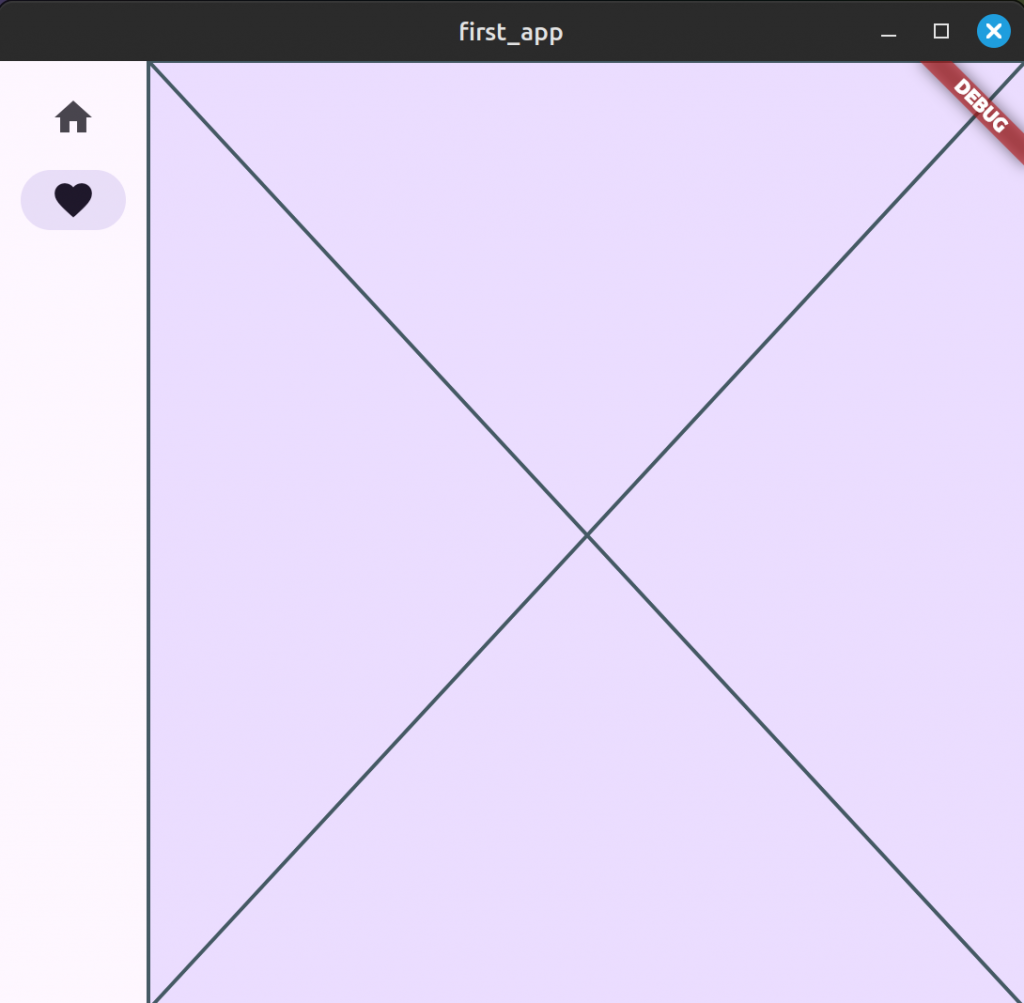
現在我們選擇頁面時,Debug Console就會顯示我們的所在頁面了。
flutter: Page [FavoritesPage] selected
flutter: Page [GenerationPage] selected
只剩下最後一步,我們的第一個應用程式就要完成了!後續內容中,筆者會去研究下dart的語法,並將整理結果部份分享到這裡。
若有任何想法,都歡迎留言或是email!謝謝閱讀到這裡的你,明天會再繼續發下篇文的!
