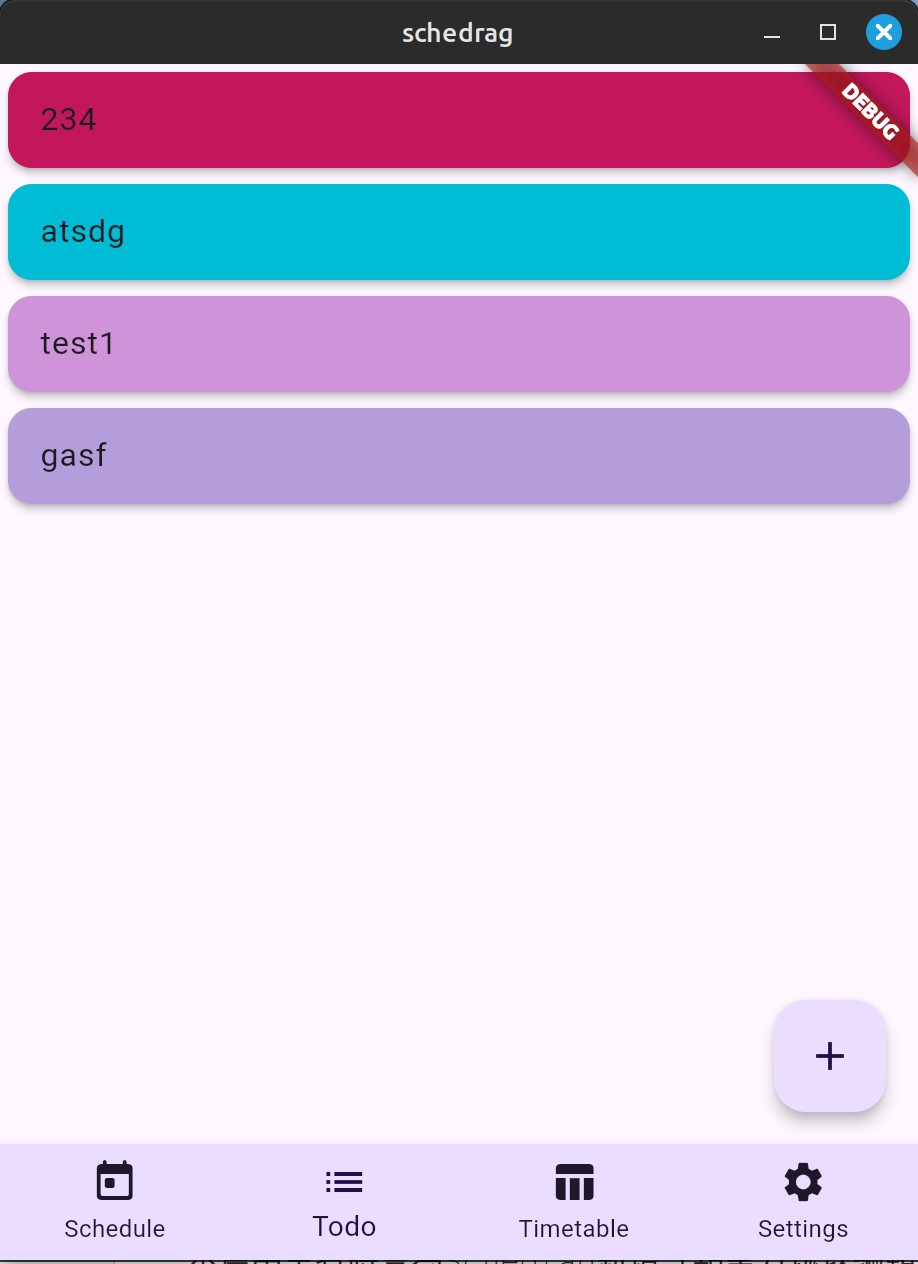
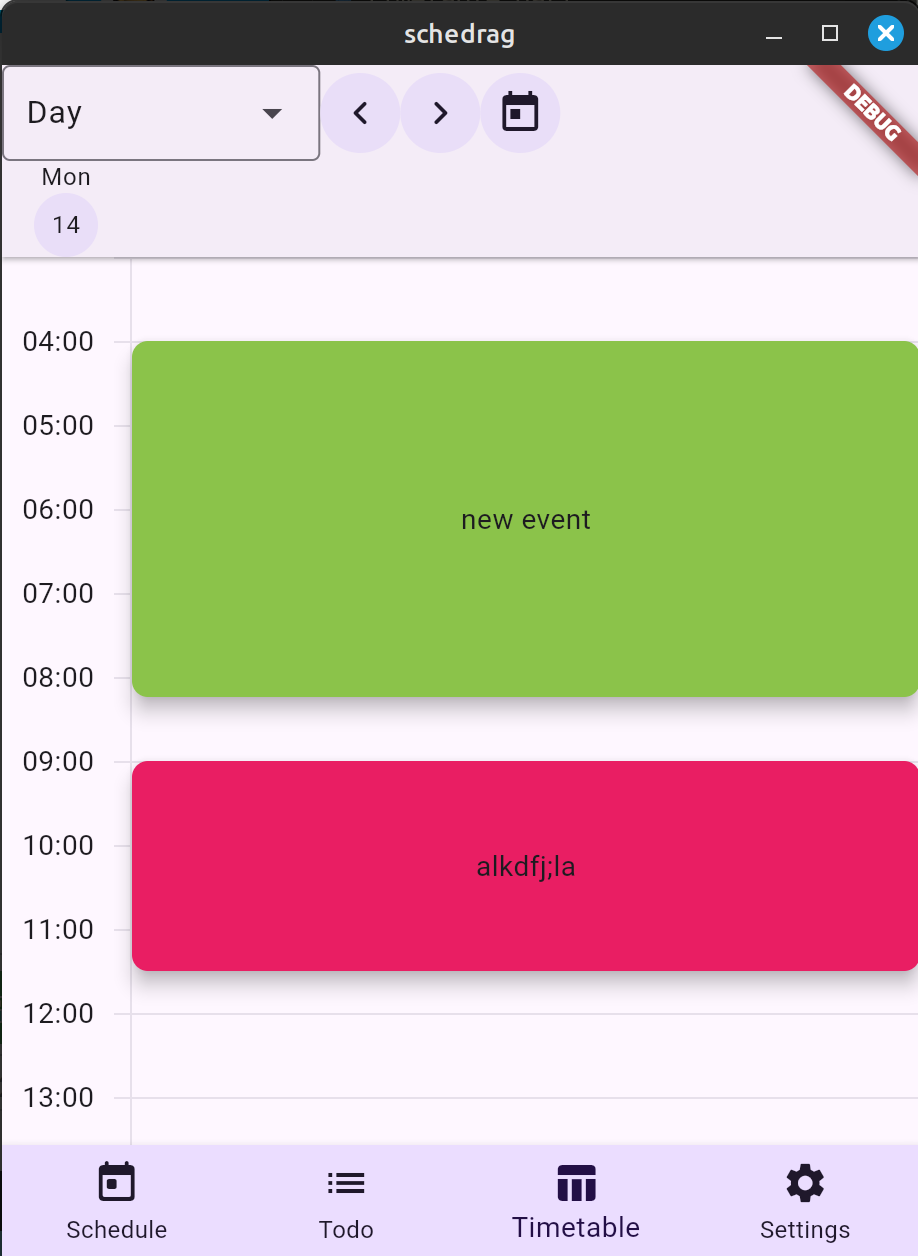
本篇中筆者將會為Schedrag新增「點擊方塊以編輯」的功能,並對資料庫中的資料內容做更新。此過程中也發現之前的Block子類別在讀取資料庫資料時有點小bug,也在此做了修改。
除了更新資料以外,筆者也為各個block在使用者介面上增加顏色,以增加並美化頁面。因這僅僅是小部份的更動,在此篇中僅會簡單帶過。

此部份對presentation/pages/todo.dart的\_TodoPageState內的ListView做了以下修改:
  return ListView.builder(
    itemCount: snap.data!.length,
    itemBuilder: (context, index) {
      return Card(
        color: snap.data![index].color,
        elevation: 3,
        child: ListTile(
            title: Text(snap.data![index].name.toString()),
            onTap: () {
              if (kDebugMode) {
                print(
                    "[name]: ${snap.data![index].name.toString()}");
              }
              Navigator.push(
                  context,
                  MaterialPageRoute(
                    builder: (context) => EditForm(
                        db: todoblocksdb,
                        block: snap.data![index]),
                  ));
            }),
      );
    },
  );

此部份是依照作者的example檔案中的顏色設定方式去操作的。
修改部份如下:
  Widget _tileBuilder(...) {
    return Card(
      ...
      color: configuration.tileType != TileType.ghost
          ? event.eventData?.color
          : event.eventData?.color?.withAlpha(100),

      child: Center(...),
    );
  }
  Widget _multiDayTileBuilder(...) {
    return Card(
      ...

      color: configuration.tileType != TileType.ghost
          ? event.eventData?.color
          : null,

      child: Center(...),
    );
  }
  Widget _scheduleTileBuilder(...) {
    return DecoratedBox(
      decoration: BoxDecoration(
        color: event.eventData?.color,
        borderRadius: BorderRadius.circular(8),
      ),
      child: Text(event.eventData?.name ?? 'New Event'),
    );
  }
筆者在製作更新的功能時,發現不論怎麼變動資料的數值都沒有改變。花了一點時間糾錯後,發現原來之前的toBlock函式(將資料庫中的資料轉為Block物件)沒有將id一併存入新的Block,這樣子在更新時肯定無法準確更新呀!(因更新需要使用物件的id)
想在toBlock中新增id的轉換,須一併對Block子類別的constructor做更改,要改的內容應該挺顯而易見的吧。對,就是增加id的設定一項。
下方為程式中受更動的部份:
class Block
abstract class Block {
  String? name;
  String? category, notes;
  int? id;
  Color? color;

  Block() : color = Colors.white;
  Block.detail(
      {required String this.name,
      int? id,
      String? category,
      String? notes,
      this.color = Colors.white}) {
    if (id != null) this.id = id;
    if (category != null) this.category = category;
    if (notes != null) this.notes = notes;
  }

  Map<String, Object?> toMap();
  Block toBlock(Map<String, Object?> data);

  void setDetail(
      {String? name, String? category, String? notes, Color? color}) {
    if (name != null) this.name = name;
    if (category != null) this.category = category;
    if (notes != null) this.notes = notes;
    if (color != null) this.color = color;
  }
}
class TodoBlock
class TodoBlock extends Block {
  late DateTime estimatedTime, deadline;

  TodoBlock()
      : estimatedTime = DateTime.now(),
        deadline = DateTime.now();

  TodoBlock.detail({
    required super.name,
    super.id,
    super.category,
    super.notes,
    DateTime? estimatedTime,
    DateTime? deadline,
    super.color,
  }) : super.detail() {
    if (estimatedTime == null) {
      this.estimatedTime = DateTime.now();
    } else {
      this.estimatedTime = estimatedTime;
    }
    if (deadline == null) {
      this.deadline = DateTime.now();
    } else {
      this.deadline = deadline;
    }
  }

  @override
  void setDetail(
      {String? name,
      String? category,
      String? notes,
      DateTime? estimatedTime,
      DateTime? deadline,
      Color? color}) {
    super.setDetail(name: name, category: category, notes: notes, color: color);
    if (estimatedTime != null) this.estimatedTime = estimatedTime;
    if (deadline != null) this.deadline = deadline;
  }

  @override
  Map<String, Object?> toMap() {...}

  @override
  TodoBlock toBlock(Map<String, Object?> data) {
    return TodoBlock.detail(
      name: data['name'].toString(),
      id: int.parse(data['id'].toString()),
      category: data['category'].toString(),
      estimatedTime: DateTime.tryParse(data['estimatedTime'].toString()),
      deadline: DateTime.tryParse(data['deadline'].toString()),
      notes: data['notes'].toString(),
      color: Color(int.parse(data['color'].toString(), radix: 16)),
    );
  }
}
class TimeBlock
class TimeBlock extends Block {
  late DateTime startTime, endTime;

  TimeBlock()
      : startTime = DateTime.now(),
        endTime = DateTime.now();

  TimeBlock.detail(
      {required super.name,
      super.id,
      super.category,
      super.notes,
      super.color,
      DateTime? startTime,
      DateTime? endTime})
      : super.detail() {
    if (startTime == null) {
      this.startTime = DateTime.now();
    } else {
      this.startTime = startTime;
    }
    if (endTime == null) {
      this.endTime = DateTime.now();
    } else {
      this.endTime = endTime;
    }
  }

  @override
  void setDetail(
      {String? name,
      String? category,
      String? notes,
      DateTime? startTime,
      DateTime? endTime,
      Color? color}) {
    super.setDetail(name: name, category: category, notes: notes, color: color);
    if (startTime != null) this.startTime = startTime;
    if (endTime != null) this.endTime = endTime;
  }

  @override
  Map<String, Object?> toMap() {...}

  @override
  TimeBlock toBlock(Map<String, Object?> data) {
    return TimeBlock.detail(
      name: data['name'].toString(),
      id: int.parse(data['id'].toString()),
      category: data['category'].toString(),
      startTime: DateTime.tryParse(data['startTime'].toString()),
      endTime: DateTime.tryParse(data['endTime'].toString()),
      notes: data['notes'].toString(),
      color: Color(int.parse(data['color'].toString(), radix: 16)),
    );
  }
}
EditForm為了方便製作,更新頁面的製作方式將直接使用大部分新增頁面的程式碼。而其中主要的改動有三:
因TodoBlock與TimeBlock的更新頁面幾乎相同,除了少部份的變數名稱,為了讓頁面精簡一點,在此將只放上前者的程式碼。
這部份非常基礎,與之前設定欲更改的資料庫方式相同。程式碼如下:
class EditForm extends StatefulWidget {
  final TodoBlocksDb? db;
  final TodoBlock block;
  const EditForm({super.key, required this.db, required this.block});

  @override
  State<EditForm> createState() => _EditFormState(db, block);
}

class _EditFormState extends State<EditForm> {
  final TodoBlocksDb? db;
  final TodoBlock block;
  late Color selectedColor;
  late List<TextEditingController> controllers;

  _EditFormState(this.db, this.block) {...}
因在此想要做的是修改並更新過去的資料,相較於之前建立資料時的留白,使用者在使用時會希望能夠在各個欄位上看到之前所設定的值,因此筆者將在此為各個欄位設定他們的初始值,也就是顯示原本的內容。
先從顏色選擇器的開始看起吧。
class _EditFormState extends State<EditForm> {
  ...
  late Color selectedColor;

  _EditFormState(this.db, this.block) {
    selectedColor = block.color!;
    ...
  }

...

Card(
  elevation: 2,
  child: ColorPicker(
    color: selectedColor,
    onColorChanged: (Color color) =>
        setState(() => selectedColor = color),
    heading: Text("Select color",
        style: Theme.of(context).textTheme.headlineSmall),
    subheading: Text("Select color shade",
        style: Theme.of(context).textTheme.titleSmall),
  ),
)
從上方程式碼可以看到,在此做的改動僅僅是在頁面初始化時將顏色設定為block原本的色彩。至於更新值的部份,因考量到使用者更動後會想使用原本的值,因此僅當按下新增按鈕FloatingActionButton後才會做更新。那部份的程式將於下方再做說明。
`
接下來直接看TextFormField與DateTimeFormField中所作的設定吧!(因程式碼相似,故各類別只放一個做示範)
TextFormField(
  decoration: const InputDecoration(
    icon: Icon(Icons.sticky_note_2_rounded),
    labelText: "Notes",
  ),
  controller: controllers[Tags.notes.index],
),

DateTimeFormField(
  decoration: const InputDecoration(
    icon: Icon(Icons.timer_outlined),
    labelText: "estimatedTime",
  ),
  initialValue: block.estimatedTime,
  onChanged: (value) => setState(() => times[0] = value),
),
DateTimeFormField的非常直觀,直接設定initialValue就結束了。
至於TextFormFied......欸,怎麼好像沒改變呢?這要說到FormField的一項特性:TextFormField不可同時設定initialValue和controller,要嘛則一使用,要嘛都不使用
不過,controller也可以設定初始值的!所以使用controller也還是能夠作到輸入欄位的初始值設定。設定方式如下:
class _EditFormState extends State<EditForm> {
  late List<TextEditingController> controllers;

  _EditFormState(this.db, this.block) {
    selectedColor = block.color!;
    controllers = [
      TextEditingController(text: block.name),
      TextEditingController(text: block.category),
      TextEditingController(text: block.notes),
    ];
  }
只需要在宣告時的text欄位中設定欲顯示的文字內容即可,其餘部份不需更改。很容易吧!
現在完成了預設值的設定,那麼就來到今天的最後一段內容了:修改資料內容。
基本上,僅需要將原本的insert(),改為setDetail()(一個用於修改block內properties的函式),接著再使用BlocksDb的update()函式,輸入欲更改的block。它會根據那個block的id找到它在資料庫的位置,並對其做更新。一切結束後再將這個更新頁面pop掉,我們這部份的程式就完成啦!
floatingActionButton: FloatingActionButton(
  onPressed: () {
    if (db != null && _formKey.currentState!.validate()) {
      block.setDetail(
          name: controllers[Tags.name.index].text,
          category: controllers[Tags.category.index].text,
          estimatedTime: times[0],
          deadline: times[1],
          notes: controllers[Tags.notes.index].text,
          color: selectedColor);
      db?.update(block);
      Navigator.pop(context);
    }
  },
  child: const Icon(Icons.check),
),
謝謝閱讀到這裡的讀者,有任何問題歡迎留言及email,明天將會......欸,沒有了耶,今天是最後一天了。
這次為筆者初次參加鐵人賽,也有點趕鴨子上架,基本上當天才會去想要做的內容,沒有做好完整的規劃,因此寫的有點哩哩啦啦的,最終也無法完成一開始設定的目標內容。在此對各位說聲抱歉 <(_ _)> 。
程式當然還是會繼續努力製作的,畢竟這是我一直都想要的東西,至於文章更新嘛......未來將會找個部落格網站,在那裡定期更新,此次鐵人賽的內容也會整理後放在那。(雖然部落格半點都還沒開始弄,但肯定近期會去做的!)iThome可能會是隨緣更新吧。也許會將後續內容發在這,也許不會。嗯,就看到時候的想法吧!
非常感謝閱讀到這裡的你,過程中也有人願意給我回應,讓我知道是有人在看這些內容的。即使不多,一點點也好,也給了我極大的鼓勵。我們有緣再會!
- email: nnyjan02426@gmail.com
- github
- Schedrag
