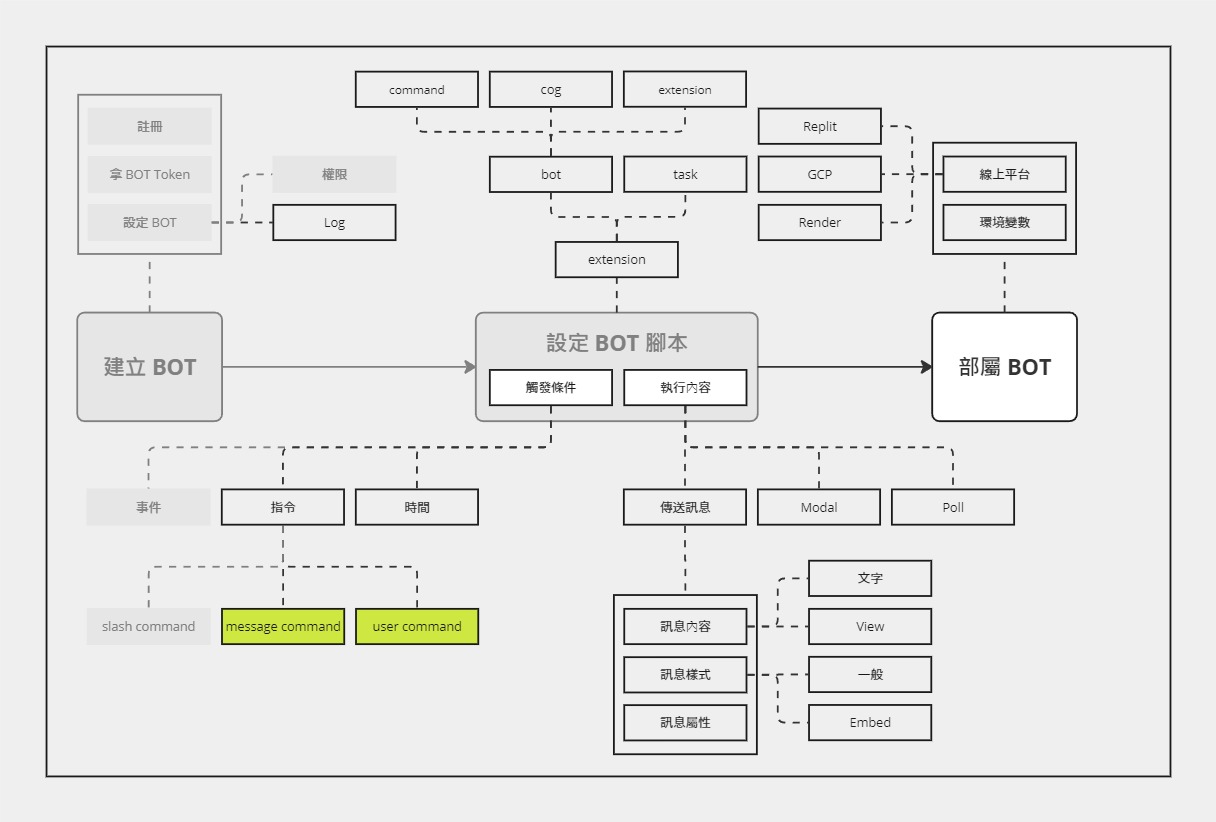
今天接著繼續介紹指令:訊息指令與用戶指令。

訊息指令與用戶指令的概念差不多,就決定合併一起介紹了。
訊息指令,顧名思義,就是作用在訊息的指令。使用方式很簡單,只要在訊息上面按滑鼠右鍵,就會看到「應用程式」的選單,再選擇要使用的指令即可。(沒有預設指令)
同理,用戶指令就是作用在用戶上的指令,一樣是對著用戶按下滑鼠右鍵,再進入「應用程式」選單選擇要使用的指令。(同樣沒有預設指令)
對自己:
對其他伺服器成員:
這兩種指令的撰寫方式非常相似,就一起介紹了。(範例程式簡化自 Github 上的範例)
# day08.py

import discord
from discord import app_commands

GUILD_ID = "your guild ID"
MY_GUILD = discord.Object(id=GUILD_ID)


class MyClient(discord.Client):
    def __init__(self, *, intents: discord.Intents):
        super().__init__(intents=intents)
        self.tree = app_commands.CommandTree(self)

    async def setup_hook(self):
        self.tree.copy_global_to(guild=MY_GUILD)
        await self.tree.sync(guild=MY_GUILD)


intents = discord.Intents.default()
client = MyClient(intents=intents)


@client.event
async def on_ready():
    print(f'Logged in as {client.user} (ID: {client.user.id})')

@client.tree.context_menu(name="Show Join Date")
async def show_join_date(interaction: discord.Interaction, member: discord.Member):
    # The format_dt function formats the date time into a human readable representation in the official client
    await interaction.response.send_message(
        f"{member} joined at {discord.utils.format_dt(member.joined_at)}"
    )

@client.tree.context_menu(name="Report to Moderators")
async def report_message(interaction: discord.Interaction, message: discord.Message):
    await interaction.response.send_message(
        f"Thanks for reporting this message by {message.author.mention} to our moderators.",
    )

client.run('token')
與之前的 Quickstart (Day 04) 一樣,可以大致上把這段程式分成三個階段:
今天的重點在第二階段的兩個函數:show_join_date 與 report_message。其中,show_join_date 是用戶指令,而 report_message 是訊息指令。
這兩個函數的寫法非常接近,有以下幾點注意事項:
context_menu。其中,name不是必要參數,但如果不填的話就會直接使用函數名作為訊息指令或是用戶指令的名稱。interaction。type hint 只能是以下這幾個其中一個:
discord.Message,discord.User,discord.Member, 或是 「discord.Member|discord.User」
啟動後,就可以看到原本空的選單已經有剛剛建立的訊息指令了
執行結果:
用戶指令的選單也有更新
執行結果:
今天把剩下的兩個指令:訊息指令 (message command) 和用戶指令 (user command) 都介紹完了,明天會介紹指令的其他細節,並補上之前 slash command 沒有介紹完的內容。
明後兩天都在高雄參加 PyCon,好期待啊!![]()
