哈囉大家好!歡迎來到我們 React 學習之旅的第九天。今天我們要來聊聊一個實用但常常被忽略的功能:錯誤邊界(Error Boundaries)。
如果應用程式是一間大餐廳,每個 React 元件就像是餐廳裡的一個櫃台。錯誤邊界就像是餐廳裡的防火牆,當某個櫃台著火了(發生錯誤),防火牆可以把火侷限在那個區域,不讓整間餐廳都燒起來(整個應用程式當機)。
簡單來說,錯誤邊界是一種特殊的 React 元件,它可以:
src/components/common/ErrorBoundary.tsx
import React, { Component, ErrorInfo, ReactNode } from 'react';

interface ErrorBoundaryProps {
  children: ReactNode;
  fallback?: ReactNode;
}

interface ErrorBoundaryState {
  hasError: boolean;
}

class ErrorBoundary extends Component<ErrorBoundaryProps, ErrorBoundaryState> {
  constructor(props: ErrorBoundaryProps) {
    super(props);
    this.state = { hasError: false };
  }

  static getDerivedStateFromError(_: Error): ErrorBoundaryState {
    return { hasError: true };
  }

  componentDidCatch(error: Error, errorInfo: ErrorInfo) {
    console.error('錯誤邊界捕捉到一個錯誤:', error, errorInfo);
  }

  render() {
    if (this.state.hasError) {
      return this.props.fallback || <h1>哎呀!好像有東西出錯了。</h1>;
    }

    return this.props.children;
  }
}

export default ErrorBoundary;
這個錯誤邊界元件做了幾件事:
來看看如何在實際應用中使用這個錯誤邊界:
BuggyCounter.tsx
import React from 'react';

// 這是一個會拋出錯誤的元件
const BuggyCounter: React.FC = () => {
    const [count, setCount] = React.useState(0);

    if (count === 3) {
        throw new Error('我數到 3 就會當機啦!');
    }

    return (
        <div>
            <p>數字: {count}</p>
            <button onClick={() => setCount(count + 1)}>
                點我加 1
            </button>
        </div>
    );
};

export default BuggyCounter;
App.tsx
import React from 'react';
import Counter from './components/Counter';
import MessageInput from "@/components/MessageInput.tsx";
import {ThemeProvider} from "@/components/ThemeContext.tsx";
import ThemedButton from "@/components/ThemedButton.tsx";
import ErrorBoundary from "@/components/common/ErrorBoundary.tsx";
import BuggyCounter from "@/components/BuggyCounter.tsx";

const App: React.FC = () => {
    return (
        <ThemeProvider>
        <div className="container mx-auto mt-10">
            <h1 className="text-3xl font-bold mb-6">我的第一個React應用</h1>
            <Counter />
            <MessageInput />
            <ThemedButton />
            <ErrorBoundary fallback={<h2>哎呀!計數器壞掉了。</h2>}>
                <BuggyCounter />
            </ErrorBoundary>
            <hr />
            <ErrorBoundary>
                <h2>這裡很安全,不會受到上面的錯誤影響</h2>
                <BuggyCounter />
            </ErrorBoundary>
        </div>
        </ThemeProvider>

    );
};

export default App;
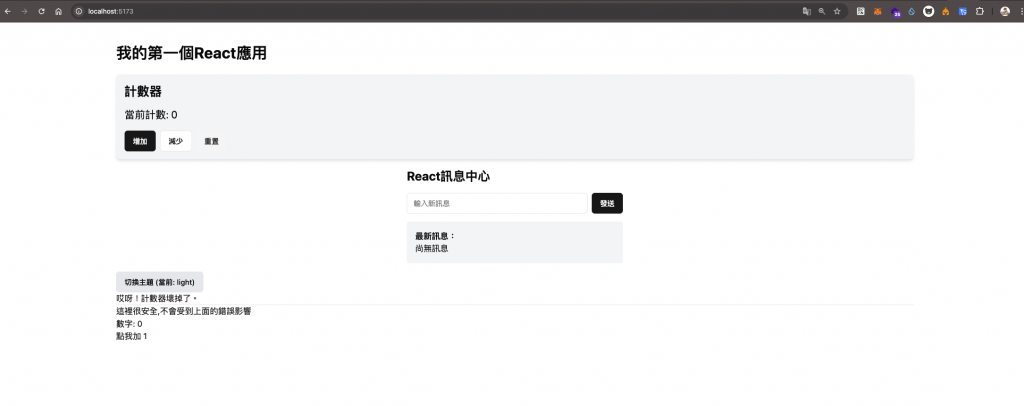
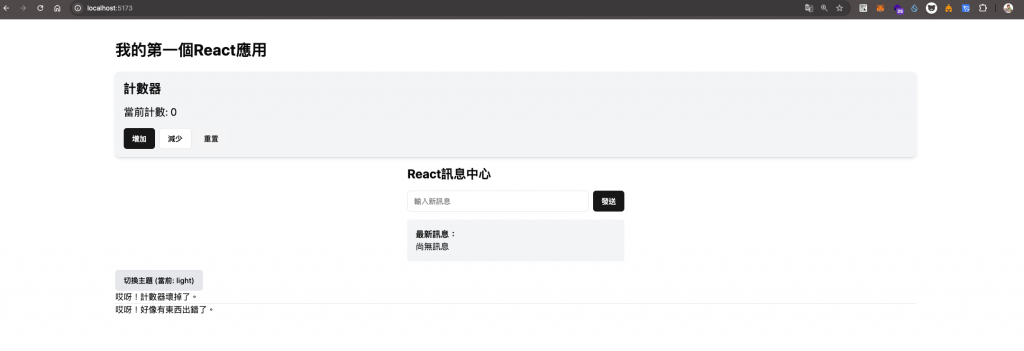
在這個例子中:
BuggyCounter 元件,當數到 3 時就會拋出錯誤。ErrorBoundary 把 BuggyCounter 包起來。ErrorBoundary 會顯示我們設定的備用內容。ErrorBoundary,這樣即使一個計數器出錯,另一個還是可以正常運作。錯誤邊界無法捕捉以下類型的錯誤:
setTimeout 或 requestAnimationFrame 回調函數)錯誤邊界在開發模式和生產模式下的行為會有些不同,所以要在兩種模式下都進行測試。
今天我們學習了 React 的錯誤邊界。它就像是應用程式中的安全網,可以防止一個小錯誤演變成大災難。適當地使用錯誤邊界,可以大大提升應用程式的穩定性和用戶體驗。
記住,錯誤邊界不是用來取代 try/catch 的。它們各有用處:try/catch 適合用在知道可能會出錯的特定程式區塊,而錯誤邊界則是用來處理整個子元件樹中未預期的錯誤。
如果你想深入了解錯誤邊界,可以查看 React 官方文檔中關於錯誤邊界的章節。


 iThome鐵人賽