大家好,今天是我們 React 學習的第十二天,想和大家聊聊如何為 React 應用程式撰寫測試。其實,寫測試沒有想像中困難,反而能讓你的程式碼更穩定可靠。
為什麼要寫測試?
撰寫測試可以確保你的程式碼如預期運作,減少潛在的錯誤。它能幫助你在開發過程中及早發現問題,提升程式碼品質,讓後續的維護和更新更輕鬆。
React 測試的工具箱
在 React 的開發中,常用的測試工具有:
這兩個工具搭配使用,可以滿足大部分的測試需求。
假設我們有一個簡單的問候組件:
// Greeting.tsx
import React from 'react';

interface GreetingProps {
  name: string;
}

const Greeting: React.FC<GreetingProps> = ({ name }) => {
  return <h1>哈囉,{name}!</h1>;
};

export default Greeting;
我們可以這樣測試它:
// Greeting.test.tsx
import React from 'react';
import { render, screen } from '@testing-library/react';
import Greeting from './Greeting';

test('顯示正確的問候語', () => {
  render(<Greeting name="小明" />);
  const greetingElement = screen.getByText(/哈囉,小明!/i);
  expect(greetingElement).toBeInTheDocument();
});
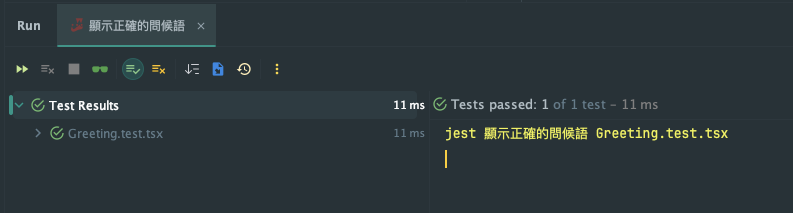
這個測試確保 Greeting 組件能正確顯示傳入的名字。
再來看一個稍微複雜的例子:一個登入表單。
// LoginForm.tsx
import React, { useState } from 'react';

interface LoginFormProps {
  onSubmit: (username: string, password: string) => void;
}

const LoginForm: React.FC<LoginFormProps> = ({ onSubmit }) => {
  const [username, setUsername] = useState('');
  const [password, setPassword] = useState('');

  const handleSubmit = (e: React.FormEvent) => {
    e.preventDefault();
    onSubmit(username, password);
  };

  return (
    <form onSubmit={handleSubmit}>
      <input
        type="text"
        value={username}
        onChange={(e) => setUsername(e.target.value)}
        placeholder="使用者名稱"
      />
      <input
        type="password"
        value={password}
        onChange={(e) => setPassword(e.target.value)}
        placeholder="密碼"
      />
      <button type="submit">登入</button>
    </form>
  );
};

export default LoginForm;
我們可以這樣測試它:
// LoginForm.test.tsx
import React from 'react';
import { render, screen, fireEvent } from '@testing-library/react';
import LoginForm from './LoginForm';

test('提交表單時,應以正確的值呼叫 onSubmit', () => {
  const mockOnSubmit = jest.fn();
  render(<LoginForm onSubmit={mockOnSubmit} />);

  // 填寫表單
  fireEvent.change(screen.getByPlaceholderText(/使用者名稱/i), {
    target: { value: 'testuser' },
  });
  fireEvent.change(screen.getByPlaceholderText(/密碼/i), {
    target: { value: 'testpass' },
  });

  // 提交表單
  fireEvent.click(screen.getByText(/登入/i));

  // 檢查 onSubmit 是否被正確呼叫
  expect(mockOnSubmit).toHaveBeenCalledWith('testuser', 'testpass');
});

這個測試模擬使用者填寫並提交表單的過程,確保表單組件能正確處理輸入並呼叫 onSubmit 函數。
今天我們探討了如何為 React 組件撰寫測試。測試不僅不是負擔,還是確保程式碼品質的重要工具。良好的測試能讓你更有信心地進行程式碼重構和開發新功能。
想更深入了解 React 測試,可以參考 React 官方文件的測試章節。