- 新增員工或主管時,要能分配隸屬哪個分店。
- 註冊時資料就要能判斷。
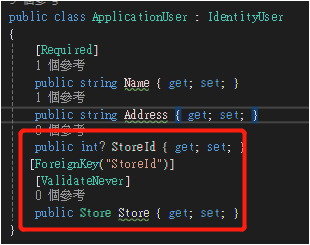
- ApplicationUser新增StoreId與Store來綁定角色。
- 設置完後:
- Add-migration addStoreToUser
- Update-database
public class ApplicationUser : IdentityUser
    {
[Required]
public string Name { get; set; }
public string Address { get; set; }
public int? StoreId { get; set; }
       [ForeignKey("StoreId")]
[ValidateNever]
public Store Store { get; set; }
    }

- public class InputModel 內設置:
public int? StoreId { get; set; }
public IEnumerable<SelectListItem> StoreList { get; set; }
- Task OnGetAsync 內設置:
 Input = new()
    {
RoleList = _roleManager.Roles.Select(x => x.Name).Select(i => new SelectListItem
{
    Text = i,
    Value = i
}),
StoreList = _unitOfWork.Store.GetAll().Select(i => new SelectListItem
{
    Text = i.Name,
    Value = i.Id.ToString()
})
    };
- Task OnPostAsync
- 建立員工或主管時,AspNetUsers寫入StoreId
if (Input.Role == SD.Role_Employee || Input.Role == SD.Role_Manager)
{
    user.StoreId = Input.StoreId;
}

- 修改註冊功能:
- Task OnPostAsync
- 由Admin or Manager新增帳號時,新增帳號後,點選confirm不會自動登入
 if (_userManager.Options.SignIn.RequireConfirmedAccount)
 {
     return RedirectToPage("RegisterConfirmation", new { email = Input.Email, returnUrl = returnUrl });
 }
 else
 {
     if (User.IsInRole(SD.Role_Admin) || User.IsInRole(SD.Role_Manager))
     {
 TempData["success"] = "建立新使用者成功";
     }
     else
     {
 await _signInManager.SignInAsync(user, isPersistent: false);
     }
     return LocalRedirect(returnUrl);
 }
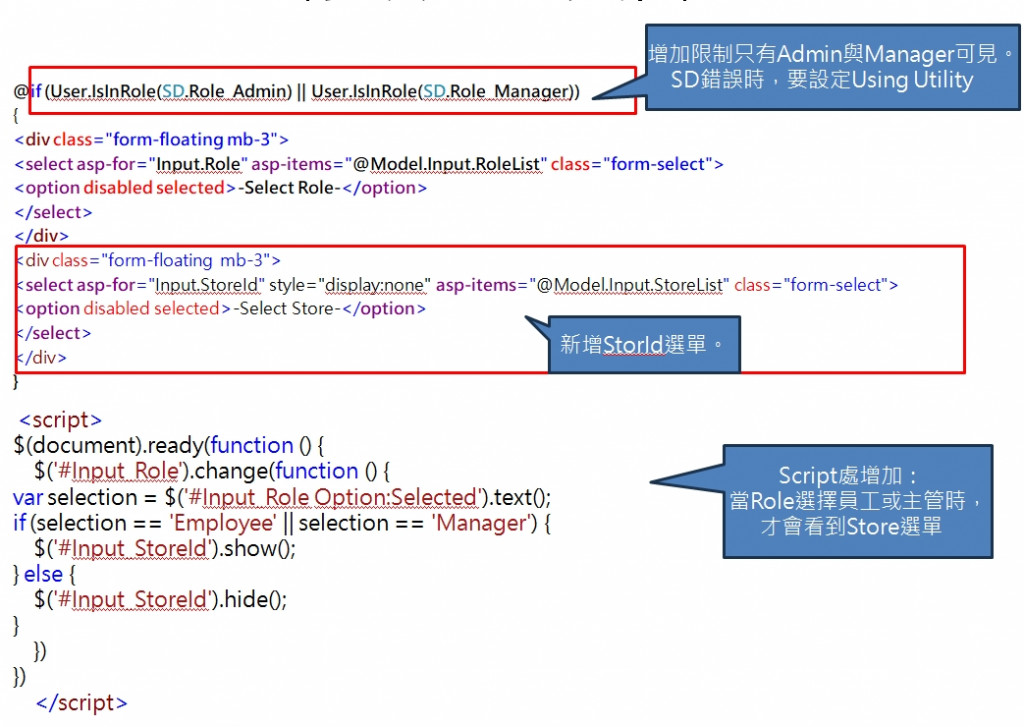
@if (User.IsInRole(SD.Role_Admin) || User.IsInRole(SD.Role_Manager))
{
<div class="form-floating mb-3">
<select asp-for="Input.Role" asp-items="@Model.Input.RoleList" class="form-select">
<option disabled selected>-Select Role-</option>
</select>
</div>
<div class="form-floating mb-3">
<select asp-for="Input.StoreId" style="display:none" asp-items="@Model.Input.StoreList" class="form-select">
<option disabled selected>-Select Store-</option>
</select>
</div>
}
 <script>
$(document).ready(function () {
    $('#Input_Role').change(function () {
var selection = $('#Input_Role Option:Selected').text();
if (selection == 'Employee' || selection == 'Manager') {
    $('#Input_StoreId').show();
} else {
    $('#Input_StoreId').hide();
}
    })
})
    </script>


