在現代雲原生應用程式中,微服務架構已成為主流。然而,隨著微服務數量增加,如何有效地管理和路由外部請求變得至關重要。API Gateway 作為單一入口點,負責處理所有 API 請求,並將其路由到後端相應的微服務,同時提供安全性、負載平衡和監控等功能,成為構建 GKE 微服務架構不可或缺的一部分。本文將深入探討 API Gateway 在 GKE 微服務中的作用和優勢。
API Gateway 是一個充當 API 服務前端的服務,用於接受 API 請求、管理流量、驗證授權、路由請求到後端服務,並將結果返回給呼叫者。它提供集中管理 API 的功能,簡化開發和部署流程,同時提高 API 的安全性、可靠性和可擴展性。您可以將 API Gateway 視為 API 管理的中央樞紐,它在 API 消費者和後端服務之間起到橋樑作用。
常見的 API 網關有 Kong Gateway、Apigee、APISIX、及各種雲廠商的 API Gateway。
其中的 APISIX 是一款開源的、雲原生的、高性能的 API Gateway ,由 Apache 基金會孵化。它基於 Nginx 和 etcd,是一個動態、實時、高性能的雲原生 API Gateway,提供了負載均衡、動態上遊、灰度發布、服務熔斷、身份認證、可觀測性等豐富的流量管理功能。
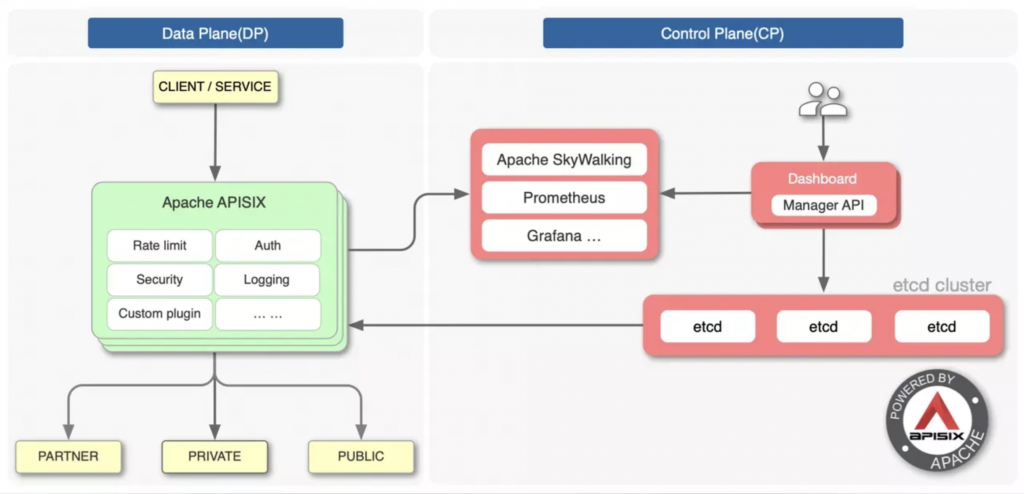
如上圖所示,左右分別是 APISIX 的數據面(Data Plane)和控制面(Control Plane):
APISIX 不是使用如 PostgreSQL 或 MySQL 這類的關系數據庫,且不像其他的 API Gateway 產品路由使用的是遍歷查找,而 APISIX 改採用監聽 etcd 的配置變更的方式,如此一來,可以將時間控制在毫秒級,達到實時生效的效果。
且由於 APISIX 和 etcd 均支持多點部署,因此在 APISIX 當前架構中,任何一個服務出現異常宕機等事故,都不會影響 APISIX 正常對外提供服務的能力,加上 etcd 中的實時事件通知系統比這些替代方案更容易擴展,這允許 APISIX 實時同步配置,使代碼簡潔,並避免單點故障。
$ helm repo add apisix https://charts.apiseven.com && helm repo update
$ helm pull apisix/apisix --version 2.9.0
$ tar zxvf apisix-2.9.0.tgz
修改 value.yaml 中的這些值
service:
  type: LoadBalancer
  externalTrafficPolicy: Local
apisix:
  ssl:
    enabled: true
    containerPort: 9443
  plugins: # 可以在官網搜索需要使用到的插件在此加入
  - ip-restriction
  - proxy-rewrite
  - redirect
  - request-id
  - real-ip
  - traffic-split
dashboard:
  enabled: true
ingress-controller:
  enabled: true
這裡有幾個重點要注意:
True
安裝 etcd, apisix, apisix-ingress-controller, apisix-dashboard 和 apisix CRD
$ helm upgrade --install apisix -f values.yaml . -n ingress-apisix --create-namespace
$ cd charts/apisix-ingress-controller/crds/
$ kubectl apply -f .
安裝成功
$ kubectl get pod -n ingress-apisix
NAME                                        READY   STATUS    RESTARTS       AGE
apisix-6bf98f8ff-8f75b                      1/1     Running   0              167m
apisix-dashboard-7c87f86cf7-z6rn6           1/1     Running   4 (168m ago)   169m
apisix-etcd-0                               1/1     Running   0              165m
apisix-etcd-1                               1/1     Running   0              166m
apisix-etcd-2                               1/1     Running   0              167m
apisix-ingress-controller-cb67df667-hjd2q   1/1     Running   0              45m


$ kubectl get svc -n ingress-apisix
NAME                                       TYPE           CLUSTER-IP       EXTERNAL-IP      PORT(S)                      AGE
apisix-admin                               ClusterIP      10.120.103.138   <none>           9180/TCP                     165m
apisix-dashboard                           ClusterIP      10.120.109.5     <none>           80/TCP                       165m
apisix-etcd                                ClusterIP      10.120.101.179   <none>           2379/TCP,2380/TCP            165m
apisix-etcd-headless                       ClusterIP      None             <none>           2379/TCP,2380/TCP            165m
apisix-gateway                             LoadBalancer   10.120.105.233   35.225.122.197   80:30993/TCP                 165m
apisix-ingress-controller                  ClusterIP      10.120.109.119   <none>           80/TCP                       165m
apisix-ingress-controller-apisix-gateway   NodePort       10.120.102.119   <none>           80:32001/TCP,443:31992/TCP   165m
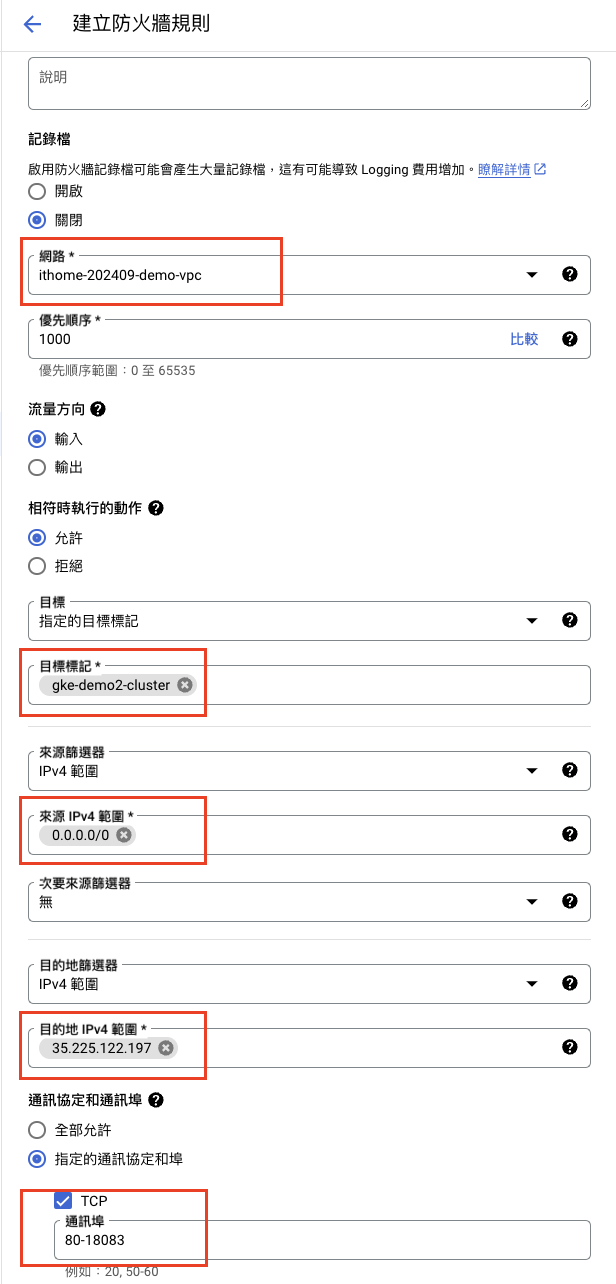
可以看到 GKE service: apisix-gateway 綁定 GCP Loadbalance 已經創建出來 IP 為 35.225.122.197
這裡有一個坑,如果使用 ShredVPC 但是 GKE 不是在 ShredVPC Host Project 的話,防火牆不會自動添加,記得要手動添加上去
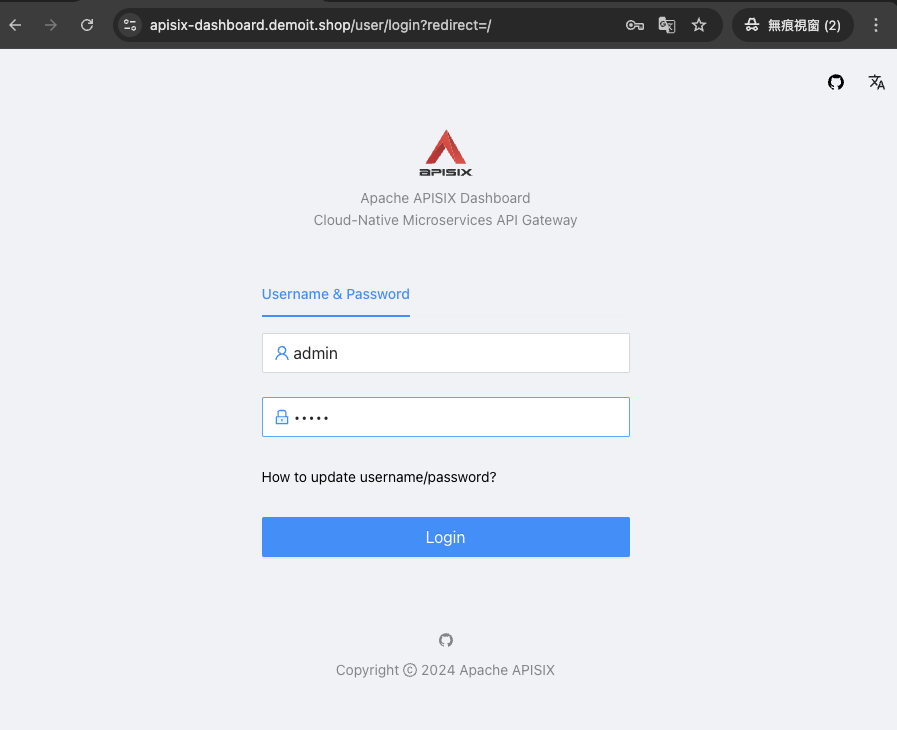
創建 APISIX Dashboard 服務網域 apisix-dashboard.demoit.shop,並使用白名單 plugins ,增加安全性
apiVersion: cert-manager.io/v1
kind: Certificate
metadata:
name: apisix-dashboard
namespace: ingress-apisix
labels:
project: apisix
component: certificate
spec:
renewBefore: 360h0m0s
commonName: apisix-dashboard.demoit.shop
dnsNames:
- apisix-dashboard.demoit.shop
secretName: apisix-dashboard-tls
issuerRef:
name: letsencrypt-demo
group: cert-manager.io
kind: ClusterIssuer
usages:
- digital signature
- key encipherment
---
apiVersion: apisix.apache.org/v2
kind: ApisixTls
metadata:
name: apisix-dashboard-apisixtls
namespace: ingress-apisix
spec:
hosts:
- apisix-dashboard.demoit.shop
secret:
name: apisix-dashboard-tls
namespace: ingress-apisix
---
apiVersion: apisix.apache.org/v2beta3
kind: ApisixRoute
metadata:
name: apisix-dashboard
namespace: ingress-apisix
labels:
env: apisix
spec:
http:
- name: apisix-dashboard
match:
hosts:
- apisix-dashboard.demoit.shop
paths:
- /*
methods:
- GET
- POST
backends:
- serviceName: apisix-dashboard
servicePort: 80
plugins:
- name: ip-restriction
enable: true
config:
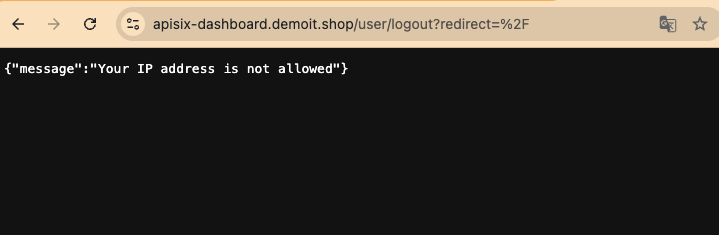
message: "Your IP address is not allowed"
whitelist:
# 填入要開放訪問 APISIX Dashboard的 白名單 IP
- "x.x.x.x"
開啟 APISIX 的 Dashboard 登入,帳號密碼預設都是 admin,如果有問題可以去 apisix-dashboard Helm Chart values.yaml (apisix/charts/apisix-dashboard/values.yaml) 查看設定的密碼
可以換個 IP 測試白名單是否生效
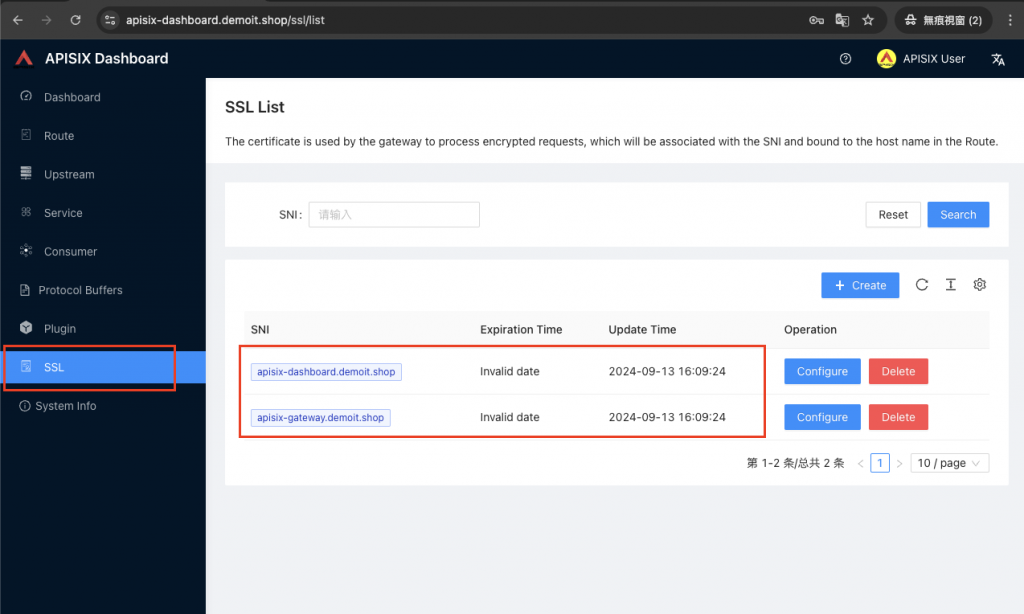
創建 APISIX 這個 API Gateway 入口網域(apisix-gateway.demoit.shop)所使用的證書,證書就使用上一章節講解的 cert-manager 產出,並掛載到 APISIX 的 Controller 上
apiVersion: cert-manager.io/v1
kind: Certificate
metadata:
  name: demoit.shop-apisix-tls
  namespace: ingress-apisix
  labels:
    project: demo
    component: certificate
spec:
  renewBefore: 360h0m0s
  commonName: apisix-gateway.demoit.shop
  dnsNames:
    - "apisix-gateway.demoit.shop"
  secretName: demoit.shop-apisix-tls
  issuerRef:
    name: letsencrypt-demo
    group: cert-manager.io
    kind: ClusterIssuer
  usages:
    - digital signature
    - key encipherment
---
apiVersion: apisix.apache.org/v2
kind: ApisixTls
metadata:
  name: demoit.shop-apisix-tls
  namespace: ingress-apisix
spec:
  hosts:
    - "apisix-gateway.demoit.shop"
  secret:
    name: demoit.shop-apisix-tls
    namespace: ingress-apisix
可至 SSL 頁面看到我們產生的證書已經掛上去了
接下來示範 traffic-split 及 proxy-rewrite
使用 Day11 的 new-old-nginx Deployment 及 Service 當作後端,這裡就只需要創建 ApisixRoute
apiVersion: apisix.apache.org/v2beta3
kind: ApisixRoute
metadata:
  name: apisix-canary-fromgateway
  namespace: httpd
  labels:
    app: apisix-canary
spec:
  http:

    - name: apisix-canary
      match:
        hosts:
          - apisix-gateway.demoit.shop
        paths:
          - /canary/*
        methods:
          - GET
      backends:
        - serviceName: new-nginx
          servicePort: 80
          weight: 50
        - serviceName: old-nginx
          servicePort: 80
          weight: 50
      plugins:
        - name: proxy-rewrite
          enable: true
          config:
            headers:
              X-Forwarded-Prefix: /canary
            regex_uri:
              - ^/canary/(.*)
              - /
測試看看路由規則是否生效,這裡示範兩種 plugins(插件):
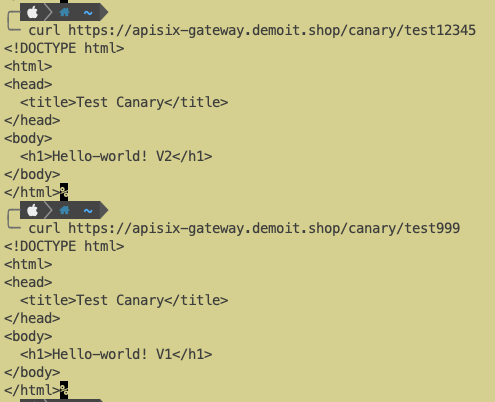
沒錯,這兩者的功能非常類似,以下就來說說兩者的區別
API Gateway 是一個通用概念,描述了任何暴露後端服務功能,同時提供額外流量路由和處理能力的組件。這些能力包括負載均衡、請求和響應轉換,以及一些更高級的功能,如身份驗證和授權、速率限制和斷路器。
而 Gateway API 是一種接口或一組資源,用於在 Kubernetes 中對服務網絡進行建模。其中一個主要資源是“網關”,它聲明要實例化的網關類型(或類)及其配置。作為網關提供者,您可以實現 Gateway API,以一種表達能力強、可擴展且面向角色的方式對 Kubernetes 服務網絡進行建模。
大多數 Gateway API 的實現都是某種程度上的 API 網關,但並非所有 API 網關都是 Gateway API 的實現。
Day10, Day11 講述了 Gateway API,而今天介紹 API Gateway APISIX,會這樣安排的原因是為了讓讀者可以了解兩者的相似之處以及不同之處,如果未來讀者需要導入類似的工具,可以更快的進行技術選型。
至於選擇哪一個取決於你的需求, 如果你需要一個與 Kubernetes 深度整合、易於上手的解決方案,那麼 Gateway API 是理想選擇。 如果你需要一個功能豐富、高性能、可擴展的 API 網關,並且需要靈活的定制化能力,那麼 APISIX 更勝一籌。 目前已知 APISIX Ingress Controller 正在對 Gateway API 添加支持,支持 HTTPRoute、TCPRoute 等資源,還處於 Alpha 階段,所以這裡先不進行示範了。
兩者都代表了現代 API 管理的趨勢,可以幫助你构建安全、可靠、高效的微服務架構。