昨天我們一口氣完成了行事曆功能的建構,今天我們來補齊一點細節,以及將UI的顏色設定改成夜間模式
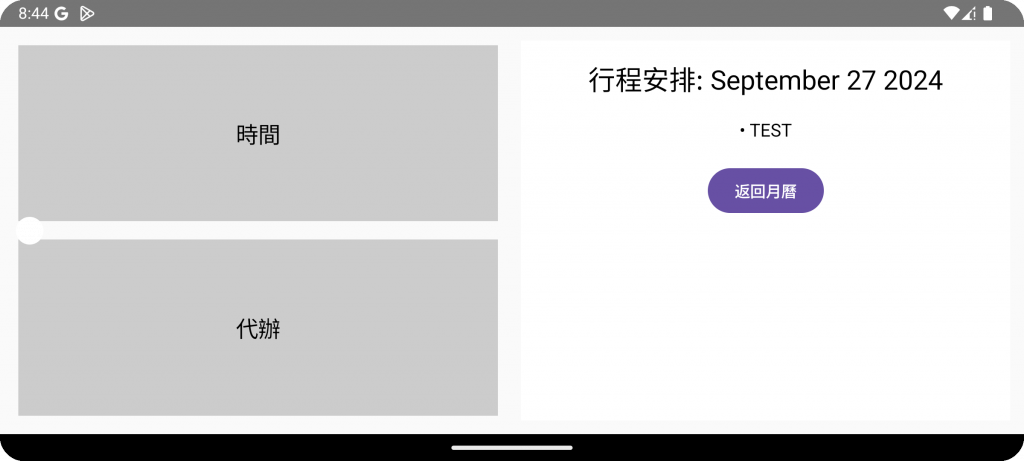
昨天我們點擊月曆元件上的日期時,是透過彈出的窗口來顯示當日的事件,今天我們進一步的完善該功能,我打算在點擊日期後將月曆的BOX頁面換成獨立的單日行事曆。操作如下
程式碼如下
package com.example.a2024ironman

import androidx.compose.foundation.background
import androidx.compose.foundation.layout.*
import androidx.compose.foundation.verticalScroll
import androidx.compose.material3.*
import androidx.compose.runtime.Composable
import androidx.compose.runtime.mutableStateOf
import androidx.compose.runtime.remember
import androidx.compose.ui.Alignment
import androidx.compose.ui.Modifier
import androidx.compose.ui.graphics.Color
import androidx.compose.ui.text.TextStyle
import androidx.compose.ui.unit.dp
import androidx.compose.ui.unit.sp
import com.google.api.services.calendar.model.Event

@Composable
fun DayCalendar(selectedDate: String, events: List<Event>, onBack: () -> Unit) {
    Column(
        modifier = Modifier
            .fillMaxSize()
            .padding(16.dp)
            .background(Color.White),
        horizontalAlignment = Alignment.CenterHorizontally
    ) {
        Text(
            text = "行程安排: $selectedDate",
            style = TextStyle(fontSize = 24.sp),
            modifier = Modifier.padding(bottom = 16.dp)
        )

        if (events.isEmpty()) {
            Text("當天沒有行程", style = TextStyle(fontSize = 18.sp, color = Color.Gray))
        } else {
            Column(modifier = Modifier.verticalScroll(rememberScrollState())) {
                events.forEach { event ->
                    Text(
                        text = "• ${event.summary}",
                        style = TextStyle(fontSize = 16.sp),
                        modifier = Modifier.padding(4.dp)
                    )
                }
            }
        }

        Spacer(modifier = Modifier.height(16.dp))

        Button(onClick = onBack) {
            Text("返回月曆")
        }
    }
}
上面的程式碼會根據selectedDate和events動態呈現行程安排,提供了查看行程以及返回上一步的功能。
為了實現點擊日期跳轉到單日行事曆頁面的功能,我們要在CalendarPager.kt裡面新增一個if判斷式
詳細如下
if (showDayView) {
    DayCalendar(
        selectedDate = selectedDate,
        events = selectedEvents,
        onBack = {
            showDayView = false
        }
    )
}
else {
    // 顯示月行事曆
    HorizontalPager(
        count = 12, // 一年12個月
        state = pagerState,
        modifier = Modifier.fillMaxSize()
    ) { page ->
        ...
    }
}
同時在MainActivity.kt的月行事曆的Box組件內,新增以下邏輯負責處理點擊日期時的操作
Box(
    modifier = Modifier
        .weight(1f)
        .aspectRatio(1f)
        .padding(2.dp)
        .background(
            if (isCurrentMonth && dayOfMonth == todayDay) Color.Blue else Color.Transparent,
            shape = CircleShape
        )
        .clickable {
            // 點擊日期時更新選取的事件與日期,並顯示日行事曆
            selectedDate = "$currentMonth $dayOfMonth $currentYear"
            selectedEvents = eventsForDay
            showDayView = true
        },
    contentAlignment = Alignment.Center
) {
    // 顯示日期與事件
}
上面的程式碼透過監控showDayView的布林值來控制顯示日行事曆 (DayCalendar) 或月行事曆 (HorizontalPager)。當使用者在月行事曆中點擊某個日期時,更新selectedDate和selectedEvents,並將 showDayView設為true,從而顯示DayCalendar
完成上述的修改後,點擊日期後成果應如下圖所示
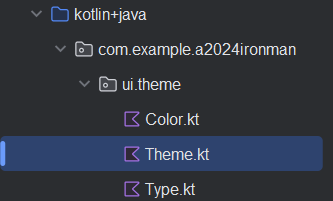
通常你可以在旁邊的ui.theme資料夾中找到Theme.kt,Theme.kt的主要作用是定義應用程式的主題風格,包括定義暗色與亮色的顏色方案。
程式碼如下
private val DarkColorScheme = darkColorScheme(
    primary = Purple80,// 主要顏色 (用於應用程式中的主要元件,如按鈕和強調色)
    secondary = PurpleGrey80,// 次要顏色 (用於次要元件,例如浮動按鈕、滑動條等)
    tertiary = Pink80// 第三顏色 (用於輔助元件或一些額外的強調色)
)

private val LightColorScheme = lightColorScheme(
    primary = Purple40,// 主要顏色 (用於應用程式中的主要元件,如按鈕和強調色)
    secondary = PurpleGrey40,// 次要顏色 (用於次要元件,例如浮動按鈕、滑動條等)
    tertiary = Pink40// 第三顏色 (用於輔助元件或一些額外的強調色)
)
同時我們還能更詳細的定義了深色與亮色主題下不同元件的主要顏色、次要顏色、背景顏色、表面顏色,以及在這些顏色上的內容(如文字、圖標)的顏色。
程式碼如下
private val DarkColorScheme = darkColorScheme(
    primary = Purple80,        // 主要顏色 (用於應用程式中的主要元件,如按鈕和強調色)
    secondary = PurpleGrey80,  // 次要顏色 (用於次要元件,例如浮動按鈕、滑動條等)
    tertiary = Pink80,         // 第三顏色 (用於輔助元件或一些額外的強調色)
    background = Color(0xFF121212), // 背景顏色 (應用程式的主要背景,例如整個畫面背景)
    surface = Color(0xFF1E1E1E),    // 表面顏色 (應用於卡片、對話框等元件的背景)
    onPrimary = Color.White,   // 主顏色上的內容顏色 (用於主顏色上面的文字、圖標等)
    onSecondary = Color.White, // 次顏色上的內容顏色 (用於次顏色上面的文字、圖標等)
    onBackground = Color.White,// 背景上的內容顏色 (用於背景上顯示的文字、圖標等)
    onSurface = Color.White    // 表面上的內容顏色 (用於表面顏色上顯示的文字、圖標等)
)

private val LightColorScheme = lightColorScheme(
    primary = Purple40,        // 主要顏色 (用於應用程式中的主要元件,如按鈕和強調色)
    secondary = PurpleGrey40,  // 次要顏色 (用於次要元件,例如浮動按鈕、滑動條等)
    tertiary = Pink40,         // 第三顏色 (用於輔助元件或一些額外的強調色)
    background = Color(0xFFFFFFFF), // 背景顏色 (應用程式的主要背景,例如整個畫面背景)
    surface = Color(0xFFF5F5F5),    // 表面顏色 (應用於卡片、對話框等元件的背景)
    onPrimary = Color.Black,   // 主顏色上的內容顏色 (用於主顏色上面的文字、圖標等)
    onSecondary = Color.Black, // 次顏色上的內容顏色 (用於次顏色上面的文字、圖標等)
    onBackground = Color.Black,// 背景上的內容顏色 (用於背景上顯示的文字、圖標等)
    onSurface = Color.Black    // 表面上的內容顏色 (用於表面顏色上顯示的文字、圖標等)
)
定義完了深色與亮色主題的配色之後,我們就可以在我們的程式中使用了
首先在MainActivity.kt,設定App使用夜間模式
setContent {
    _2024ironmanTheme(darkTheme = true) { // 設定 true 強制夜間模式
        CalendarLayout() // 您的主組合函式
    }
}
之後我們可以對我們ui進行修改
@Composable
fun CalendarLayout() {
    Row(
        modifier = Modifier
            .fillMaxSize()
            .padding(8.dp)
            .background(MaterialTheme.colorScheme.background) // 使用主題背景顏色
    ) {
        // 左側:時間與代辦事項
        Column(
            modifier = Modifier
                .weight(1f)
                .fillMaxHeight()
                .padding(4.dp)
                .background(MaterialTheme.colorScheme.surface) // 使用主題的表面顏色
        ) {
            // 顯示時間區塊
            Box(
                modifier = Modifier
                    .weight(1f)
                    .fillMaxWidth()
                    .padding(4.dp)
                    .background(MaterialTheme.colorScheme.surface), // 使用主題的表面顏色
                contentAlignment = Alignment.Center
            ) {
                Text(
                    text = "時間",
                    style = TextStyle(
                        fontSize = 20.sp,
                        color = MaterialTheme.colorScheme.onSurface // 使用主題的文字顏色
                    )
                )
            }

            Spacer(modifier = Modifier.height(8.dp))

            // 顯示代辦事項區塊
            Box(
                modifier = Modifier
                    .weight(1f)
                    .fillMaxWidth()
                    .padding(4.dp)
                    .background(MaterialTheme.colorScheme.surface), // 使用主題的表面顏色
                contentAlignment = Alignment.Center
            ) {
                Text(
                    text = "代辦",
                    style = TextStyle(
                        fontSize = 20.sp,
                        color = MaterialTheme.colorScheme.onSurface // 使用主題的文字顏色
                    )
                )
            }
        }

        Spacer(modifier = Modifier.width(8.dp))

        // 右側:日曆,將 calendarEvents 傳遞給 CalendarPager
        Box(
            modifier = Modifier
                .weight(1f)
                .fillMaxHeight()
                .padding(4.dp)
                .background(MaterialTheme.colorScheme.surface), // 使用主題的表面顏色
            contentAlignment = Alignment.Center
        ) {
            // 傳入 calendarEvents 給 CalendarPager
            CalendarPager(events = calendarEvents)
        }
    }
}
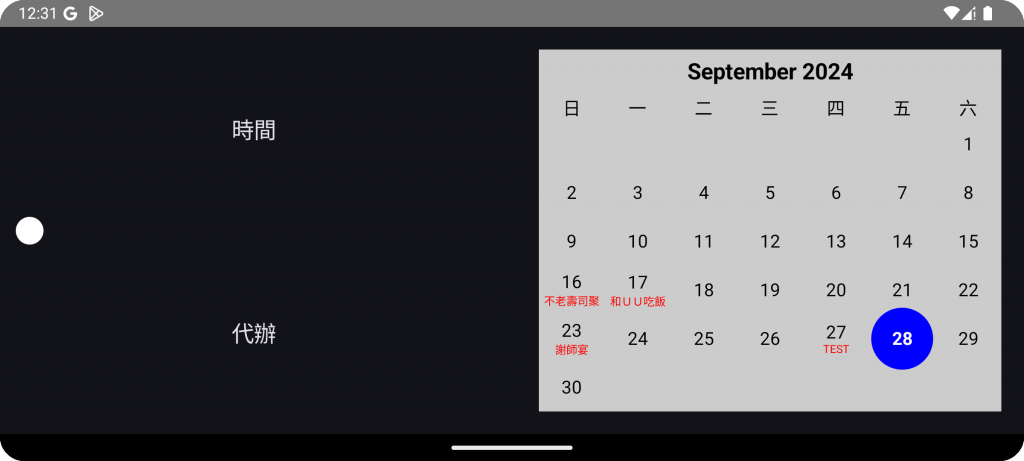
呈現的結果如下
今天的內容就到這邊,今天我們完善了昨天的行事曆功能,增加了單日形式的頁面,並透過Theme.kt來管理app在不同主題下的ui配色,明天我們視情況來實現其他功能或是繼續優化行事曆功能,感謝你今天的觀看,我們明天再見。
